Convert a list of historic places into a map
Prepare the table
To convert a list of locations into points on a map, the list first must be reformatted as a table, for example, as an .xlsx or .csv file. The work of copying and pasting the content from Wikipedia into a .csv table has already been done for you. However, before you import the table into ArcGIS, you'll make some improvements to its formatting to ensure that the correct locations are found.
- Download AncientCities.csv.
- Right-click the downloaded file, point to Open with, and choose Excel.
Note:
If you don't have access to Microsoft Excel or a similar program, you can download the modified file and skip to the next section.
- Open the table and review the data.
Some of the entries in the Name column have their previous names in parentheses.

This might make location matching difficult. You'll separate the historic names into their own column to help ensure that the geocoding process is smooth and finds the correct locations.
- Right-click the header for column B and click Insert.
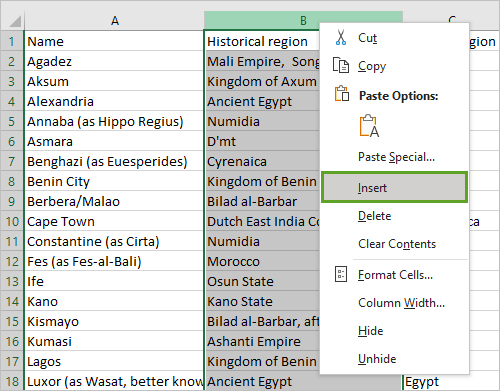
A new empty column (named B) appears.
- In column B, row 1, type Historical name.
- In column B, row 5, type Hippo Regius.
- In column A, row 5, remove the text (as Hippo Regius) so the cell contains only the text Annaba.
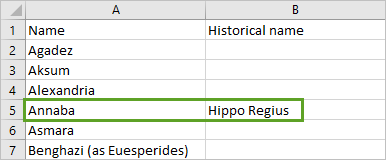
- Edit the following place-names in the same way so all of the names in parentheses are moved into the Historical name column:
- Benghazi/Euesperides
- Constantine/Cirta
- Fes/Fes-al-Bali
- Luxor/Wasat, better known by its Greek name Thebes
- Marrakesh/Murakuc
- Tangier/Tingi
- Tripoli/Oyat
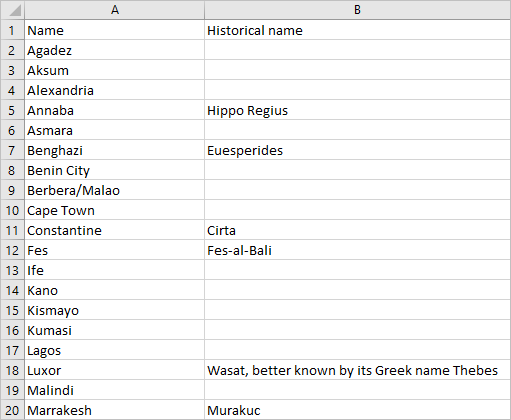
Some of the place-names in this table are relevant to your class and some are not. There may also be some cities that are missing from the list that you'd like to include. Since Wikipedia is an unreliable source, you'll need to evaluate this data for errors as well as relevancy.
- Make any further edits to the table that you feel are appropriate, such as adding or removing rows.
- Save the table and close Excel.
Your list is now formatted as a table and is ready to be geocoded.
Add the table to ArcGIS Pro
Now that you have a table of locations, you can use ArcGIS Pro to convert it into geospatial data. The geocoding process will ask you a series of questions about your data and then try to match each row in the table to the correct location on earth. You'll have a chance later to review the matches and fix any errors.
- Start ArcGIS Pro. If prompted, sign in using your licensed ArcGIS organizational account.
Note:
If you don't have access to ArcGIS Pro or an ArcGIS organizational account, see options for software access.
- Under New Project, click Map.
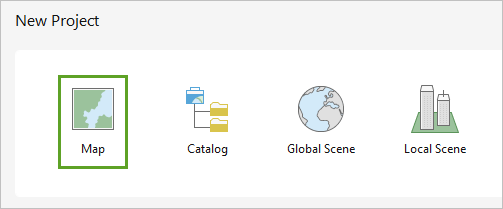
- In the Create a New Project window, for Name, type Ancient cities in Africa. Optionally, choose a new location for your project. Click OK.
- On the ribbon, click the Map tab. In the Layer group, click Add Data.

- Browse to and choose AncientCities.csv. Click OK.
- In the Contents pane, under Standalone Tables, right-click AncientCities.csv and click Geocode Table.
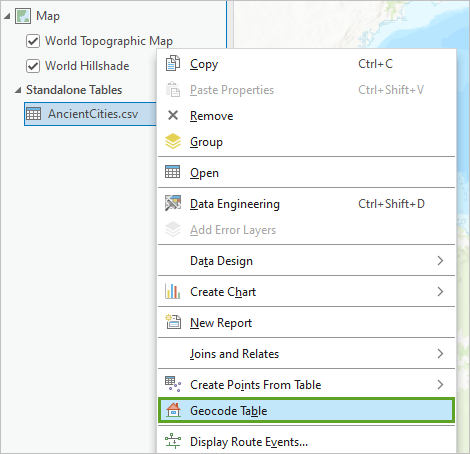
The Geocode Table pane appears next to the map.
Geocode the table
In this tutorial, you'll follow a guided process to set up the geocoding tool. Later, you may prefer to click Go to Tool to skip the questions and fill in the tool's parameters without guidance.
- At the bottom of the Geocode Table pane, click Start.
The first page asks which locator to use.
- For Input Locator, choose ArcGIS World Geocoding Service. Click Next.
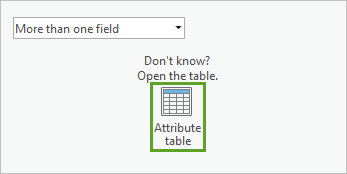
The next page asks if you want to geocode using one field or multiple fields from your table. In ArcGIS, columns are called fields. You'll review the fields in your table to help make this decision.
- Click the Attribute table button.
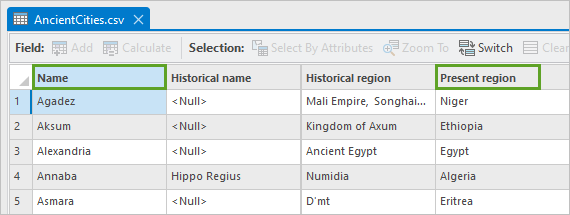
The table appears beneath the map. The Name field is the primary information that you need to locate the cities on a contemporary map of Africa. The Present region field will also be helpful, as it lists the country that each city is located in today.
- Close the attribute table. In the Geocode Table pane, choose More than one field.
- Click Next.
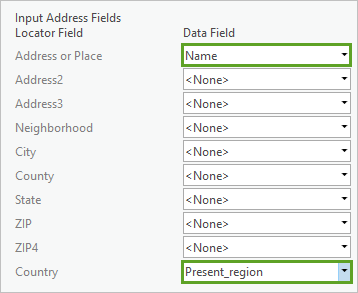
Next, you'll specify the fields to be used for geocoding.
- For Address or Place, choose Name. For Country, choose Present_region.
Using this service will consume credits. The cost is 40 credits per 1,000 geocodes. You can expect to spend at least 1.48 credits in this tutorial, but you may consume more as you rematch locations.
- Click Next.
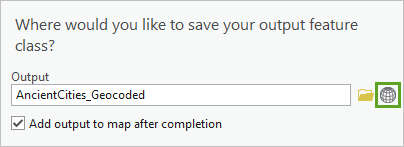
Next, you must decide how and where to store the new data. By default, the Geocode Table tool will create a feature class, which is a kind of geospatial dataset. The feature class will be stored in the geodatabase that was created when you created the project. This default location is suitable, so you won't change it.
Geospatial data has to be stored with a coordinate system. By default, the new feature class will use the WGS 1984 geographic coordinate system. You'd prefer to use a projection that is better suited for maps of Africa, so you will choose a different coordinate system.
- Next to Output, click the Select coordinate system button.
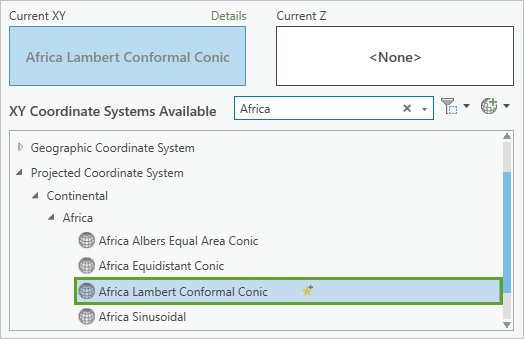
- In the Coordinate System window, in the Search bar, type Africa and press Enter.
- Expand Projected Coordinate System, Continental, and Africa. Click Africa Lambert Conformal Conic.
Note:
To learn more about how to choose an appropriate coordinate system, see Choose the right projection.
- Click OK.
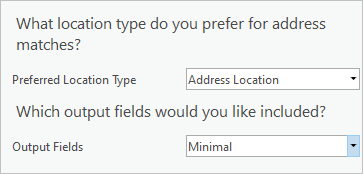
- In the Geocode Table pane, for Preferred Location Type, choose Address Location.
- For Output Fields, choose Minimal.
Choosing Minimal will ensure that you have a chance to review your matches, without adding too many new fields to your geocode results.
- Click Next.
Next, you can choose to limit the search to a single country. Because your locations are in many countries, you'll skip this part.
- Click Next.
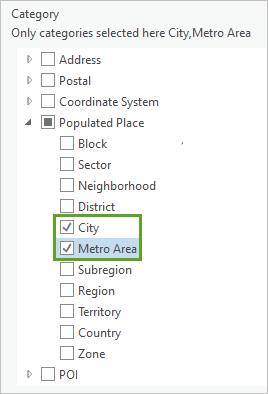
You can also limit the search to only certain kinds of places, so time is not wasted searching for things such as street names or postal codes.
- Expand Populated Place and check City and Metro Area.
- Click Finish.
The Geocode Table tool appears. All of the parameters have been filled in based on the guided workflow that you just completed.
- At the top of the pane, click estimate credits.
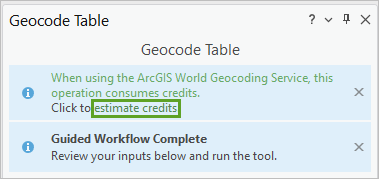
Using the ArcGIS World Geocoding Service consumes credits. Running this tool will consume 1.48 credits.
- At the bottom of the pane, click Run.
Review unmatched locations
A new layer, named AncientCities_Geocoded, is added to the map. A Geocoding Completed window also appears. It says that 2 locations were matched, 1 was unmatched, and 34 were tied.
Note:
The ArcGIS World Geocoding Service is constantly being updated with new addresses, so your numbers and locations may be different.
You'll begin the rematch process to properly locate the one unmatched location and to confirm that the other locations were matched correctly.
- In the Geocoding Completed window, click Yes.
Tip:
If you want to continue rematching cities later, right-click the AncientCities_Geocoded layer in the Contents pane, point to Data and click Rematch Addresses.
The attribute table for the new layer appears beneath the map. The Rematch Addresses pane also appears. The Unmatched tab is currently selected, showing Zeila/Avalites as the one unmatched address.
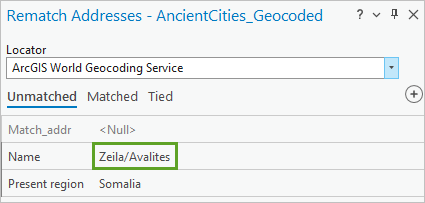
The geocoding process did not find a location to match this place-name. It possibly failed because the country name is spelled incorrectly.
- In the Rematch Addresses pane, ensure that the Auto Apply toggle button is turned on.
- Next to the Present region field, click Sonalia and type Somalia to rename it. Press Tab.
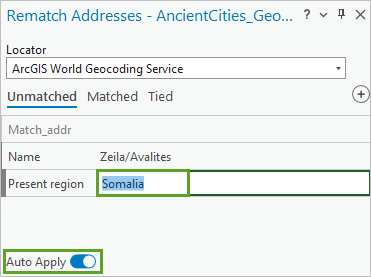
- The map zooms to a marker on a peninsula in Eastern Africa.
These are potential match candidates that the geocoding process found for Zeila/Avalites, Somalia.
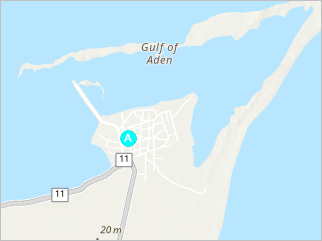
The map shows the streets of a town, but no label. You're not familiar with this place, so you'll go back to your original data source to see whether you can learn more.
- Go to https://en.wikipedia.org/wiki/Zeila.
The Wikipedia page shows a map that matches the suggested location.
- In the Rematch Addresses pane, ensure that Zeila, Awadal is selected (highlighted in blue) and click the Match button.
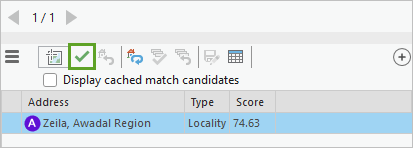
The Rematch Addresses pane switches to the first location in the Matched list, because there are no longer any unmatched addresses.
Note:
When you clicked the Match button, the address was moved out of the Unmatched list and into the Matched list.
Review matched locations
There are three matched addresses. You could accept these matches and assume that they are correct; however, it's recommended that you review them first. This dataset in particular merits a review of the address matches as there may be other cities with incorrect spellings or alternative spellings that have become less common since ancient times. These factors can make accurate location matching difficult.
Tip:
If you want to continue rematching cities later, right-click the AncientCities_Geocoded layer in the Contents pane, click Data and choose Rematch Addresses.
The Rematch Addresses pane shows the first matched address: Berbera/Malao, also in Somalia. On the basemap, the match candidate coincides with a basemap label for the town of Berbera. It appears to be in the correct location, so you will not change it.
- In the Rematch Addresses pane, click the Next Record button.
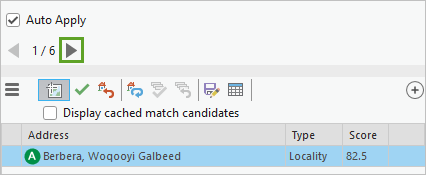
The next address is Kismayo. It appears on a city labeled as Kismaayo.
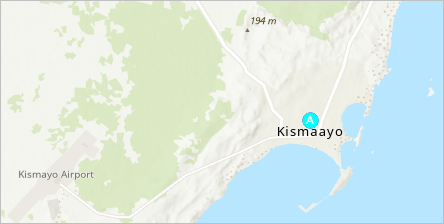
This is an alternative spelling. The matched location is correct.
- Click the Next Record button.
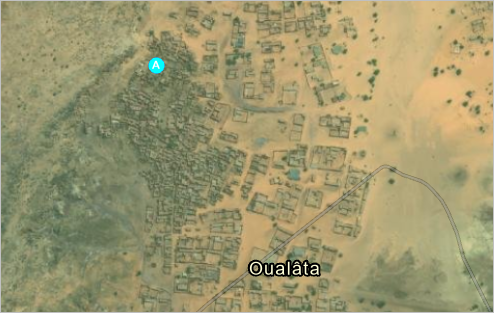
The next location is Walata. The map zooms to a small town in the desert.
- Zoom in until a label appears on the map.
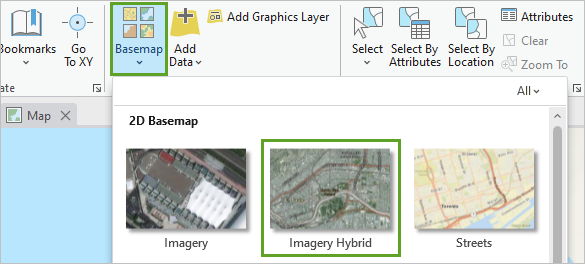
Basemaps provide geographical context for a map. So far, you've been using the default Topographic basemap. However, ArcGIS Pro provides a variety of basemaps in different styles, which provide different kinds of context. You'll change the basemap to see more detail.
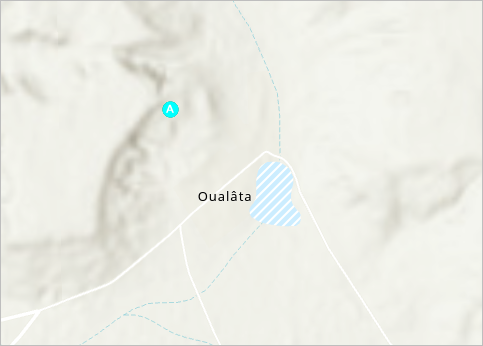
- On the ribbon, click the Map tab. In the Layer group, click Basemap and choose Imagery Hybrid.
- Click the Next Record button.
The basemap includes a label for Oualâta. Once again, you'll consult Wikipedia for more information about this town.
- Go to https://en.wikipedia.org/wiki/Oualata.
The Wikipedia page confirms that Oualâta is an alternative spelling for Walata. The matched location is correct.
- Click the Next Record button.
The last matched address is Zeila/Avalites, which you matched earlier.
Review tied locations
Tied addresses are those where the geocoding process found several match candidates, but without a clear winner. You'll review the tied addresses and choose the best candidate as the match.
Tip:
If you want to continue rematching cities later, right-click the AncientCities_Geocoded layer in the Contents pane, click Data and choose Rematch Addresses.
- In the Rematch Addresses pane, click the Tied tab.
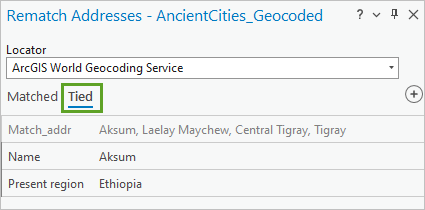
The first tied address is Agadez, in Niger. The Rematch Addresses pane lists two match candidates. Both locations are marked on the map, and both are correct. It doesn't matter which one is selected.
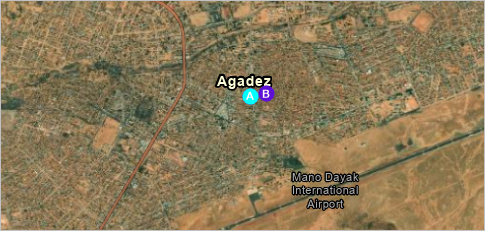
- In the Rematch Addresses pane, ensure one of the addresses is selected and click the Match button.
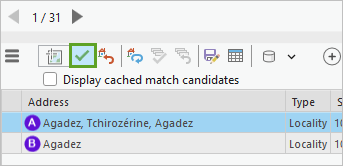
Agadez moves to the Matched list, and the pane updates to show the next tied address: Aksum, in Ethiopia.
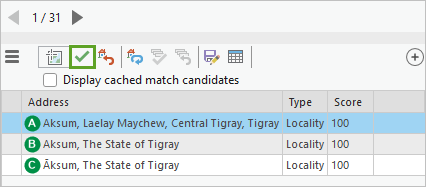
The Rematch Addresses pane lists three match candidates for Aksum. On the map, you can see that two are in the city of Aksum and one is outside of the city to the northwest.
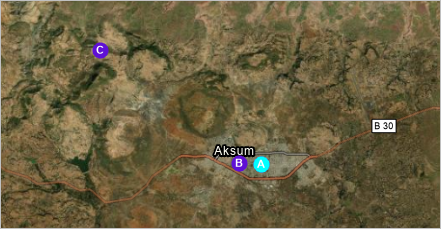
Candidate A in the center of the city looks like the best representation.
- In the Rematch Addresses pane, ensure that candidate A is selected and click the Match button.
The next tied address appears: the city of Annaba, in Algeria.
Instead of stepping through all of the addresses one by one, you can choose addresses from the attribute table. Next, you'll pick two addresses from the attribute table and match them before continuing on to the rest of the list.
- In the attribute table, find the Name field. Click the row number for Fes to select it.

Two match candidates are shown on the map. However, the main label for the city (spelled Fez) is to the northeast. You'll explore the city to determine if the basemap label represents a better match location.
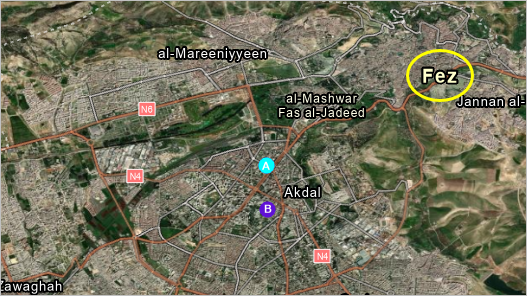
- Zoom and pan to explore the city.
On the imagery, the area to the northeast (labeled as Fas al-Madeenah) appears as a distinct neighborhood with dense settlement and narrow streets. In some areas, the city's walls can be seen.
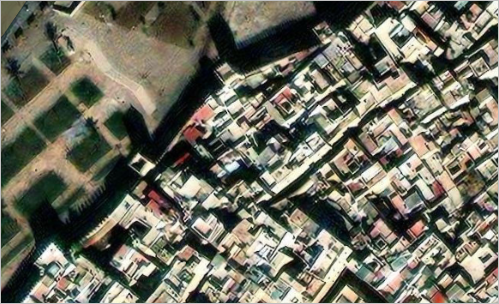
This settlement pattern appears much older than the area to the south, with its grid of streets. You'll match the address to this ancient part of the city.
- In the lower portion of the Rematch Addresses pane, click the Pick from Map button.
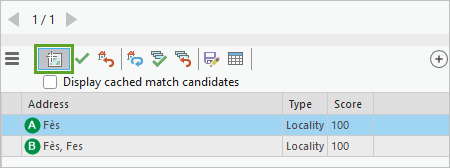
- On the map, click near the center of the Fas al-Madeenah area.
A marker appears on the map and a new match candidate appears in the Rematch Addresses pane.
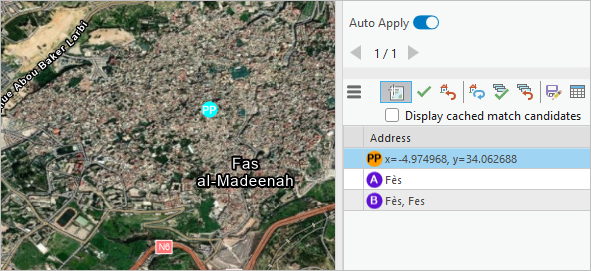
- In the Rematched Addresses pane, ensure that the new candidate is selected and click the Match button.
- In the Would like to cache matched map point candidates window, click No.
Note:
You can read about cached candidates in the geocoding documentation.
- In the Rematch Addresses pane, click the Pick from Map button again to disable it.
- In the attribute table, click the row number for Sofala to select it.
In the pane, three match candidates are listed.
- On the map, zoom out until all candidate locations are visible.
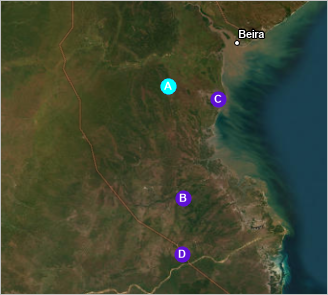
You know that Sofala was once a seaport town, so of the match candidates, only candidate B, on the coast, makes sense.
- On the map, zoom to candidate B.
Note:
The letters for your geocoding results may be different. Zoom to the candidate location that is along the coast.
The marker for candidate B appears on a village, but there are no labels to identify it. You'll consult another basemap to see if you can find more information about this area.
- Change the basemap to OpenStreetMap.
The OpenStreetMap basemap, like Wikipedia, is created from crowdsourced data.
The basemap changes and a label for Sofala appears next to the marker. This appears to be the correct location.
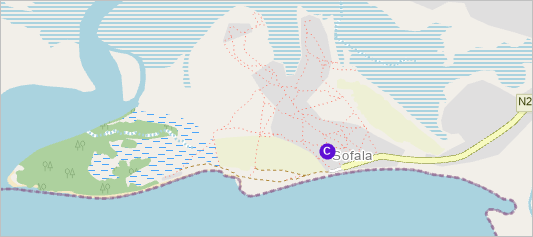
- On the map, click the B marker to select it. In the Rematch Addresses pane, click the Match button.
Next, you'll review and match the remaining tied addresses.
- On the attribute table's toolbar, click the Clear button to clear the selection.

- If necessary, at the top of the Rematch Addresses pane, click the Tied tab.
The next tied location appears on the map and in the pane.
- Select the best match candidate and click the Match button. Repeat this process to review all of the tied addresses.
Switch between the Topographic, OpenStreetMap, and Imagery Hybrid basemaps to help you determine whether the locations are correct.
Note:
When you have matched all of the tied addresses, the Rematch Addresses pane will return to the Matched list.
- When you are satisfied that you have an accurate dataset, in the Rematch Addresses pane, click the Save Edits button.
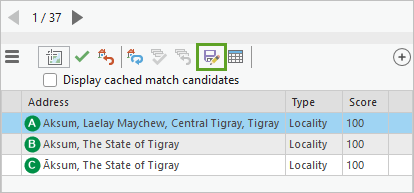
- In the Save Edits window, click Yes.
- Close the Rematch Addresses pane and the Geocode Table pane. Leave the attribute table open.
Style the map
You have converted a list of place-names into geographic data. Next, you'll label the locations and save a map that you can share with your students.
- In the Contents pane, right-click AncientCities_Geocoded and click Label.
Labels appear for each matched location on the map. You'll also change the basemap to match the other maps you've created for this class.
- Change the basemap to Modern Antique Map.
Note:
If Modern Antique Map is not listed in the basemap gallery, open the Catalog pane. On the Portal tab, on the Living Atlas tab, search for the Modern Antique vector tile layer and add it to your map.
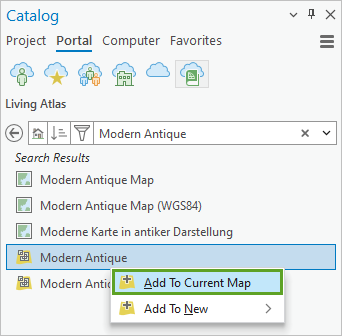
The contents of the basemap gallery are set by your organization's administrator.
- On the map, click one of the point symbols to view the pop-up.
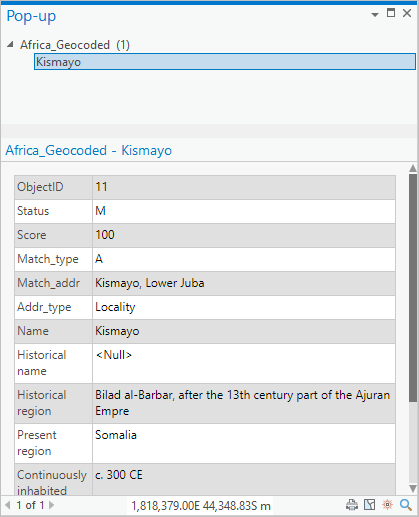
The pop-up contains a few extra fields that were added by the geocoding process. You don't need to share these with your students. You'll configure the pop-up to only show the relevant fields.
- Close the pop-up.
- In the Contents pane, right-click AncientCities_Geocoded and click Configure Pop-ups.
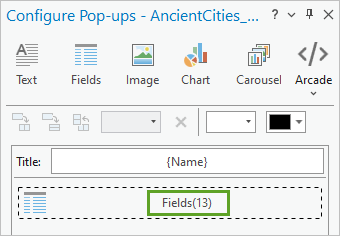
- In the Configure Pop-ups pane, double-click Fields (13).
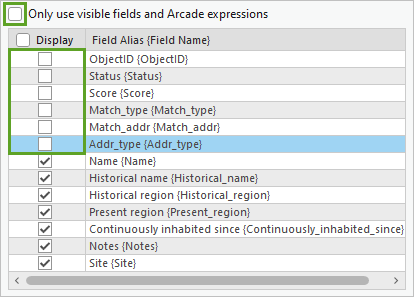
- Uncheck Only use visible fields and Arcade expressions.
- In the Display column, uncheck all fields above Name {Name}.
- Close the Configure Pop-ups pane. Click a feature to view its new pop-up.
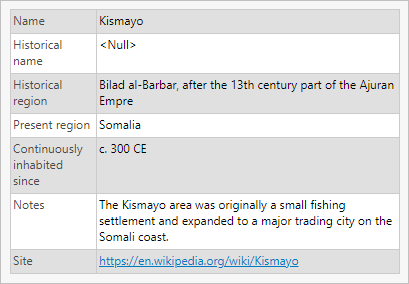
The unnecessary fields are gone.
- Close the pop-up.
Edit the data
If you notice an error or a mistake in your data after you finish reviewing locations, it can still be fixed. You'll edit the table to fix a few errors that you noticed in the place-names.
- Zoom to the Gulf of Aden, between Yemen and Somalia.
There are two labels here with slashes: Zeila/Avalites and Berbera/Malao.
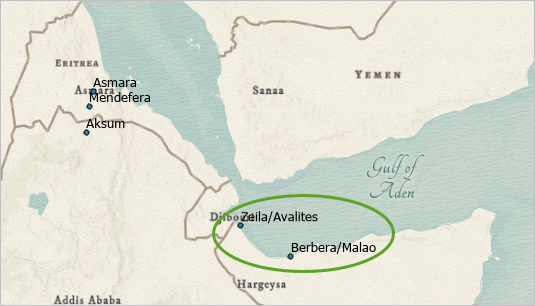
When you were researching Zeila earlier, you read that Avalites is its ancient name. Some more research tells you that Berbera is the current place-name, while Malao is the historic one. You'll edit the data to correct these place-names.
- In the attribute table, scroll to the Berbera/Malao row. In the Historical name column, double-click the empty cell and type Malao. In the Name column, rename Berbera/Malao to Berbera.
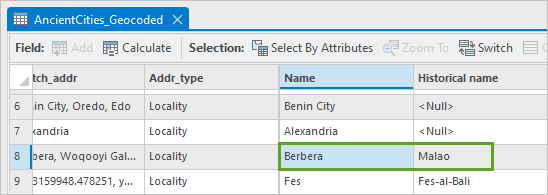
- Scroll to the Zeila/Avalites row. For Name, type Zeila. For Historical name, type Avalites.
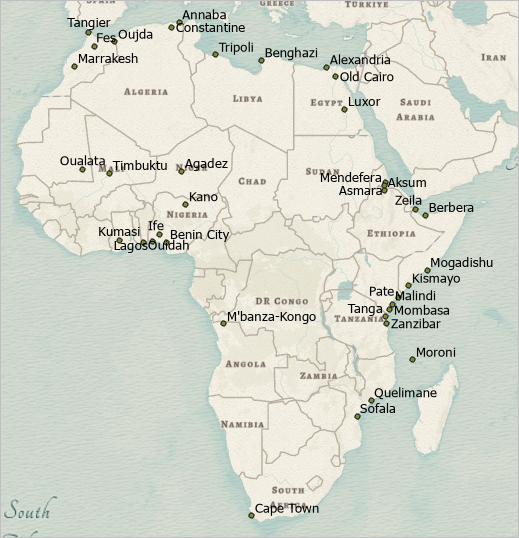
The labels on the map now only show the present name of each city.
- On the ribbon, click the Edit tab. In the Manage Edits group, click Save.

- In the Save Edits window, click Yes.
- Close the attribute table.
Finally, you will rename the AncientCities_Geocoded layer so it is ready to share.
- In the Contents pane, click AncientCities_Geocoded two times so it is editable. Type Ancient cities in Africa and press Enter.
- Right-click Ancient cities in Africa and click Zoom To Layer.
- On the Quick Access Toolbar, click Save.
The map of ancient cities in Africa is ready to share with your students. You converted a list of place-names into a geospatial dataset and a map.
You edited a table so it would have more consistent formatting, geocoded the table, and reviewed and corrected the resulting location matches. You researched place-names and used basemaps to find the right locations. Now your students can use the map you've made to better explore and understand the places they'll be learning about in class.
Now that you've made a map, the next step is to share it. If you want to design a layout and print this map, try Make a layout. If you want to share this map in an interactive form so people can zoom and access the pop-ups, try the tutorial Convert a static map into a web app.
You can find more tutorials in the tutorial gallery.

