Configure your organization website
You'll configure your ArcGIS organization's customized view of the ArcGIS Online website. After activating your subscription, you'll perform some initial setup to meet the needs of your department. To make the site appealing to visitors, you'll also personalize its appearance by adding a logo and choosing a banner for the home page. For an example of the home page that you'll create, see the sample organization.
Activate your ArcGIS Online subscription
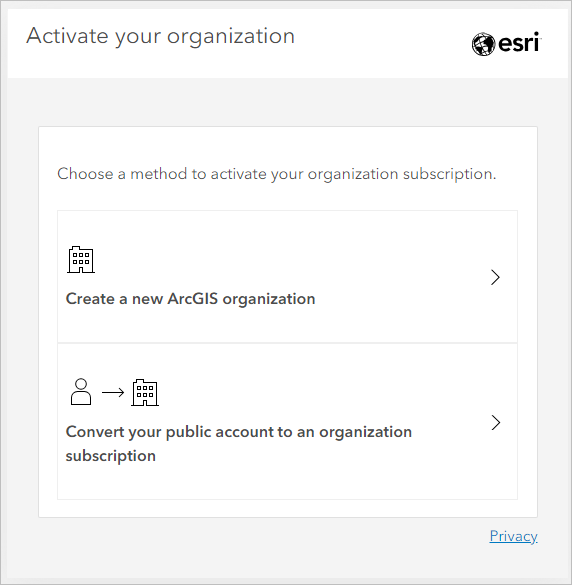
As the designated administrator, your first step is to activate your subscription and create your administrator account.
Note:
It is recommended that you complete this tutorial using an ArcGIS free trial. With the trial account, you can complete this tutorial and practice setting up an ArcGIS organization, however there are some functions in the tutorial that will only be possible with full organizational subscription.
- If necessary, sign up for an ArcGIS free trial.
- If you've already activated your ArcGIS Online subscription and have a username for your administrator account, skip to the next section.
The person who requested the subscription should have received an email with an activation link. The subscription must be activated by a person who will administer it, so you'll need that email to get started.
Note:
If you requested the subscription and didn't receive an activation email, check your junk or spam folder. You can also contact Customer Service for assistance.
- Open the email from Esri with the subject heading Activate Your ArcGIS Online Trial.
- Click Activate Your Trial.
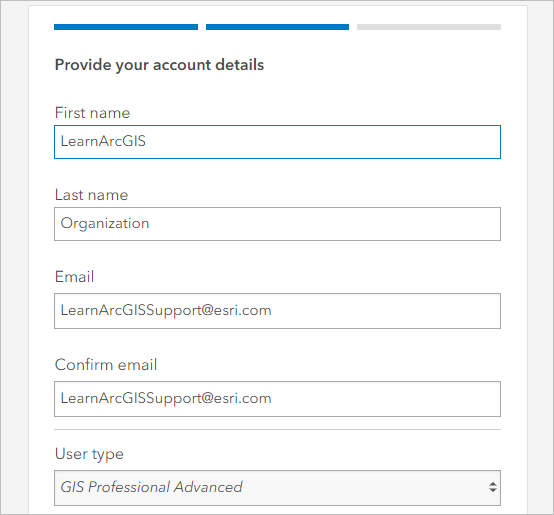
A Welcome page opens with a form to create your administrator account for the organization.
Note:
If you're practicing with a trial organization that you don't plan to keep, you can complete the tutorial using the sample information in the steps. The images throughout the tutorial will match the sample.
- Complete the online form by following the instructions for each field. If you're replicating the sample organization, then for Create a New Username, type instructor_ and add your name, for example, instructor_YourName.
- After you read and accept the terms & conditions, click Submit.
Your account is created and the subscription is activated.
- Click on Click here to continue to ArcGIS Online. Login with your username and password that you created in the previous step.
The Set Up Your Organization page opens. You're already signed in as the administrator.
Configure general site settings
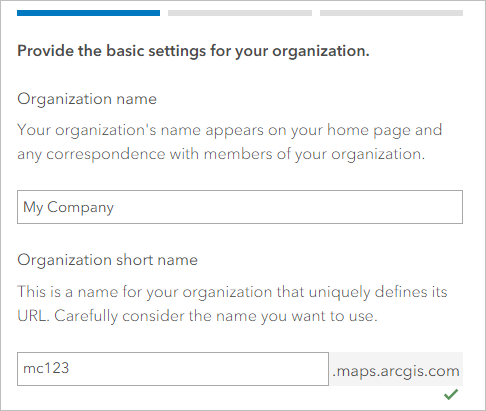
Next, you'll configure some general settings to finish creating the organization. You already chose a name to represent your website, but you still need to set up your organization's URL. You'll specify a unique short name that will be used to create the URL.
- If necessary, sign in to ArcGIS Online with your administrator account.
- If you already completed the initial setup steps for your organization before starting this tutorial, skip to the next section. (If you're not sure, you can skip this section if you see Home at the top of the page.)
- On the Set Up Your Organization page, for Organization name, type the name of your organization. If you're following the sample organization, type Laurel Junction Community College.
- For Organization short name, type an acronym or abbreviation for your organization. If you're following the sample organization, type ljcc- and add your name or initials to the end.
Caution:
If you're using a trial organization that you plan to upgrade to a full organizational subscription, choose an appropriate short name for your organization's URL.
You can also choose a default language for members of your organization. The Language setting determines the user interface as well as the way time, date, and numerical values appear. You'll accept the default setting of Browser Default. Members can change the language they see through their profile page.
Next, you'll set a specific region to determine the default basemap gallery and the default basemap and extent for new maps.
- For Region, choose United States (or a region appropriate for your organization).
Finally, you'll create a custom contact link that will appear at the footer of the site. Members can use this link to contact you for assistance. You can enter a website URL or mailto: link syntax.
- For Link, check the Contact Us box and type mailto: followed by your email address, for example, mailto:name@email.com.
If you leave the box unchecked, the only contact link that will appear in the footer is the Contact Esri link.
- Click Save and Continue.
A welcome window appears with options to try ArcGIS Pro and other ArcGIS apps. You'll download the apps later.
- Close the welcome window.
Your site opens to the Organization page, which is divided into tabs to help you perform a variety of administrative tasks. The Overview tab provides key information about your organization, such as subscription details, credit status, total members, and available add-on licenses.
Customize the appearance of your site
Next, you'll personalize the site by adding logo and banner images.
- On the Organization page, click the Settings tab.
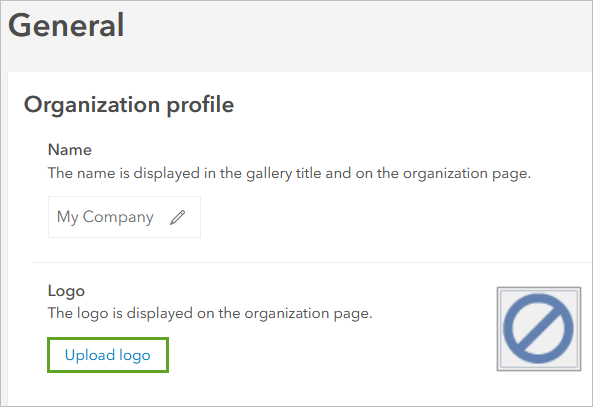
First, you'll add a logo. The logo appears on the home and organization pages.
- If you don't have your own logo image, download and unzip the sample-images.zip file to a location where you can easily find it.
Note:
Acceptable image formats are PNG, GIF, and JPEG.
- In the General settings, for Organization profile, under Logo, click Upload image.
- In the Upload logo window, click Browse (or your browser's equivalent command).
- Browse to the folder where you saved logo.png and upload the image and in the Upload logo window, click Save.
Next, you'll add a description to your home page to tell members about the organization. By default, the home page is what members see first when they sign in.
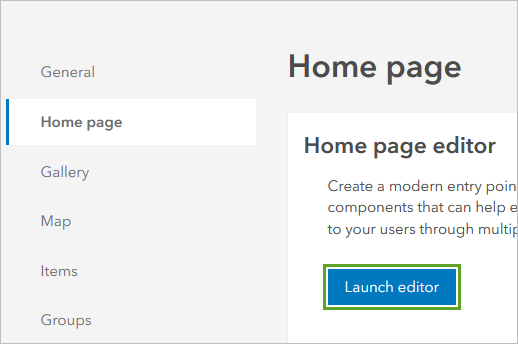
- Click the Home page tab.
The Home page editor opens.
- Click Launch editor.
The home page editor appears.
The home page editor includes a flexible set of components and options that allow you to create a unique entry point to your site. As you configure your page using the home page editor, a live preview of your design choices helps you achieve the look and functionality you want. Use the view options at the bottom of the home page editor to see how your page will appear on different devices.
First, you'll add a header.
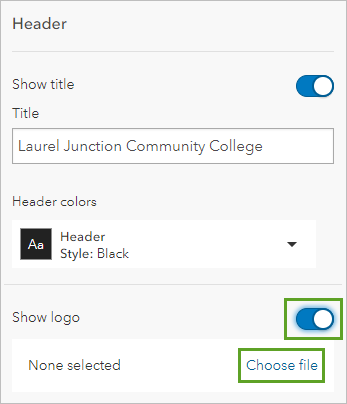
- In the side pane, under Content, click Header.
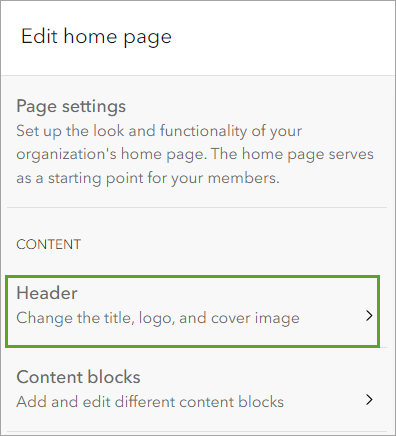
In this pane, you can choose the background and font color for your homepage. Before making any of these choices, you'll want to upload your logo to the home page.
- For Show organization logo, toggle the button and click Choose file.
- In the Upload logo window, browse to the folder where you saved logo.png earlier, select it, and click Save.
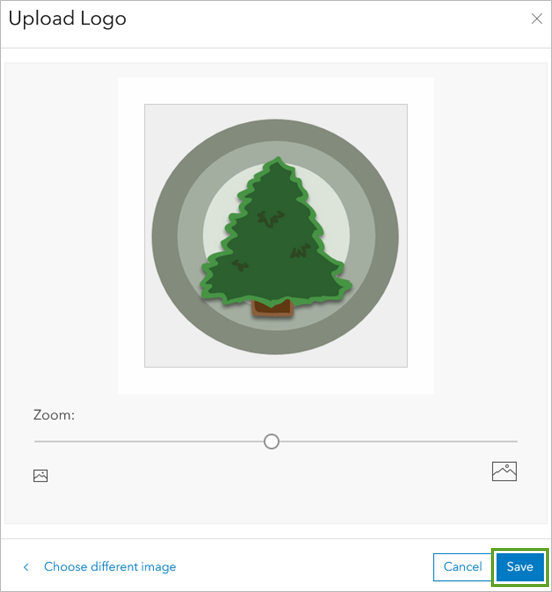
Now that you have your logo for an idea of the color scheme you need to match, you'll look at the background. There are several stock covers that you can choose to use. For the purposes of this tutorial, we'll upload a custom cover.
- For Show cover image, choose Upload a custom cover.
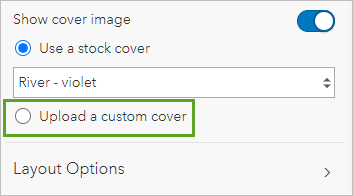
Note:
If you don't have a background image you want to use, a sample image you can use is in the zip file downloaded earlier in the tutorial.
- Click Choose file and browse to the location where you saved cover.png. Choose the file and click Save.
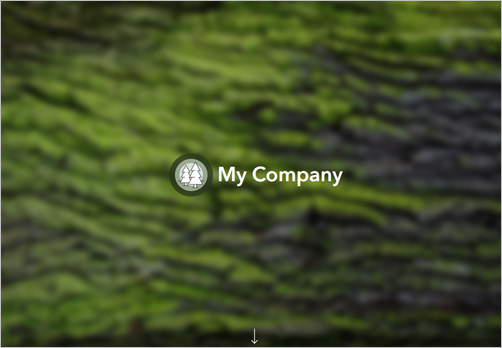
The image is added to the homepage. Against this background, the white title text stands out well. Finally, you'll look at positioning for the title and background image.
- Expand Layout Options.
- For Cover Image, choose Half screen height.
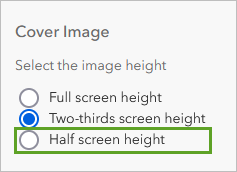
The cover image resizes to the top half of the homepage layout. This will allow you to add blocks below the background image, like a description about your organization and map gallery.
- If you want, adjust the Focal Point and Overlay value. When you're happy with the background and title, click Header and click Page settings to return to the Edit home page pane.
Now you'll add a description about the organization's purpose.
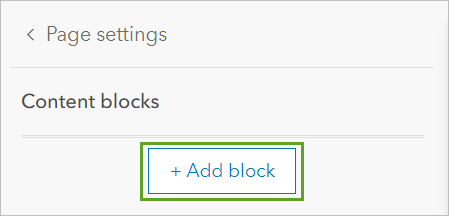
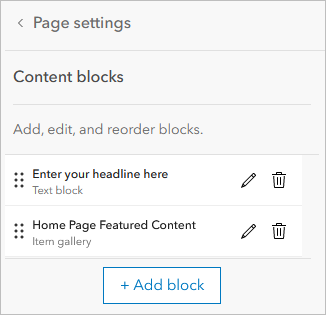
- In the side pane, click on Content blocks and click Add block.
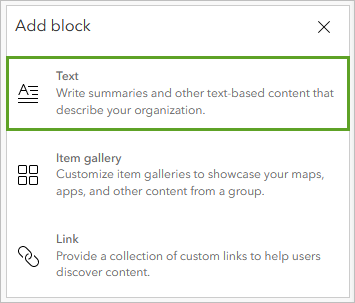
The Add block pane appears. There are two options: a Text block or an Item gallery. You can add text blocks at any time, but you'll need to create maps before adding the gallery block to your homepage.
- In the Add Block pane, click Text.
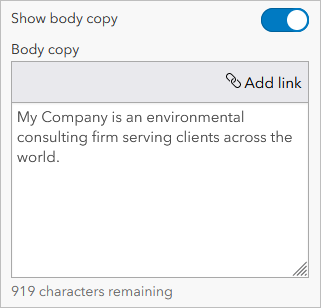
Each text block is configured with a headline and body copy. Since this block will sit underneath the title of the organization, you won't use the headline in this example.
- For Show headline, toggle the button off. For Show body copy, type a few sentences to describe your organization, or use the description for the sample organization:
The Laurel Junction Community College Department of Geography invites you to explore a modern web GIS. Use this site to view and create gorgeous, inspiring, and occasionally troubling web apps and maps that weave interesting stories about our planet and the issues we face.
- On the bottom ribbon, for View, click the Tablet view and Mobile view buttons to see what your homepage will look on different devices.
- At the bottom of the page, click Save.
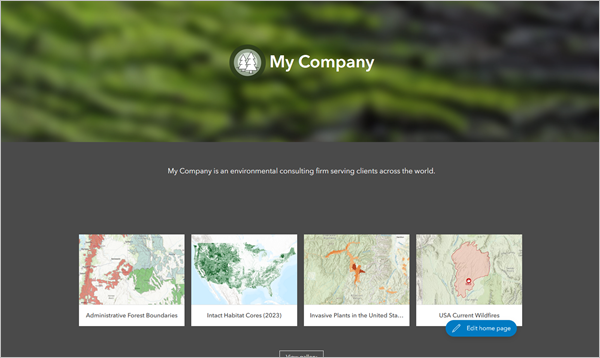
The home page includes your logo and organization name, which overlay a banner image. The organization description appears in a box below the banner.
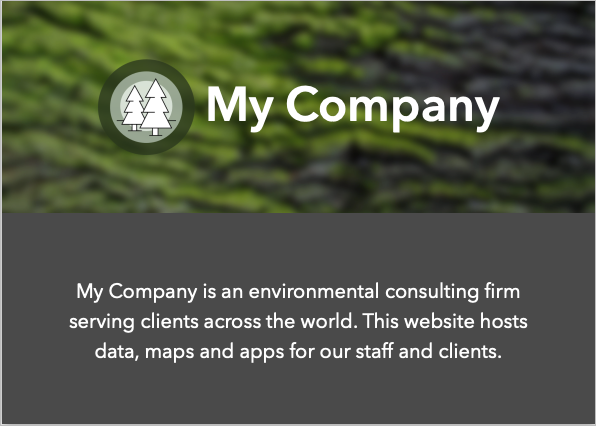
- On the ribbon, click Close to close the editor.
Next, you'll create a group of public items and feature them on the home page. You'll also create a new item to share with your organization.
Share content
Previously, you activated your ArcGIS Online subscription and configured some general site settings. Next, you'll create a group of public items to feature on your home page so students can easily access key maps and apps. You'll also create a new item to share with members of your organization.
Create a group
A group is a collection of items, often related to a common topic, such as region, subject, or project. Groups are used to organize and share items. For example, you can use groups to facilitate team collaboration on a project, share items privately with specific organization members, or organize content to feature on your organization's home page or gallery.
Earlier, you configured a basic home page for your organization and customized it by including a description and banner. Now you want to further customize the home page by adding a featured content gallery that students will see when they sign in to the site. You must find, collect, and organize the content that you want to feature. The best way to do this is by using a group to organize the featured content. You'll start by creating the group.
- If necessary, sign in to your ArcGIS organization with your administrator account.
- At the top of the page, click Groups.
- On the Groups page, click Create group.
The Create a group window appears.
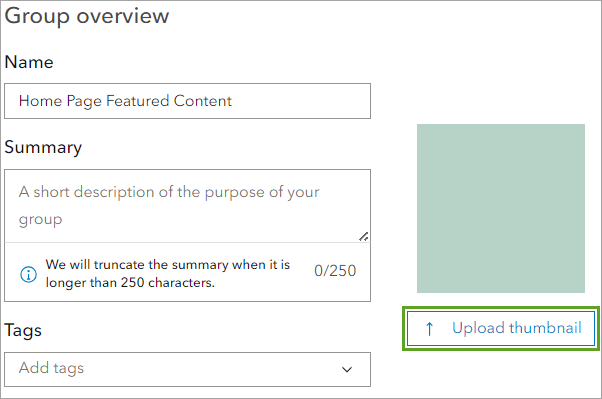
- Under the Group overview section,
for Name, type Home Page Featured Content.
You'll add a thumbnail image for the group to make it stand out to organization members. To save time, you'll use the same image that you used for your organization logo.
- Click Upload image.
- In the Upload thumbnail window, click Browse (or your browser's equivalent command).
- Browse to the thumbnail image that you used for the organization logo and select it. Click Save.
Next, you'll add a summary and tags for the group so that it's easy to find and identify.
- For Summary, type Featured content for the home page.
- For Tags, type featured content, home page and press Enter.
- Accept the default settings for the remaining options.
Anyone can search for and find your group, but they won't be able to apply to join the group. One of the instructors who is helping you will also test sharing their items with this group, so you want to allow others to contribute content. Later, when you create the student account for the instructor to test, you'll add them as a member to this group.
- Click Save.
The group is saved with the settings that you specified.
Share public content
The Home Page Featured Content group currently has no content. Your students will complete several Learn ArcGIS tutorials as part of their course work. You'd like to feature some of the final results on your home page so students can see what they'll create. All the maps, apps, and other content associated with Learn tutorials are shared as public items through the Learn ArcGIS organization. You'll share some of these items with your group to feature them on the home page.
For this scenario, you already know from earlier planning that result maps and apps in the Learn ArcGIS organization are owned by Learn_ArcGIS. (All items in ArcGIS Online have an owner, which you can see on item pages and in search results.) To find Learn ArcGIS content to feature on your home page, you'll search for items owned by Learn_ArcGIS using the owner field in an advanced search string.
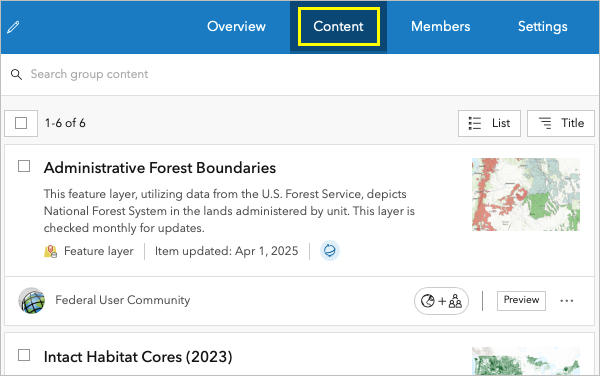
- On the Home Page Featured Content group page, click on the Content tab.
Note:
This option is only available for the group owner and managers.
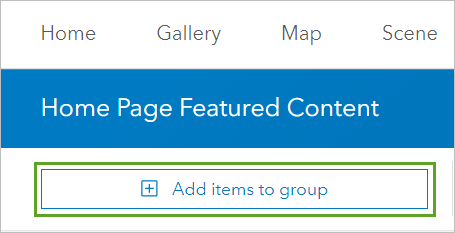
- On the Home Page Featured Content page, click Add items to group.
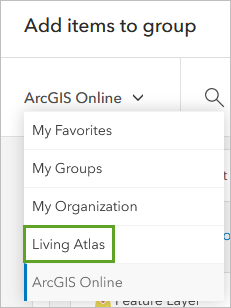
- In the Add Items to group window, on the ArcGIS Online tab, search for
owner:Learn_ArcGIS.
The list of results includes all the public items that the Learn_ArcGIS account owns. You want to feature only web maps and apps on your home page. First, you'll filter the results to show only web apps.
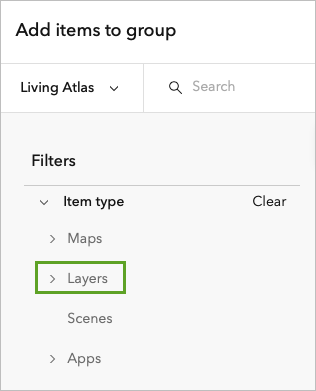
- Click Filter, expand the Item Type list, and click Maps.
The list of search results refreshes to show only items that are web maps.
- In the Maps list, click Web Maps.
Now the list only displays web maps that the Learn_ArcGIS account owns. For an upcoming assignment, students will complete the Create a policy map to address health conditions tutorial. They'll create the Adult obesity rates by county, 2016 web map, so you'll include this web map on the home page.
- In the search box type Adult (don't replace the owner search phrase) and press Enter. In the search results, for Adult obesity rates by county, 2016 and check the box for the item.
The web map is now shared with your group. Students will also create an app showing demographics in Detroit, Michigan, when they complete the Fight child poverty with demographic analysis tutorial. You'll add the corresponding result app to the group. First, you will change the filter from Web Maps to Web Apps.
- In the Item type, click Apps and choose Web Apps.
- Change the sort method by clicking Relevance and click Title to sort the list of results alphabetically by title.
- Update the search terms to locate the Detroit Demographic Analysis (2021) web app and add this item to your group.
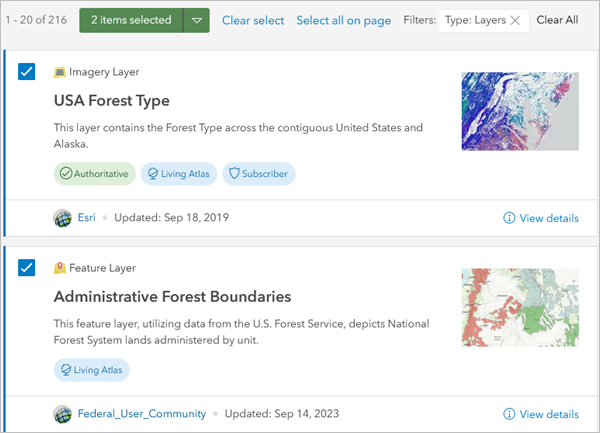
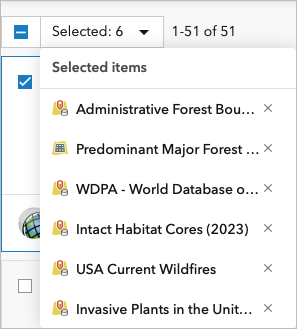
- Using what you've learned, share the following web maps and apps with the Home Page Featured Content group. (As needed, refine the search phrase and use the Maps and Apps filter options and the Previous and Next buttons.)
- When you are done, click Add items.
The apps and maps that you shared with the group are now listed on the Content tab for your Home Page Featured Content group.
Feature group content on the home page
Now that you have a group of items that you'd like to feature, you'll display them in a gallery ribbon on your home page.
- Go to the Organization page and click the Settings tab.
- Click the Home Page tab and choose Launch editor.
- Click on Content blocks and click Add block.
- In the Add block pane, choose Item gallery.
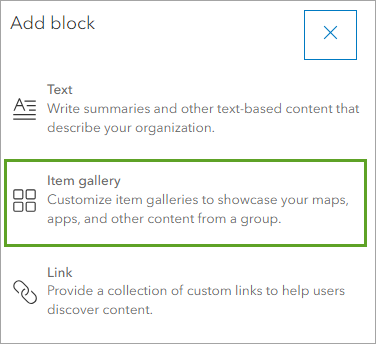
Since you only have one group in the organization, your Home Page Featured Content group is automatically added to the home page above the description text block. Once you've created more groups, you can change this in the Body pane under Group.
- For Show title and Show summary, toggle the buttons to hide the elements.
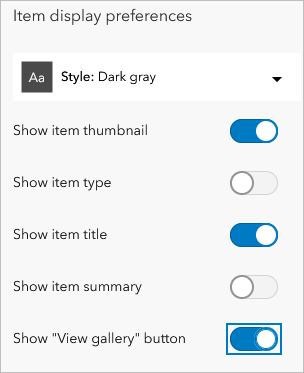
You can also choose what information about each map and app is displayed. By default, the cards show a short summary about each item, but these are long and push the organization description out of sight. To change this display, you'll remove the extra information.
- For Number of items displayed, accept the default to show 4 items.
- For Item display preferences, for Block colors, choose Black.
- Toggle Show item type and Show item summary off to hide them and toggle the Show "View gallery button" on.
- At the bottom of the page, click Save.
In addition to the featured content gallery, the description text has been moved below the banner.
- Close the editor and on the top ribbon, click the Home tab.
- Click the Boulder County Map thumbnail to open the map in a new tab.
- Close the tab to return to the home page.
Create and share an item
Not only can you share public items with your groups, but you can also add your own items to ArcGIS Online. You can share your items with groups, your organization, or the public. Next, you'll add a CSV file of addresses that all students will need for their first assignment.
- Save this CSV file of addresses to a location where you can easily find it.
Note:
To use your own CSV file, see Publish a CSV file.
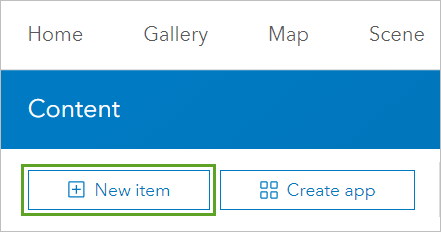
- On your ArcGIS organization page, on the ribbon, click the Content tab. Click New item.
The New item window appears.
- In the New item window choose Your device.
- Browse to and select the movietheaters.csv file.
- For How would you like to add this CSV?, choose Add movietheaters.csv and create a hosted feature layer or table and click Next.
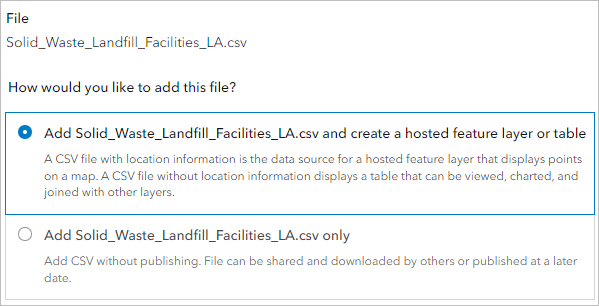
- Review the fields included and click Next.
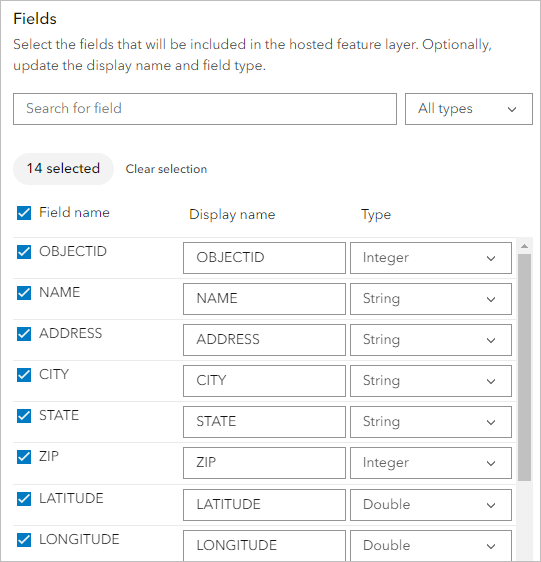
If the field types can be identified, they are set automatically. You can remove fields, change the display name of the field, and change the field type.
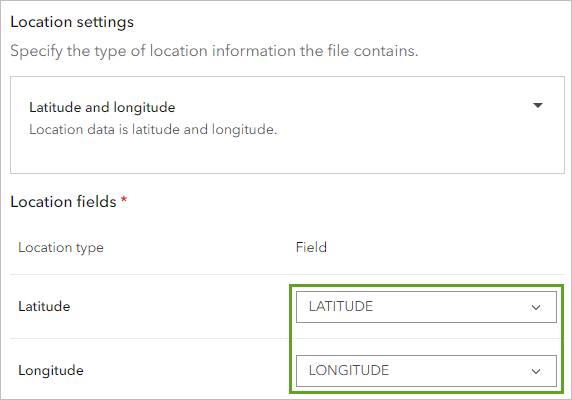
- In Location settings, verify for Location fields, Location information is in one field is selected.
- In Location type, for Address or Place verify the Field selected is Street. Click Next.
The Location type field indicates the type of location-based data that you're providing, such as street addresses or latitude-longitude coordinates. In this case, the CSV file includes United States address data, so Addresses or Places is automatically set for you. Adding an item from a file of addresses will use the ArcGIS Online World Geocoding Service to find corresponding locations. By default, ArcGIS Online geocodes addresses based on your organization's region.
- Accept the default title. Type tags to describe the item. If you're using the movietheaters.csv file, type assignment 1.
Tip:
Tags can be useful for more efficient management of content in your organization. For tips, see the Using tags effectively blog article.
You'll publish this file as a hosted feature layer that students will add to a map for an assignment. Publishing the first hosted layer in your organization will also enable the credit tools so you can see how the credit reports work later.
- Verify that the Publish this file as a hosted layer box is checked and Locate features by is set to Addresses or Places.
- Click Save.
A Review Locations message appears, indicating how many locations were matched to the addresses. You're also prompted to review the matched (and possibly unmatched) locations to make any necessary corrections. For now, you'll skip reviewing the addresses.
Note:
You can review the matched locations at a later time by clicking Review Locations on the item page or from the layer's More Options menu in a map.
- Click No.
The data file and the new hosted feature layer are added to My Content. The item page opens for the hosted feature layer. You can add a summary, description, and other information by clicking Edit in each editable section. To learn best practices for sharing content and creating compelling and authoritative item details, see Best practices for sharing. For now, you'll share the item with your organization.
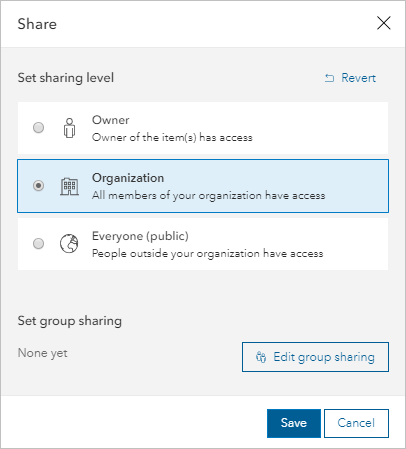
By default, the hosted feature layer can only be accessed by the person who published it or by an administrator. Students will need to use this layer, so you'll share the hosted feature layer with your organization.
- Click Share.
The Share window has options to share the item with everyone, your organization, or your group.
- Choose the option to share the item with your organization.
- Click Save.
You've created a group with which you shared public web apps and maps to feature on your home page. You also created and shared your own content for members of your organization to access. You're almost ready to add members to the organization.
Configure additional site settings
Previously, you created a group and shared content for members to access. Next, you'll configure security settings for your site. You'll set a policy that allows anonymous users (people who aren't signed in) access to the organization's website. You'll also limit who can share content with the public and create a custom role that you can assign to members to further limit privileges.
Update security
As the administrator of your organization, you can configure security policies for your website, including settings for sharing, searching, and signing in.
- If necessary, sign in to your ArcGIS organization with your administrator account.
- Go to the Organization page and click the Settings tab.
- Click Security.
Caution:
The steps in this section are specific to the tutorial scenario. If you're not using a trial account, be cautious about the security settings that you change for your organization. For best practices to improve the overall security of your ArcGIS Online organization, see ArcGIS Online Implementation Guidance.
By default, anonymous users can't access your organization's website; that is, visitors must sign in with a member account. However, you want prospective students to discover your organization home page so they can see the types of maps and apps they could make.
- In the Policies section, in the Access and permissions section, turn on Allow anonymous access to your organization's website.
You'll accept the defaults for the other policy settings.
When an item is shared publicly, anyone can find and access the item. You want to ensure that only authoritative content is shared with the public, so you'll disable the option that allows members to share with everyone.
- In the Sharing and searching section, turn off Members can share content publicly.
Administrators can still share content outside the organization.
You'll accept the defaults for the other sharing and searching settings. The next few sections relate to the usernames and passwords that members use to sign in to the organization. For members with ArcGIS accounts, you can establish rules to determine the format and frequency of their passwords.
- Click Manage password policy.
A window opens with a variety of rules for member passwords. You can define a minimum number of characters and what type of characters are required for passwords. You'll set a rule that prevents members from repeating their last five passwords when they reset their password.
- In the Manage password policy window, turn on Users cannot reuse the following number of last passwords. Accept the default value of 5. (If you're not following the sample, turn on the options that meet the needs of your organization.)
- Click Save.
The Enterprise Logins section allows you to specify that members sign in with their school accounts (or the same usernames as your enterprise information systems). With this approach, members don't need to create and remember multiple usernames to access essential systems. For more information, see Set up enterprise logins.
For added security, you can allow members to enable multifactor authentication for their ArcGIS accounts. Optionally, if members need to access services that are secured with web-tier authentication, you can configure a list of trusted servers. These settings are for a more complex scenario than that of this tutorial. For more information, see Configure security settings.
Create a custom role
Administrators can configure custom roles to limit member privileges based on the specific workflows in your organization. You want one of the instructors to help you test a custom role intended for students. Students need to perform analysis and create content, but they do not need to generate tiles (because they won't be making basemaps). You also want students to create groups that other organization members can join, but you don't want students to join public groups.
- On the Settings tab, click Member roles.
There are six default roles in an organization: Administrator, Data Editor, Facilitator, Publisher, User, and Viewer. Each role has a defined set of specific privileges for members who are assigned the role.
- Click the Role Information button next to each of the role names to read about each one.
The Publisher role would offer student members the privileges they need to complete their assignments. However, they'd also be able to publish tiles, which you don't want. None of the default roles meet your needs exactly, so you'll create a custom role to limit student member privileges.
- Click Create role.
- For Role name, type Student (or a name that's appropriate for your custom role).
- For Description, type LJCC student role (or a phrase or sentence that describes your role).
You can create a role by using an existing role as a starting point or choosing a template that best matches the members' needs. You're creating a role for students, so you'll start with the Student template and modify the privileges to meet your requirements.
- In the Role privileges section, click
Set from existing role.
- In the window that appears, choose Student Template.
- Click Import settings.
The student template includes privileges that allow members to create, update, and delete groups and content; use premium content (including analysis services); and edit features. In contrast, assigned members can't publish tile or scene layers and won't have any administrative privileges. The default choices for this template are close to meeting your requirements for student members, but you also need to modify two group-related privileges.
- In the General privileges section, expand Groups and turn off Join external groups.
Note:
If you aren't following the sample organization, check and uncheck boxes to add or remove privileges for the custom role according to the needs of your organization.
- Expand Sharing and turn on Make groups visible to organization.
- Click Save.
The list of roles in your organization now includes your custom role. You can click the button next to Custom to edit or delete the role. (You can't edit or delete the default roles.)
- Click the Role Information button for your new role.
A window appears displaying a description of the role and the list of privileges.
- Close the window.
At this point, if your organization had members, you could assign the custom role. In this scenario, you're currently the only member, so you'll assign roles later when you add members.
The organization page includes several other settings you can configure, such as Map, Items, and Utility services. You can skip these settings for now because the default configuration is acceptable for your testing scenario. Feel free to explore the other settings on your own. To learn more about the available options, see Configure website.
You've configured security settings for your site and created a custom role to limit privileges for student members.
Add members to the organization
Previously, you created a custom role for student members. Now that you've specified the privileges for roles in your organization, you're ready to add members.
Add members automatically
An organization's administrator invites members to join or adds members directly.
- If necessary, sign in to your ArcGIS organization with your administrator account.
- On the Organization page, click the Members tab and click Invite members.
You can add members automatically or you can send an email invitation for users to accept. You'll add multiple members automatically by uploading a CSV file of names and email addresses.
- Choose Add members without sending invitations and click Next.
Note:
For more information about the other methods, see Invite and add members.
You can use an online form to add members one at a time, or you can add multiple members at once by uploading a CSV or text file that contains the required member information. You'll upload a CSV file to add four new members. (Depending on how many members your organization can have, you can include up to 200 members in your file.)
- On the Compile member list tab, click New members from a file.
To add members from a file, the first line in the CSV file must contain these field names separated by a comma, semicolon, or tab:
- First Name
- Last Name
- Username (optional)
- Password
- Role
- User Type
- If you're following the sample organization, download and save this sample CSV file of accounts to a location where you can easily find it.
Note:
You may need to edit the password values in the CSV file if you changed the password policy for your organization. Also, if you plan to use the new member accounts later, edit the Email field to use your real email address instead.
If you're creating your own CSV file to add members, consider the following guidelines and confirm that the records in your file meet the requirements:
- The email address is used to communicate information about the account, such as when the password is reset. If you don't want to use student email addresses, include your own instead.
- usernames must contain 6 to 128 alphanumeric characters and cannot contain spaces or be the same as the password. You can exclude values for the Username field if you'd prefer that the system generate unique usernames for each account. You can edit the usernames during a review process.
- The password is case sensitive and must match the requirements of your organization. The member will be prompted to change the password after signing in for the first time.
- For Role, the value can be Viewer, Data Editor, User, Publisher, or one of your custom roles (that don't have administrative privileges). You can change a member's role later, if necessary.
- For User Type, the value can be Viewer or Creator if you're using a trial account. If your organization has additional user types available, other possible values include Editor, Mobile Worker, GIS Professional Basic, GIS Professional Standard,GIS Professional Advanced, or Insights Analyst. The user type determines which privileges and apps can be assigned to the member. You can change the user type later, if necessary.
- Click browse.
- Locate the folder where you saved SampleAccounts.csv and upload the file.
Your file is checked for required fields.
Note:
If your file is missing required fields, you can edit your file, click Choose a different file, and select the updated file. Or review the compiled members list and edit information for any member with an error icon.
- Click Next. Review the list of new member information.
If a username you chose is already taken, the system adds a number to the username. In this case, you'd need to update your own records with any new usernames, so you can provide correct usernames to the corresponding students. You can edit values for each member or remove selected entries.
- Click Next.
- Under Add-on licenses, click Manage.
The add members workflow assigns the same add-on licenses, groups, and settings to the entire list of compiled members. If you're using a trial account, there are only two available licenses for each app and the sample compiled members list includes four members. Therefore, you can't select these licenses on the Add-on licenses tab because there aren't enough to assign to all the members in the list. If you're not using a trial account, you can assign available licenses to the new members if all members in the list have a compatible user type. Otherwise, you'll assign add-on licenses to specific members later.
- In the Add-on licenses window, click Cancel.
- Under Groups, click Manage.
The instructors who are helping you also need to test contributing content to the home page, so you'll add these new members to the appropriate group.
- In the list of groups, check the Home Page Featured Content box (or select another appropriate group for your new members) and click Save.
- Review the rest of the options on the Set member properties tab.
Note:
If you're not using a trial account, you also have the option to set the credit allocation to a specified number of credits or no allocated limit. (You'll learn more about managing credits later.)
If you choose to enable Esri Access, the new members can use My Esri and Esri Community and access e-Learning on the Training website.
There are also settings for profile visibility, a member's start page, language, and number and date format.
You'll accept the default settings.
- Click Next.
- Review the Summary details. Click Add members.
The Organization page opens to the Members tab. The members are automatically added to the organization and a message briefly appears to show how many members were added. When you automatically add members, you must inform them of their usernames and passwords because they will not receive an email notification about their accounts.
- In the Role column, click the arrow next to Student.
As your organization's needs change, you can choose from a list of available roles to assign members. You can also manage other options regarding individual accounts.
- Click the options button for one of the new members to display the options menu.
With this menu, an administrator can assign and unassign add-on licenses, change a member's user type, and reset their password. You can also enable accounts for Esri access and delete the member from the organization. When members sign in the first time, and the Last login value changes from Never to a date, the menu will include an option to disable a member's access to the organization's resources. Disabling access gives you time to move their content to another member before you delete the account, such as for an instructor who retires. For more information, see Manage members.
- Click the member name that's assigned the Student role.
A window appears with a preview of the member's profile and links to open their profile page, manage their items, and view their items or groups. Currently, your new members have incomplete profiles. When members first sign in with their new account, they'll be prompted to complete their profile. You'll update your profile next.
Create a user profile
All users should create informative profiles to help others know more about them, their groups, and the content that they've shared. Your profile communicates who you are to your organization and the greater ArcGIS Online web community and can connect you with others who have similar interests. You'll create a profile for your account to set an example for other members.
- At the top of the page, click your name and choose My Profile.
Your profile page opens. As an administrator, you can modify most of the information in your profile, but usernames cannot be changed. At this time, you shouldn't need to modify your first name, last name, or email address because you set these values when you activated your account earlier.
- For Bio, click Add a bio and type a few sentences about yourself, such as areas of expertise, interests, and contact information. If you're using a practice organization, you can use the member description from the sample:
I am a senior lecturer at Laurel Junction Community College who teaches Introduction to Human Geography, Urban Applications of GIS, and Politics of Global Health. I'm interested in the interactions between health and the urban environment and how cartographic design affects people's perceptions of data. In my free time, I like to run and ski and hang out with my three dogs.
The next setting indicates that only members within your organization can see your profile. This default setting also means that users outside your organization cannot invite you to join groups. Users who can see your profile can see your image, name, username, and biographical information (if allowed in your organization's settings). Profile pages also include links to view a user's items and groups. Members can change this setting to Private, so only administrators in the organization can see their profile. If the organization allows sharing with the public, members can also choose for everyone to see their profile. You configured your organization to prevent sharing outside the organization, so only an administrator can make member profiles visible to the public.
- Click Save.
- For Profile visibility, select Everyone (public).
Next, you'll add an image of yourself (or something else that represents you).
- If you don't have your own image, browse to the sample-images folder you downloaded earlier and choose the instructor-profile.png image.
Note:
Acceptable image formats are PNG, GIF, and JPEG. For best results, the image should be 400 pixels wide by 400 pixels high. The maximum file size is 1 MB.
- Click the thumbnail to add a photo.
- In the Upload Thumbnail window, click Choose File.
- Browse to the folder where you saved instructor-profile.png and upload the image. Pan and zoom the image to center it in the circle frame, and click Save.
Your profile photo updates.
You can also change your password and security question and answer. If you ever forget your password and need to reset it, you'll be prompted to answer the security question to receive a temporary password. Temporary passwords are sent to the email address associated with your account. You chose a security question and answer when you activated your account, but the form only displays the question. This can be done in My settings.
- Click View my settings.
The My settings page appears on the General tab.
The Language, number and date format and Region values match the organization settings that you configured earlier. Members can choose their preferred language for the user interface, but they can't change the region. The Region value determines gallery content and the default extent for new maps.
The Units setting defines the units used for the map scale bar, measure tool, directions, and analysis. Members can choose US Standard or Metric.
Tip:
As an administrator, you can change the default units for the organization in the Map section of the organization settings.
Because you just created your account, your email is likely correct, but you can change it on this page if necessary.
Note:
Only administrators can modify the email address associated with member accounts. (To modify another member's profile, access it from the Organization page or click the member name that appears as an item's owner.)
Your profile page also includes an option to manage mail that you receive from Esri. To stay informed about the latest ArcGIS updates, best practices, and user success stories, you can subscribe to free Esri publications.
- If you want to subscribe to Esri publications, under Manage email from Esri, click Set email preferences and complete the online form that appears.
Note:
This option is only available to members in your organization whose accounts are enabled for Esri access.
You've added members and updated your member profile.
Monitor member activity
Previously, you added members to your organization. Next, you'll estimate credit usage for members and explore available reports that you can use to monitor how members use the organization's resources. You'll also manage the organization's credit budget by limiting credit allocation.
Estimate credit usage
ArcGIS Online is based on an annual subscription that offers a set of plans, each including an allotted number of members and credits. Credits are the currency used across ArcGIS and are consumed for feature and file storage, performing analytics, using subscriber content, and publishing tiles. (Any app that interacts with ArcGIS Online, such as ArcGIS Pro, can use credits.) The ArcGIS Online tools and storage that your organization uses will determine the number of credits consumed. In many cases, credit-consuming activities carry a relatively low cost.
For planned assignments, you should ensure that your organization has enough credits for each student member to complete the expected workflows and store any associated results. The ArcGIS Online help provides a credits by capability table that you can use to estimate how many credits you'll need. To practice, you'll estimate credit usage for two Learn ArcGIS lessons that you expect students to complete as part of their assignments.
For example, in the Convert a list of historic places into a map lesson, users geocode 36 addresses and create a map of the results. You'll estimate the credits required to geocode and store the results.
- In a new window, go to the Credits by capability page and review the table.
Note:
You'll need the credits table throughout this section, so keep the table open to refer to as needed.
The credit rates in the table vary for the listed capabilities. For example, geocoding uses 40 credits for every 1,000 geocoded addresses.
- Calculate how many credits each student would use to geocode the 36 addresses in the Learn ArcGIS tutorial Convert a list of historic places into a map.
- If 1,000 geocodes uses 40 credits, then 1 geocoded address uses 0.04 credits (40 ÷ 1000 = 0.04).
- 36 (geocoded addresses) × 0.04 (credits per geocode) = 1.44 credits used.
Credits are also required for data storage. Students will use data storage credits for a result map and app, plus a feature collection. (In the tutorial, students create a feature collection by saving the geocoded addresses in their map as a layer.) You can see the data size for maps, apps, and other content on their respective item pages.
- Open the item page for Ancient cities in Africa feature service as an example.
- Find the Details section and make a note of the item's size.
The item details on each item page also indicate the data type. For layers, the data source is also listed in the Details section. In this case, it indicates that this item is a feature collection. This data source information can help when you're estimating credits for data storage. You'll use the file storage credit rate for feature collections.
- Open the item page for Ancient cities in Africa result map and make a note of its size.
The result map also references other layers, but they are owned by the Learn ArcGIS organization, so those layers don't use storage credits in your organization. (To see who owns the layers that the map references, you can click each link in the Layers section to open the item pages.)
- Return to the credits by capability table and calculate how many credits each student would use to store their results for the Convert a list of historic places into a map tutorial.
- Total data storage: 6 KB (web map) + 80 KB (feature collection) = 86 KB
- If 1 GB of file storage uses 1.2 credits per month and 86 KB = 0.000086 GB (1 GB = 1,000,000 KB, so 1 KB = 0.000001 GB), then 86 KB of file storage uses 0.0000252 credits per month:
0.000086 GB × 1.2 credits = 0.0001032 credits
Each student who completes the Convert a list of historic places into a map tutorial will use 1.44 credits, plus 0.0001032 credits per month (until their items are deleted).
Many workflows require using analysis tools that generate a new feature service, which is hosted on ArcGIS Online. These services are referred to as hosted feature layers. Storing hosted feature layers has a higher credit rate than the file storage that you calculated.
In the Fight Child Poverty with Demographic Analysis tutorial, users run the Enrich Layer tool to add three demographic attributes to approximately 800 features. GeoEnrichment creates a feature service that is stored in the organization. They'll also create a map of the results and share the map as a web app. You'll estimate the credits required to enrich the data and store the results.
- Open the item page for Detroit Demographics hosted feature layer and make a note of its size.
As expected, the source for this hosted feature layer is labeled as a feature service. According to the credits by capability table, you'll use the feature storage credit rate for hosted feature layers.
Note:
The Feature Service label is used for ArcGIS Online hosted services and ArcGIS Server services. A feature layer that references an ArcGIS Server service doesn't use storage credits. A feature layer's item page only indicates that the layer references a hosted service if your organization owns the item. In that case, the label for item type (next to the thumbnail image) would be Feature Layer (hosted). For more information, see the Layers help topic.
- Open the item page for the Detroit Demographic Analysis (2016) result map and make a note of its size.
- Open the item page for the Detroit Demographic Analysis (3.x) final app and make a note of its size.
- Return to the credits by capability table and calculate how many credits each student would use to store their results for the Fight Child Poverty with Demographic Analysis tutorial.
- Total file storage: 5 KB (web map) + 1 KB (web app) = 6 KB
- If 1 GB of file storage uses 1.2 credits per month and 6 KB = 0.000006 GB (1 GB = 1,000,000 KB, so 1 KB = 0.000001 GB), then 6 KB of file storage uses 0.0000072 credits per month:
0.000006 GB × 1.2 credits = 0.0000072 credits/month
- If 1 GB of file storage uses 1.2 credits per month and 6 KB = 0.000006 GB (1 GB = 1,000,000 KB, so 1 KB = 0.000001 GB), then 6 KB of file storage uses 0.0000072 credits per month:
- Total feature storage: 3 MB (feature service)
- If 10 MB of feature storage uses 2.4 credits per month, then 3 MB of feature storage uses 0.24 credits per month (2.4 ÷ 10 = 0.24):
3 MB × 0.24 credits = 0.72 credits/month
- If 10 MB of feature storage uses 2.4 credits per month, then 3 MB of feature storage uses 0.24 credits per month (2.4 ÷ 10 = 0.24):
- Total monthly storage: 0.0000072 + 0.72 = 0.7200072 credits per month
Students will create the feature service by running the Enrich Layer analysis tool. According to the credits by capability table, GeoEnrichment uses 10 credits per 1,000 attributes (data variables).
- Total file storage: 5 KB (web map) + 1 KB (web app) = 6 KB
- Calculate how many credits each student would use to enrich 800 features with three attributes each.
- If 1,000 attributes uses 10 credits, then 1 attribute uses 0.01 credits (10 ÷ 1000 = 0.01).
- 800 (features) × 3 (attributes each) × 0.01 (credits per attribute) = 24 credits used.
Each student who completes the Fight Child Poverty with Demographic Analysis tutorial will use 24 credits, plus 0.7200072 credits per month (until their items are deleted).
- Close the credits table, if necessary.
When planning assignments, you're more likely to complete the workflow first to assess its relevance to a course and its credit requirements. To estimate storage credits, you could store the results in a unique folder in My Content to quickly find the total size of any layers, maps, and apps in the folder. Before running an analysis tool, you can also click a Show credits link to see how many credits will be required to perform the operation.
For example, if you completed the analysis for the Fight Child Poverty with Demographic Analysis tutorial, the Show credits link would open a Credit Usage Report window. The report indicates the number of records to analyze and the credits required to run the analysis.
Additionally, you can access status reports to determine the credits that you used to complete the workflow.
View status reports
Administrators can view status reports for the organization. You can access interactive, detailed usage reports and see general information, such as the subscription renewal date and how many credits remain. Reports are organized into five categories: credits, content, apps, members, and groups. For instance, you can monitor credit use in multiple ways: overall, by content, and so on.
The following example shows a sample report for service credit usage in an established organization with a few hundred members. The report shows aggregated credits by date within a selected time range. Unique colors identify credit use by type: storage, analytics, subscriber content, and published content.
- If necessary, sign in to your ArcGIS organization with your administrator account.
- At the top of the page, click Organization.
Tip:
You can quickly see your subscription ID, system health information, subscription renewal date, and other information about your subscription on the Overview tab of the organization page. You can also download an audit log of activity with information about changes to the organization and its members, groups, and content. Choose a start date and time and the number of events (10,000 maximum) to include in the history log.
- On the ribbon, click the Status tab.
For a new organization, there isn't enough data yet to generate meaningful reports. After members start using the organization, you can experiment more with the reporting capabilities. For now, you'll review today's activity. You can adjust the time to change the reporting period for the reports. You can see member activity for up to the past 12 months.
- Click Quick Date Select and choose Today.
Note:
If you've been working on this tutorial over multiple days, change the Start date by choosing the day that you began this tutorial. Click Refresh, if necessary.
- Change the view from the Credits tab to the Members tab.
Member reports help you monitor the activities of your organization's members. By default, the report shows the summary and statistics for your account. It lists the total items you've created or modified and total credits that you've used during the selected time period. If your only credit-based activity today was geocoding the addresses that you added from a CSV file, the summary indicates that you created two items and used 0.48 credits.
Once your organization has other member activity, you can click Change Member and search for a particular member for a similar report.
- Locate the Credit Utilization Activity This Period section.
You can review the activity for the selected member based on various categories, such as GeoEnrichment, Geocoding, Spatial Analysis, and Tile Generation.
- Click the download button to export the report.
- Open the report.
Depending on the selected time period, the report provides hourly or daily utilization activity for each category. You could look at the credits used during the hour you completed a planned assignment to determine credits required by the workflow.
- Return to your Organization Status page and continue scrolling to the Content and Collaboration Activity this Period section.
You can also explore the member's content and collaboration activity here. Refine the report details by using the interactive charts, tables, and map.
Allocate credits
Once you know how many credits each student will need to complete course assignments, you could allocate a credit budget to prevent students from exceeding a specified credit limit. Administrators can assign a flexible allocation of credits to some or all organization members. Credit allocations can be modified at any time.
Note:
If you are completing this tutorial using an ArcGIS free trial account, you can't enable the Credits feature in a trial organization. If you're using a trial account, you can skip ahead to the next section.
- Go to the Organization page and click the Settings tab.
- Click Credits.
- Turn on Enable credit budgeting tools and click Yes.
You can set a default allocation for new members or you can manage the credit budget by individual, role, or group. Budgeting does not apply to organizational credits used for storage of files, feature services, and tiles.
- Click New member defaults.
The New member defaults settings appear. Administrators can specify the number of credits and other member properties (such as user type and role, add-on licenses, and groups) to assign by default when adding or inviting new members to the organization. Previously, you calculated that each student will need approximately 25 credits to complete two Learn ArcGIS tutorials, but you want students to complete additional assignments. To save time, you'll assume that 30 credits are enough for each student to complete the tasks you expect.
- For Credits, for Set allocation to, type 30 (or an amount appropriate for new members in your organization). Click Save.
You can also set the credit allocation for existing members.
- Click the Members tab.
- Search for members by name, group, or role, and then select them from the Members list.
- Click Manage credits.
The Set allocation window appears.
- For Set allocation, type 30 (or an amount appropriate for the selected members) and click Save.
When members use all 30 allocated credits, they'll receive an automatic email notification to let them know they've reached their credit limit. As the designated administrator, you'll also receive an email notification to let you know when a member has used all their allocated credits. Credit allocation also prevents members from performing analysis that would exceed their limit.
The members table updates with a new Credits remaining column that shows the credits available to each member. (You can also modify the credit allocations by using the more options menu associated with an individual member.)
Note:
The sum of allocated credits can exceed the organization's total available. The available credits value is an upper limit for each member, so users have the flexibility to complete their work as needed.
You've viewed status reports and used Learn ArcGIS tutorials to practice estimating credit usage. You can use the same resources and credit math to estimate the credits required for your organization's planned workflows and member activity.
Get and license apps
Previously, you explored available status reports and estimated credit usage for members of your organization. Now that you know where to monitor how members are using resources, you're ready to provide them access to the additional apps that are included with ArcGIS. You'll learn where to find information about the apps and how to access them with your account.
Review apps that are included with your subscription
You can access ArcGIS web apps from the app launcher and install other apps from My Esri or the trial downloads page (for trial accounts). You'll explore all these options.
Once a member signs in to ArcGIS Online, the user menu offers quick access to several resources. They can access online help, community and forums, and the Esri Training website. Additionally, members can access a site to download the ArcGIS software you've given them permission to use. If they're using a trial account, members go to the trial downloads page; otherwise, members go to the My Esri site.
- If necessary, sign in to your ArcGIS organization with your administrator account.
- If you're using a trial account, click your user name and choose Trial Downloads.
The ArcGIS Free Trial page opens, where you can download ArcGIS Pro. This page also includes links to access or download several ready-to-use apps that are available to use with ArcGIS Online—apps for the field, office, and community.
Note:
Before running the installation program for the downloaded apps, members should ensure that their machine meets the listed technical requirements.
- If you're not using a trial account, click your user name and choose My Esri.
My Esri consolidates Technical Support, Customer Care, and Training into a single experience and offers one location to access your software downloads and licenses, if applicable.
Note:
Your administrator account is enabled for Esri access by default. For other members (including other administrators) to see the My Esri option on the user menu, you must first enable this feature on their accounts. (On the Organization page, click the Members tab. From the more options menu for each member, choose Enable Esri Access.) Esri Access allows members to use My Esri, participate in the community and forums, and manage email communications from Esri.
The first time you access the My Esri site, you may be prompted to sign in or edit your contact information.
- If necessary, complete the online form by filling in the required fields, and click Update.
Once your contact information is successfully updated, you can make further modifications to your profile or return to the dashboard. The dashboard includes recent announcements and common questions. Esri software is available to download from My Esri on the My Organizations tab. If you don't see a Downloads option on that page, you must first click Request Permissions to associate your account with an Esri customer number. (If you're using a trial, you'll download software from the Trial Downloads page instead.)
The download page is available to users who have the permissions to download software. My Esri includes options for you to invite users or for users to request access. For more information, see the Common Questions page (you must have an Esri account to view this page).
- Close the My Esri page or the ArcGIS Free Trial downloads page.
The app launcher is another good way for members of your organization to learn about and access the web apps that are available as part of ArcGIS.
- If necessary, return to ArcGIS Online.
- Click the App Launcher button (next to your username).
A window appears with several app icons. The app launcher is a convenient window from which organization members can open the web apps available to them. It automatically includes ArcGIS apps for organization members who have an appropriate license. You'll open one of the web apps included with your subscription.
- Click an icon, such as Dashboards or Survey123.
The web app opens in a new window.
- Close the web app and return to the Organization page in ArcGIS Online.
Assign licenses
After downloading and installing licensed apps, such as ArcGIS Pro and ArcGIS Business Analyst, users must be authorized to use the app. A member's user type includes licenses for specific apps. If a license isn't included with the user type, administrators must use ArcGIS Online to assign compatible add-on licenses to the member. For example, a Creator user type is automatically licensed to use the Survey123 field app, but the member must be assigned an add-on license to use ArcGIS Pro. (ArcGIS Pro is compatible with their user type but not included.)
You expect students to use all the compatible apps that your subscription includes. Before students can use some of these apps, you need to assign add-on licenses that authorize their ArcGIS accounts.
- On the Organization page, click the Licenses tab.
The licensing page includes details about your organization's assigned and available add-on licenses and user types, including compatibility tips to help you make decisions. If your organization has ArcGIS Pro licenses, you see total numbers for each available software level (Basic, Standard, or Advanced) and extension. For ArcGIS Pro, you assign a software level and extensions for specialized tools. If you're using a trial, all licenses are for the Advanced level; otherwise, you can choose the other levels (Basic and Standard) for members based on their expected needs and workflows.
Tip:
To determine the software level required for the tasks you want to complete, see ArcGIS Pro tool reference. Expand a specific toolbox and select the licensing topic to view a summary of the licensing requirements for every tool in the toolbox.
First, you'll assign licenses for ArcGIS Pro.
- In the ArcGIS Pro section, locate an available software level that you want to assign to members. Next to Compatible user types, click the number.
The Creator user type is compatible with the ArcGIS Pro add-on license. You'll assign these licenses to applicable members in your organization.
- Click Manage.
- In the list of filters, for User type, click Creator.
The list of members is reduced to only those who are assigned the Creator user type.
Tip:
If you have a large organization, you can narrow the results by also filtering by role and group and searching by name to find a specific member. For example, you could filter by the Student role and choose to configure licenses for all members with your custom role.
- Click Manage all on page and click Assign members to update licenses for all members that meet the filter criteria. Otherwise, turn on the license assignment for each applicable member and choose whether or not to email the member.
- Close the Manage window.
- Next to ArcGIS Pro, click License activity.
A window displays which members have been assigned ArcGIS Pro add-on licenses, the last time they used ArcGIS Pro, and whether they have checked out a license. A green dot next to the last used date indicates that the member has used ArcGIS Pro recently; a red dot and a Disconnected label indicate that the member has checked out their license for offline use.
Tip:
To end a member's active session and release a license for another member, search the members list and click the row for the member to view activity details. Click End session. Review the active sessions and select which one to end.
- Close the Activity window.
Next, you'll assign all the available extensions and apps at once to the Creators in the organization. To configure add-on licenses for multiple products at once, use the Members tab.
- On the ribbon, click the Members tab.
- In the Filters list, for User type, click Creator.
- In the member table, check the box at the top to select all the members in the filtered results.
The selected members are added to the members selected list.
Tip:
If you need to assign add-on licenses for products that aren't compatible with all user types, use the Licenses tab to determine the compatible user types for the intended products. Then, on the Members tab, filter the members list by the applicable user types. If there are multiple compatible user types, filter the members list for each and select the applicable members. Your selection is maintained as you modify the filters and search the members in your organization. You can select up to 100 members at a time. You can also review a list of the selected members (grouped by user type), and remove any member from the list, if needed.
- Click Manage add-on licenses.
Similar to the licenses page, you can see the number of licenses available to assign for each compatible product. You'll choose which licenses to assign to the selected members.
- In the Extensions section, check the Select all box. (Or, check individual extensions based on your members' needs.)
All the available extensions are checked now, so all selected members will be able to use these ArcGIS Pro extensions.
You'll also assign licenses for all the available apps.
- In the Applications section, check the box next to each available application.
(Or, check appropriate products for the selected members.)
- Click Save.
Now these members can use ArcGIS Pro and the other assigned apps by signing in with their ArcGIS organizational account.
- Click the options button for one of the members and choose Manage add-on licenses.
A page displays a list of compatible licenses for that particular member. This is another method you can use to update assigned licenses for an individual.
Note:
You cannot unassign ArcGIS Pro or ArcGIS Drone2Map licenses from users who have a license checked out.
- Click Cancel.
- Return to the Licenses tab.
The status information updated to show how many available add-on licenses remain for each product. If you're using a trial account, and you assigned all the add-on licenses to the two Creators in your organization, the number of available licenses is zero.
In this tutorial, you set up a practice ArcGIS organization with some basic configurations. Now that you're ready to set up your own organization, use the guides listed below to help you administer and promote your ArcGIS organization:
- ArcGIS Online Implementation Guide—Strategies for planning, testing, and rolling out your organization
- Promoting Your Location Platform—Activities and promotional tools to engage members of your organization
- Architecting the ArcGIS Platform: Best Practices—Implementation considerations and best practices
When personalizing your site, view these model organizations for inspiration:
- https://disasterresponse.maps.arcgis.com/home/index.html
- https://boston.maps.arcgis.com/home/index.html
- https://mycity.maps.arcgis.com/home/index.html
Once members become active within the organization, you may want to determine strategies for managing the content they create, as well as managing users as students or staff members change. For a collection of related resources and ideas, including best practices and additional tools, browse the ArcGIS Blog for articles applicable to administrative tasks. You can get ideas for establishing standards and best practices for managing users, items, and groups. For example, you can find strategies for curating and maintaining content to promote your organization's best examples.
Finally, if you're using a trial subscription, you can purchase a subscription plan for your organization when the trial period expires. All the work you've done during your trial will be preserved, and you'll be able to continue using ArcGIS Online without interruption.
You can find more tutorials in the tutorial gallery.