Create a web app
To create the web app for the recreation area website, you'll use ArcGIS Instant Apps. Instant Apps includes a library of app templates and several configuration options so you can design an app tailored to your audience's needs.
Note:
If you need to create capabilities to engage with the public and promote outdoor recreation activities, use the Recreation Outreach solution. This tutorial focuses on how to create a web app and configure it to support two or more languages. It offers a small subset of options for outdoor recreation engagement.
Choose a web app template
First, you'll sign in to ArcGIS Online and choose an appropriate template using Instant Apps.
- Sign in to your ArcGIS organizational account.
Note:
If you don't have an organizational account, see options for software access.
- On the ribbon, click Content.

Your Content page appears. This page shows all of the content in your account and includes options for creating content, including apps.
- Click Create app and choose Instant Apps.
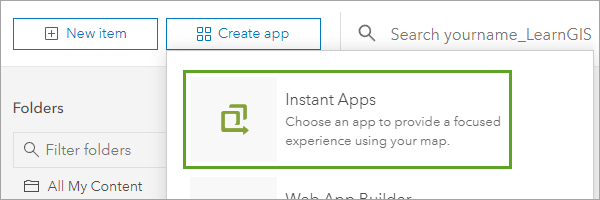
The Instant Apps gallery page appears in a new browser tab. The gallery includes many app templates, which you can filter based on the capabilities they have. Because you want to offer two language options, you'll search for templates that include the language switcher capability.
- For Search app capabilities, type language and choose language switcher.

The gallery is filtered to templates with the language switcher capability. The other capability you want your app to have is showing the elevation of hiking trails.
A good way to show elevation of a linear route (such as a trail) is with an elevation profile, which is a two-dimensional cross-sectional view of a landscape that depicts rises and falls in elevation. You'll filter the gallery further to show templates that have elevation profile capabilities.
- For Search app capabilities, type elevation and choose elevation profile.
The capability is added as a filter.

The gallery now contains a few templates. The Nearby template might be a good choice. You'll check the app's description to confirm this is the app you want.
- For Nearby, click the Menu button and choose App description.
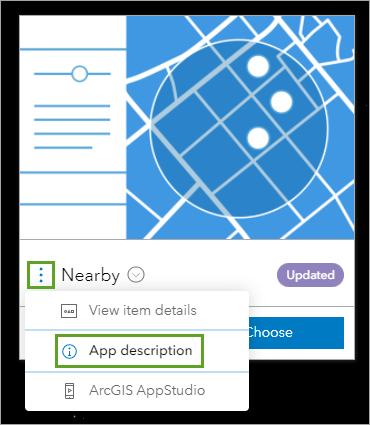
A window appears with a text description of the app template. The description states that this template guides users to points of interest based on a location search and provides directions. This template seems like exactly what you want to help park visitors search for and learn about nearby hiking trails.
- In the Nearby window, click Close.
- For Nearby, click Choose.
Tip:
To preview an app template before you choose it, click Sample to see an example app using the template.
The Create app - Nearby window appears, with options to give your app a title and search tags.
- For Give your app a title, type Santa Monica Mountains Hiking Trails.
- For Add tags, type Los Angeles and Hikes, pressing Enter after each.
- Optionally, choose a folder in which to save the app.
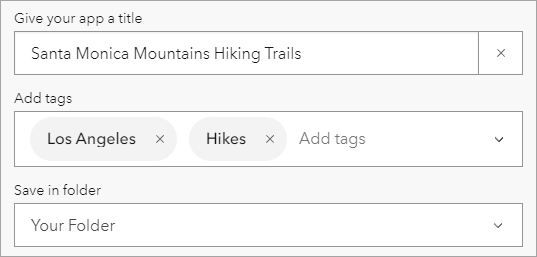
- Click Create app.
The app is created and the app configuration window appears.
The configuration window is set to express mode by default. This mode includes a simplified subset of all app settings to emphasize the most essential settings and guides you through the configuration process.
You can turn off express mode to view all settings, or search for specific settings if you need them, but for your purposes, this mode is fine right now.
Choose a map
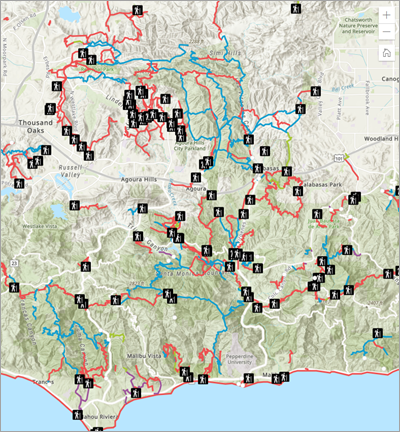
Next, you'll configure the template to suit your needs. The first thing you'll do is choose a map to display in your app. This map will show hiking trails and trailheads in the Santa Monica Mountains.
- Click Step 1. Map.
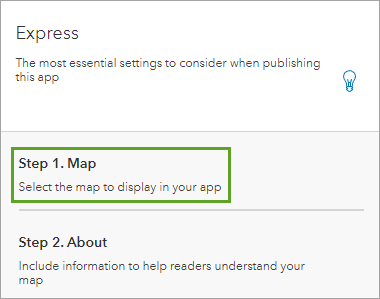
The Map pane appears.
You'll choose a web map of Santa Monica hiking trails that has already been created for you. In addition to the trails data, it includes layer names, legends, and attributes and pop-ups designed to support a multilingual app. You'll learn more about them in the second part of this tutorial.
Ordinarily, you might have to create the map you want to display in your app yourself, but for the purposes of this tutorial, you'll assume you've already created the map.
Note:
To learn more about creating web maps, try Get started with ArcGIS Online.
- Click Select a map.
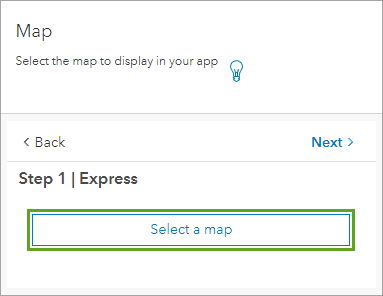
The Select a map window appears. By default, the window displays maps that you own. The map you'll use is owned by the Esri Tutorials administrator account.
- Click My content and choose ArcGIS Online.
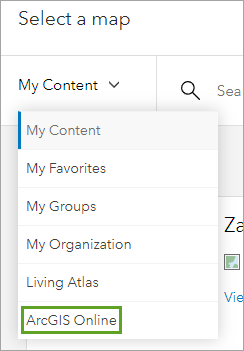
The window now shows all maps that are shared publicly on ArcGIS Online.
- In the search bar, type Santa Monica Trails owner:Esri_Tutorials.

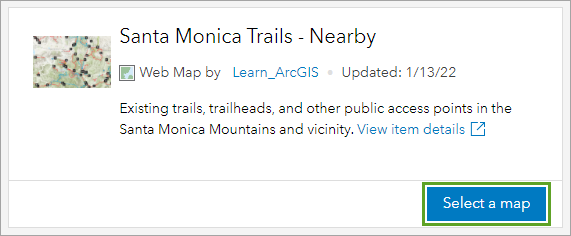
The list of maps is filtered to show a single result: Santa Monica Trails, owned by Esri_Tutorials.
- For Santa Monica Trails, click Select map.
The app preview updates to show the trails map along with introduction text explaining how to use the app.
Configure the capabilities
An app doesn't just display a map. It also contains capabilities that change how users interact with and gain meaning from the app. The main capabilities you want your app to have are the ability to search for nearby trails, the ability to view elevation profiles of the trails, and the ability to show directions to trails.
First, you'll review the information provided in the template that helps users understand the map and how to use the app features.
- In the configuration pane, click Next.
The About pane appears in the configuration pane.
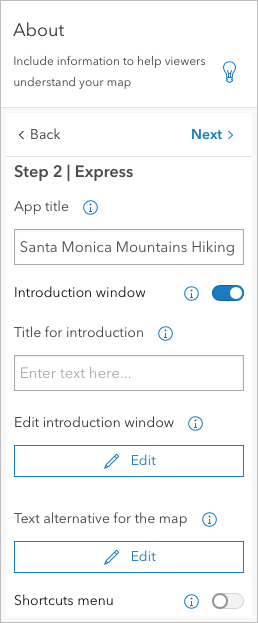
The About pane includes tools to configure information to help viewers understand the map. The default introduction describes various search methods to find locations on the map, so you won't make any changes.
Next you'll configure the search settings.
- Click Next.
The Nearby pane appears. You'll choose the layers that will be included in the search results. You want users to be able to search for both trailheads and trails.
- For Layers to include in results, check Trailheads/Inicios de senderos and Trails/Sendero.
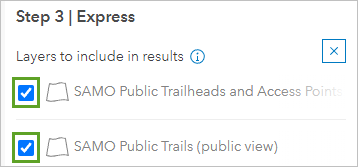
The map creator, knowing the goal of the app, included both English and Spanish names for the layers.
- For Search method, click Search radius.
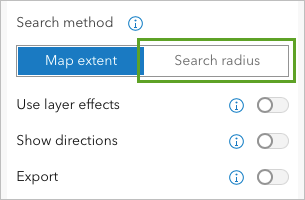
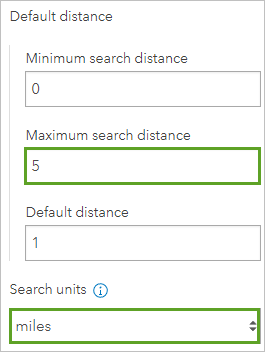
The default search distance is 2 kilometers, which isn't very big considering the recreation area has an area of 638 square kilometers (or about 246 square miles). You'll increase the default search radius and the maximum search distance and also change the unit of measurement to miles.
- For Search units, choose miles. For Maximum search distance, type 10 and for Default distance, type 5.
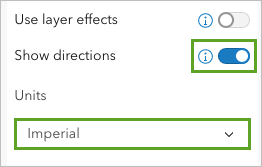
Next, you'll enable directions and set the units of measure.
- At the bottom of the Nearby pane, turn on Show directions. For Units, choose Imperial.
You've configured the search capability and enabled directions. Next, you'll configure an elevation profile capability that allows visitors to see trail elevation before they choose which trail to hike. The elevation profile is not included in the list of essential settings in the Express panel, so you'll search for it.
- Click Search settings.

- In the Search settings pane, type Elevation and click Add elevation profile link to popup.
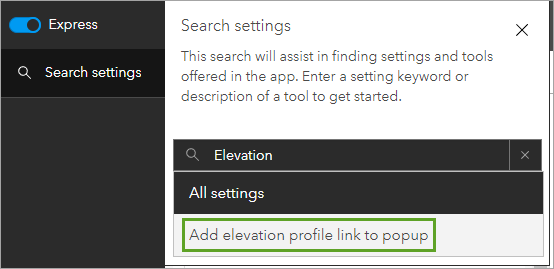
Because this setting isn't shown in express mode, you're prompted to turn off express mode before continuing.
- In the Turn off express mode window, click Continue.
The Nearby pane now includes all settings for search results.
- Under Add-on to results, turn on Add elevation profile link to popup. For Layers to include directions link in the results, check Trailheads/Inicios de senderos.
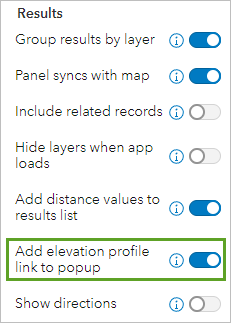
Now, elevation profiles will be available in the trails layer search results.
You'll add two final changes to your app. You'll add a button to show the map layers and their legends as well as a button that allows users to switch the basemap to show satellite imagery of the area. These options make the map more useful.
- In the configuration pane, click Interactivity.
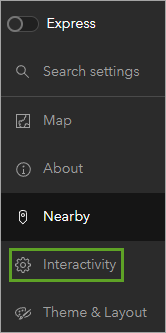
- In the Interactivity pane, click Modify.
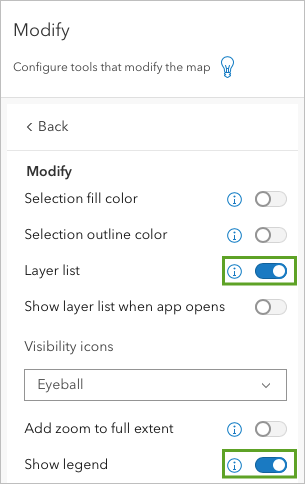
- Turn on Layer list. When more options become available, turn on Show legend.
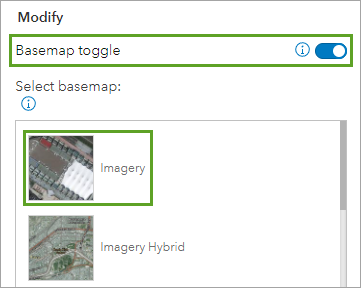
- Turn on Basemap toggle. For Select basemap, click Imagery.
In the preview pane, at the bottom of the map, the Toggle basemap and Open layer list buttons appear.
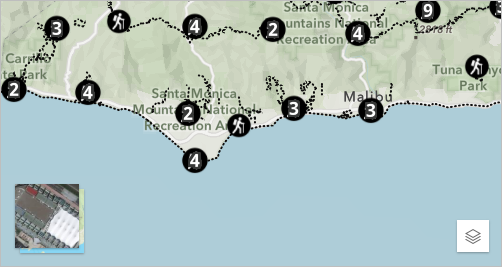
Your web app is finished. It has all the features you wanted to help visitors plan their hikes.
Publish the app
You can now publish the app and share it so everyone can view it.
- Click Publish.

- In the Publish window, click Confirm.
A window appears, asking whether you want to authorize premium content. The Santa Monica Mountains Hiking Trails layer is a premium service due to its routing capabilities used to provide directions in the app.
If you do not authorize premium content, users who do not have an ArcGIS account may not be able to see the trails layer when they use your app. If you do authorize premium content, your app will consume credits in your organization every time the app is viewed. You shouldn't authorize premium content unless you're certain your organization can sustain the cost.
In this scenario, you're an official working for a government agency, so you would want to authorize premium content so all users can view the app's content. However, for the purposes of this tutorial, you'll leave premium content unauthorized to avoid unnecessarily spending credits.
- In the Authorize premium content window, click Continue without authorizing.
Your app is published. The Share window appears with options to share your app. Currently, the app isn't shared. You'll share it with the public so everyone can see it.
Note:
Because you chose not to authorize premium content for the purposes of this tutorial, users who do not have an ArcGIS account may not be able to see the trails layer in the app.
- Click Change share settings.
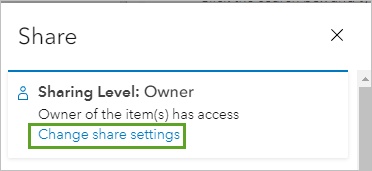
- In the Share window, choose Everyone. Click Save.
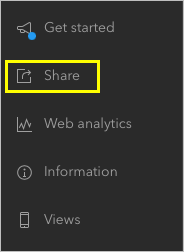
- In the configuration pane,
click Share.
- In the Share window, click Launch.
Your web app is finished and appears in a new browser tab. Anyone with the URL of the app will be able to access it.
- Test the search options and review the information provided in the results for each layer, including finding directions and examining elevation profiles for trails. Use the Toggle basemap and Open layer list buttons to change the basemap and explore each layer's legend.
To search a specific address, try searching for trailheads within 3 miles of 4515 Park Entrada, Calabasas, CA 91302. You can then click the Directions button on the Parkway Calabasas trailhead card to find the route there.
You've successfully created and published a web app using Instant Apps.
Implement language switching
You've created a web app that recreation area visitors can use to find trailheads and trails and access directions. Next, you'll enhance the app so it serves both English and Spanish users. There are three kinds of text in the app to be translated and displayed in each language; you'll address each.
Show Esri-defined text in Spanish
Esri-defined text is typically exposed through tools and tooltips. It's stored in the application. To show this text in Spanish in your app, you'll enable the language switcher feature.
- Return to the ArcGIS Instant Apps Configuration browser tab. If necessary, close the Share window.
- Click Language Switcher.
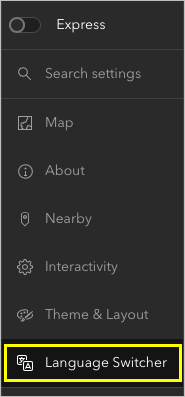
The Language Switcher pane appears.
- In the Language Switcher pane, turn on Language switcher. When the option appears, turn on Open language switcher at start.
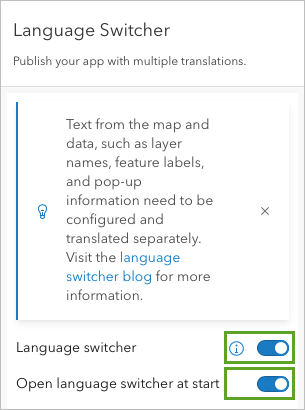
Next you'll select the language.
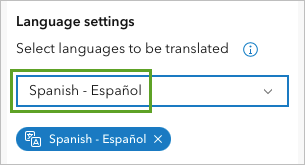
- Under Language settings, for Select languages to be translated, choose Spanish - Español.
Note:
You can select multiple languages.
- Under Map options, for Map widget icon, choose language-translate.
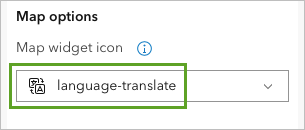
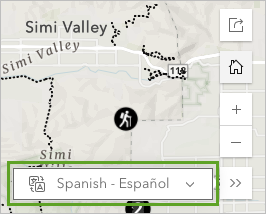
The button appears on the map in the preview pane.
- In the app preview, choose Spanish - Español.
- In the app preview, search for Pencheta Trl, Agoura Hills, California, 91301 and examine the results.
The search results that were titled Results in English are now titled Resultados in Spanish. The blue bar with the text Clear search location now reads Borrar ubicación buscada. You'll also find Spanish terms in the elevation profiles.
All of this text is Esri-defined text, text that's part of the Instant Apps template. With Spanish - Español set in the language switcher, the app displays the same translated text it would as when a device user has their browser or ArcGIS Online profile set to Spanish - Español. Esri-defined text terms in Spanish and dozens of other languages are delivered as part of ArcGIS Online.
- In the preview pane, click the Abbrir ventana de introducción button.
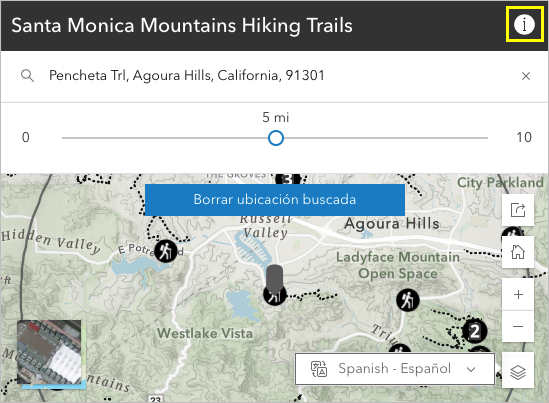
The introduction text, which explains how to use the search options, is still in English.
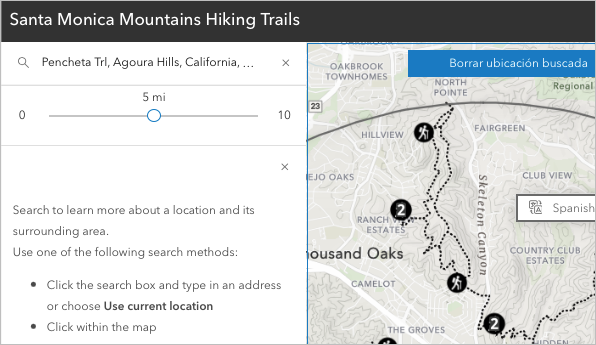
This is app text, text provided by default in Instant Apps or authored by the app creator. Next, you'll translate the app text so it's also available in Spanish.
Show app text in Spanish
You'll provide Spanish text for app text using Translation assistant (Beta).
- In the Language Switcher pane, under Language settings, for Translated text, click Translation configuration.
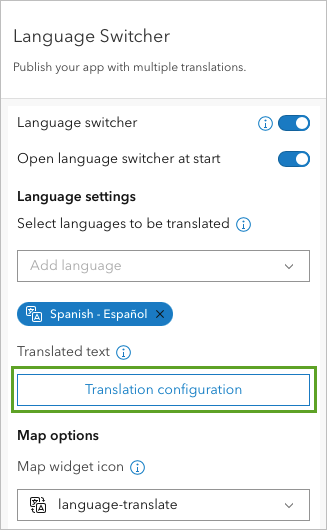
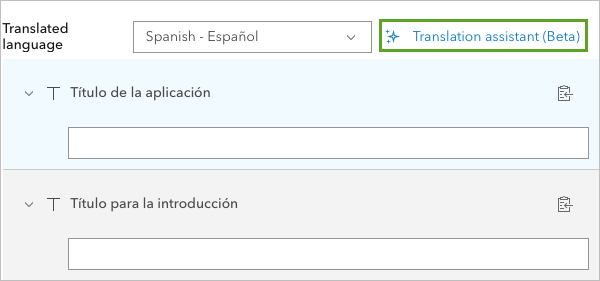
The Translation window appears with the English app text on the left and fields for the corresponding Spanish text on the right. App text fields listed include App title, Title for introduction, and Text alternative for the map.
There are two ways to populate the translated text fields. If you know or have access to the translated terms, you can input them one by one or all at once via a spreadsheet. If you do not know or have access to the translated terms, you can use Translation assistant (Beta) to automatically translate the text and populate the fields.
In this tutorial, you'll use Translation assistant (Beta), which uses machine translation.
Note:
Beta components may have incomplete functionality or documentation and may undergo some minor, unannounced changes. Learn more in this FAQ.
Machine translation is not intended to replace human translators and a review of the translations by a knowledgeable language user is strongly encouraged.
To learn more about adding your own translations directly or via a spreadsheet, see ArcGIS Instant Apps: Create multilingual apps with the new language switcher. To learn more about the Translation assistant (Beta) feature, see Generate translations in your Instant Apps using the Translation Assistant (beta).
- On the Spanish - Español side of the Translation window, click Translation assistant (Beta).
- In the Translation assistant (Beta) window, read the message and click Continue.
- For Select languages to translate, check Spanish - Español. Click Translate.
After a few minutes, the Spanish fields are populated.
- Review the translated text. When satisfied, click Close.
- In the app preview pane, review the text.
The introduction text now appears in Spanish. Other app text, including the app title, appears in Spanish too. You may want to invite a knowledgeable Spanish speaker to review the terms provided in Spanish and make any needed updates.
Show map and data text in Spanish
So far you have used the language switcher functionality provided in the Nearby app template to make two kinds of text, Esri-defined text and app text, display in Spanish. The third kind of text, map and data text, by contrast, is handled in the source map and its data layers.
The source map for the app is configured to show trailhead and trail attribute data in either English or Spanish. To learn how this is done, you'll first look at the result cards in the app preview. Then, you'll look at the layers' attributes and the use of the ArcGIS expression language Arcade in the source map, which make these translations possible.
- In the preview pane, with the language switcher set to Spanish - Español, clear the existing search and search for trailheads and trails within 1 mile of Old Oak Rd, Agoura Hills, CA, 91301.
The search results are returned.
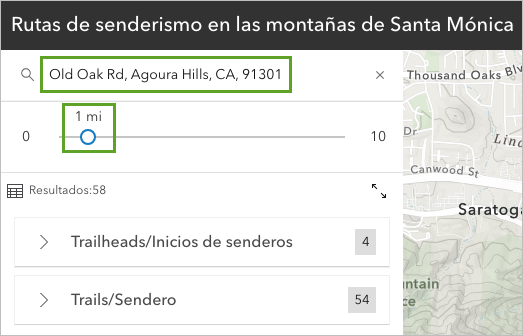
- Expand the Trailheads/Inicios de senderos results and review the text on the cards.
Each card lists the amenities at the trailhead in Spanish.
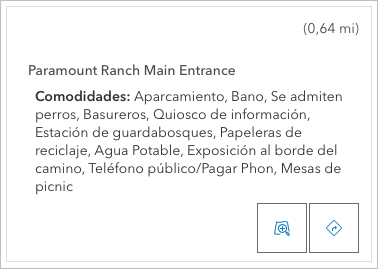
- Change the language switcher to English and review the cards.
The amenities are listed in English.
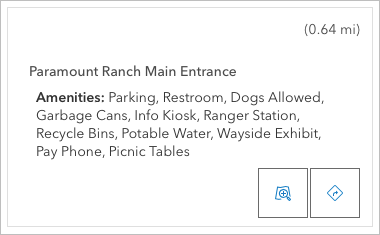
You'll look at another example of translated map and data text, then see how the card text is assembled and displayed.
- Collapse the Trailheads/Inicios de senderos results and expand the Trails/Sendero results. Review the trail cards in English.
Each trail card includes a sentence noting the trail length and the type of use it supports.
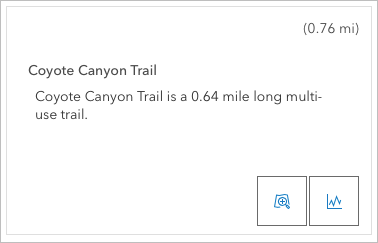
- Review the trail cards in Spanish.
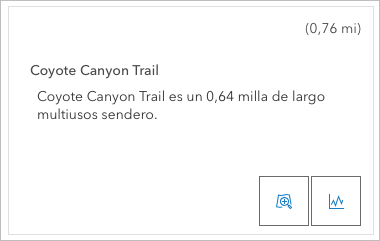
Next, you'll look at the trail layer attributes to learn how the English and Spanish cards are created.
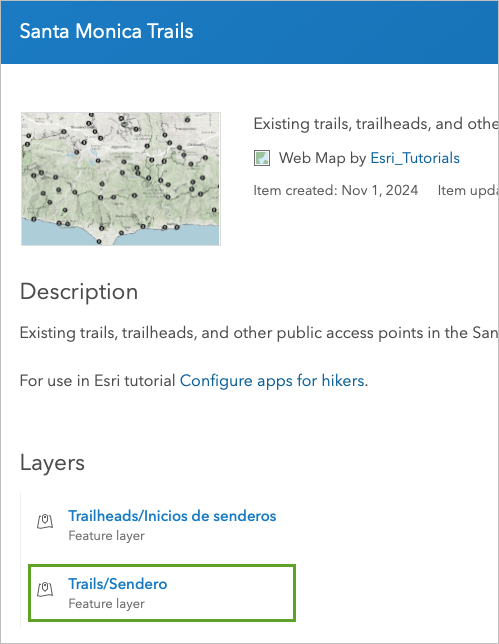
- In a new browser tab, open the Santa Monica Trails map item page.
The page includes a summary, description, and a list of layers that make up the map.
- Under Layers, click Trails/Sendero.
The NPS Trails (EN-ES) layer item page appears in a new tab.
- On the ribbon, click Data.

- Scroll right to review the field names and values.
The attribute table for the more than 2,200 trail segments in the layer appears. The field names include Name1, Miles, Use, Type, Use_es, and Type_es. Use has a corresponding Spanish field, Use-es, populated with values in Spanish. Type has a corresponding Type_es field. This table is the source of the values found in the cards in the app.
The trail cards include a complete sentence, in English or Spanish, that includes the trail name, length, and use. That sentence is configured in the source map. Arcade is used to determine the user's language preference, and to assemble the sentence from the table values.
Note:
This tutorial will not cover the details of writing Arcade or formatting text.
- To learn more about Arcade and its use in pop-ups, see the blog post Pop-ups: Arcade essentials and the Configure pop-ups documentation.
- To learn more about using Arcade for translations in Instant Apps, see the blog post Using Arcade to Translate Pop-Ups for Use in the ArcGIS Instant Apps
To view the Arcade expressions in the source map that determine the language preference and assemble the English or Spanish sentence, do the following:
- Open the Santa Monica Trails map in Map Viewer.
- On the Contents toolbar, click Layers.
- In the Layers pane, click the Trails/Sendero layer to select it.
- On the Settings toolbar, click Pop-ups.
- In the Pop-ups pane, click Attribute expressions.
- Click each expression to view the Arcade code.
To view how the sentence created is formatted for display in the source map, do the following:
- Return to the Pop-ups pane.
- Click Text, then click Edit text.
- Close the NPS Trails (EN-ES) item page and return to the Santa Monica Trails map item page.
- Under layers, click Trailheads/Inicios de senderos.
The SAMO Public Trailheads and Access Points (public view) layer item page appears in a new tab.
- On the ribbon, click Data.
- Review the data provided for the 261 trailheads and access points.
Note:
Only the 176 trailheads are included in the map and the app.
Unlike the Trails/Sendero table, the Trailheads/Inicios de senderos table does not include corresponding fields for English and Spanish terms. It uses the values Yes or No and Y and N to indicate whether a trailhead provides amenities such as parking, water, and restrooms.
The trailhead cards include a list, in English or Spanish, that includes all the amenities available. That list is configured in the source map. Arcade is used to determine the user's language preference and to assemble the list from the values.
Note:
To view the Arcade expressions that assemble the list, do the following:
- Open the Santa Monica Trails map.
- On the Contents toolbar, open the Layers pane.
- Select the Trailheads/Inicios de senderos layer.
- On the Settings toolbar, click Pop-ups.
- In the Pop-ups pane, click Expressions.
- Click each expression to view the Arcade code.
To view how the list is formatted for display in the source map, do the following:
- Return to the Pop-ups pane.
- For Text, click edit.
In this tutorial, you used a preconfigured web map as the source for an app that allows users to search for and evaluate hiking options in the Santa Monica Mountains. You added features to explore trail elevation profiles and find directions to trailheads. You further enhanced your web app by adding the option to switch the language from English to Spanish. You enabled translation of Esri-defined text and app text by configuring the language switcher feature. You also explored options to translate map and data text, in this case attribute values, by configuring data in the attribute table and using Arcade. Your final app will be valuable to individuals who use both English and Spanish.
You can find more tutorials in the tutorial gallery.
