Explore study area and data
To get started, you'll download an ArcGIS Pro project that contains all the data you'll need for this workflow. You'll explore the mountain lion habitat areas, understand the proposed analysis strategy, and review the data.
Explore the mountain lion habitat areas
First, you'll download a project and open it in ArcGIS Pro. Then you'll explore the mountain lion habitat areas.
- Download the Mountain_Lion_Corridors compressed folder.
Note:
Depending on your web browser, you may be prompted to choose the file's location before you begin the download. Most browsers download to your computer's Downloads folder by default. - Locate the downloaded file on your computer.
- Right-click the file and extract it to a location you can easily find, such as your Documents folder.
Next, you'll open the project in ArcGIS Pro.
- Start ArcGIS Pro. If prompted, sign in using your licensed ArcGIS organizational account.
Note:
If you don't have access to ArcGIS Pro or an ArcGIS organizational account, see options for software access.
- In ArcGIS Pro, under Open, click Open another project.
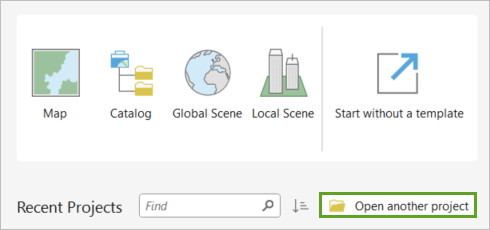
Note:
If this is your first time using ArcGIS Pro, click Open an existing project.
- In the Open Project window, browse to the project folder you extracted, click Mountain_Lion_Corridors.aprx to select it, and click OK.
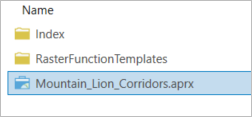
The project opens.
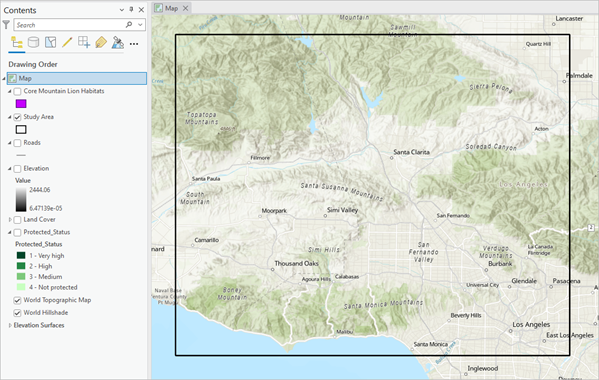
On the map, two layers are currently turned on. The Study Area layer shows the area of interest for this workflow, represented as a rectangular polygon (in black). The World Topographic basemap provides general geographic context. You can see that the study area is located in the greater Los Angeles area, in the United States. It includes the several communities, such as San Fernando Valley, Burbank, and Santa Clara, as well as several mountain ranges spread out throughout the area. Next, you will explore the mountain lion habitat areas.
- In the Contents pane, for Core Mountain Lion Habitats, click the check box to turn on the layer.
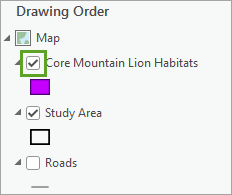
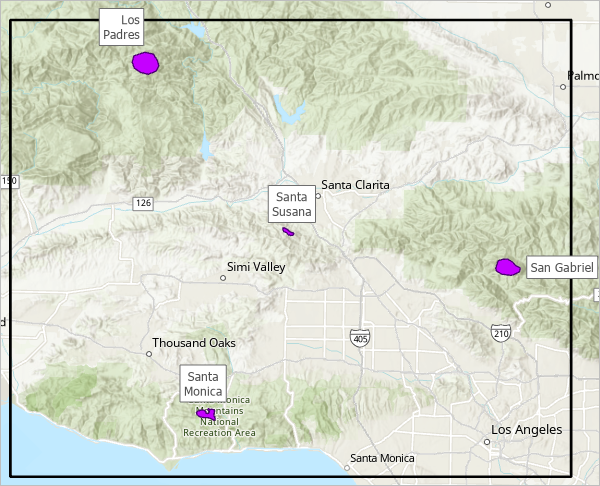
The study area contains four core mountain lion habitats, represented in purple. These are the habitats that you want to connect by proposing locations for wildlife corridors. Note that mountain lions can be present in a larger zone around each core habitat, but the purple polygons show the areas of highest mountain lion concentration.
Note:
In this tutorial, you'll focus on this specific study area to limit the time it takes for the analysis tools to run. However, there are other mountain lion habitat areas in Northern California, and the same workflow could be applied to a larger study area to connect more of these habitats with each other.
The three habitats identified as Los Padres, Santa Monica, and San Gabriel represent true core mountain lion habitat. They are set in spacious, mountainous natural areas and contain significant mountain lion populations. The Santa Susana location, which was established by the National Park Service and is located just outside of Pico Canyon Park, doesn't represent a significant core area, but it serves as an important geographic gateway for linking the other three geographically disconnected habitat patches to each other.
Instead of managing the mountain lions present in the four habitats as four separate populations, you want to manage them as a single metapopulation—a population of populations. Ensuring that this overall population of mountain lions can move around from one core habitat patch to another will help it remain healthy and genetically diverse. And if the mountain lions go locally extinct in one of the patches, the lions from other patches can recolonize it. This is why it is essential to establish wildlife corridors to connect these existing habitat patches.
You'll turn the labels off as you won't need them any longer.
- In the Contents pane, right-click the Core Mountain Lion Habitats layer and choose Label.
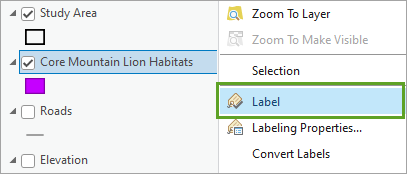
On the map, the labels disappear.
Understand the strategy and identify relevant criteria
You'll now learn about the analysis strategy that will allow you to identify the best corridors. Then, you'll identify relevant criteria for the analysis.
The best corridors are the ones that the mountain lions will find the least stressful and dangerous as they move through the landscape; the ones they will feel the most comfortable with. For instance, passing through an urbanized area would be very high stress and dangerous. Instead, passing through a protected forest that is devoid of human beings and cars would be low stress and low danger. You'll identify the best corridors by performing a least-cost analysis, in which you'll determine which paths through the landscape have the lowest cost for the mountain lions, in terms of stress and danger.
You will proceed in two overall steps:
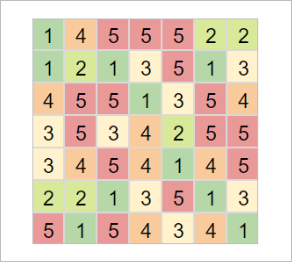
Step 1: Create a cost surface for the entire study area. This will be a raster (that is, a grid of cells or pixels) where a cost value has been assigned to every cell. Low numeric values will correspond to low cost, and high numeric values to high cost. The following illustration shows a cost surface with values varying from 1 to 5.
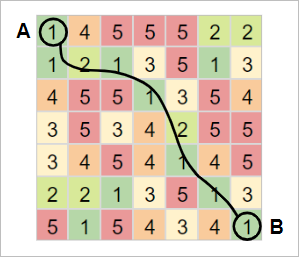
Step 2: Determine the optimal paths connecting the core habitats patches over the cost surface. A path accumulates cost values as it goes from cell to cell on the cost surface raster. The optimal paths are the ones that have the lowest accumulated cost. On the following illustration, the line shows the least cost path to go from point A to point B.
There are five steps to create a cost surface:
- Identifying several cost criteria that make sense for the topic (here mountain lions moving through the landscape).
- Identifying datasets to represent these criteria.
- If necessary, preprocessing the datasets, so that they can fully represent the criteria.
- Transforming the criteria datasets to a common scale (from 1 to 10).
- Weighing and combining the criteria datasets into a single cost surface raster.
You'll decide on several cost criteria that make sense for mountain lions. As a reminder, you want to represent the cost for mountain lions as they move through the landscape, in terms of potential danger and stress. This would also include the ability to find prey along the way and not go hungry. You'll use the following criteria:
- Terrain ruggedness—Rugged terrain serves multiple purposes allowing the mountain lions to hide within the terrain and helping them stalk their prey. It also discourages human presence and human development. The more ruggedness, the lower the cost.
- Dense vegetation land cover—The presence of trees and bushes provides security when moving and cover for stalking prey. The mountain lions' preferred prey also tends to live in this type of land cover, lowering the chances for the lions to go hungry. The more dense vegetation in an area, the lower the cost.
- Protected areas—Although the mountain lions themselves don't know whether an area is protected, such areas offer the natural environment that the lions prefer, with minimal human presence and no urban development. They are also a guarantee that the natural environment will remain intact in the future. The more protected an area, the lower the cost.
- Distance to roads—Not only are roads dangerous for mountain lions, but they also serve as a proxy for human development. The further distance from roads, the lower the cost.
Note:
You can learn more about cost surface and cost analysis in the articles Distance Analysis Simplified and Determining how distance is encountered by the traveler.
You can learn more about mountain lions on the Cougar Overview and Cougar Family Life pages, created by the Cougar Fund.
Review data for the cost surface
To represent each cost criterion in your analysis, you must have an appropriate dataset. You'll now review the four datasets selected. The first one is the Elevation layer that you'll use to represent the terrain ruggedness criterion.
- In the Contents pane, turn on the Elevation layer.
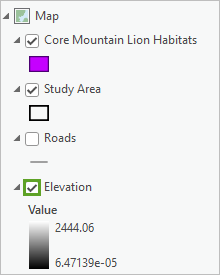
The Elevation layer appears.
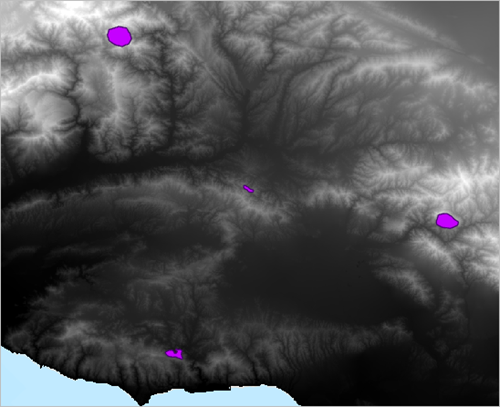
This is a raster layer where each cell represents elevation above sea level. Cells with lower elevation appear in dark tones and cells with higher elevation appear in lighter tones. You can see mountainous elevated areas in white and light gray and flatter low-lying valleys in black and dark gray.
You'll zoom in to better visualize how the raster layer is made of cells.
- On the map, choose an area that has a lot of elevation variation and zoom into it until you can see the individual cells that compose the raster.

You'll display the elevation value for some of these cells.
- On the ribbon, on the Map tab, in the Navigate group, click the Explore down arrow, and choose Selected in Contents.
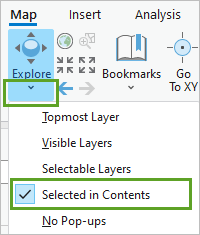
This option ensures that you see information about the layer that is currently selected.
- In the Contents pane, click the Elevation layer to select it.
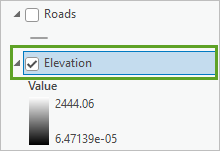
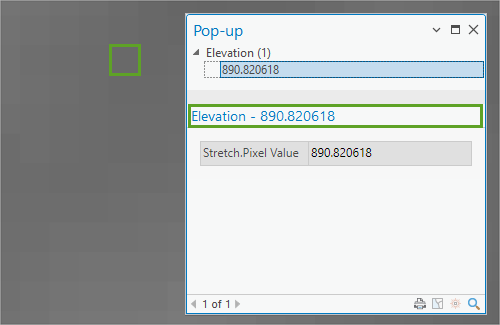
- Click one of the cells to display the informational pop-up and see its elevation value (in meters).
In the following example image, the cell represents an elevation of about 890.8 meters.
- Click more cells to see how their elevation value varies.
- Close the informational pop-up.
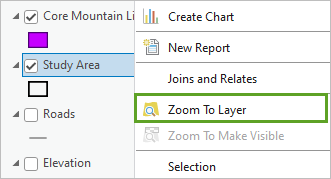
- In the Contents pane, right-click Study Area and choose Zoom To Layer.
As such, the layer represents elevation and not ruggedness. Later in the workflow, you need to preprocess it to derive a new layer that can effectively represent the ruggedness criterion. You'll then assign the lowest cost to the highest ruggedness values.
Next, you'll review the dataset that you'll use for the second criterion, dense vegetation land cover.
- In the Contents pane, turn off the Elevation layer. Turn on the Land Cover layer.
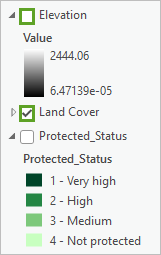
The Land Cover layer appears.
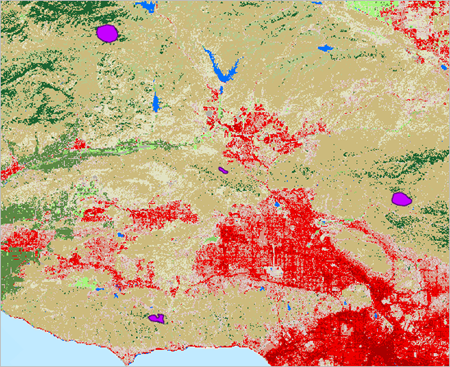
Land Cover is another raster layer, although it doesn't have a simple black-to-white color gradient like the Elevation layer. To understand what this layer shows, you'll investigate its symbology.
- In the Contents pane, click the arrow next to the Land Cover layer to expand it and view its symbology.
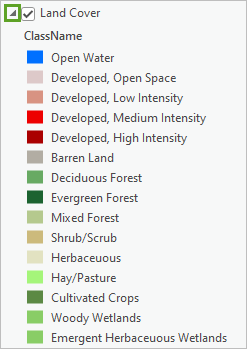
This layer represents different land cover types, like Evergreen Forest or Cultivated Crops. Each of these land types is symbolized with a color: the red colors are developed urban areas, while the green colors correspond to forests or grasslands. The brown colors are shrubland or herbaceous areas. This layer doesn't need to be preprocessed and can be used directly in the least-cost analysis, where you'll assign the lowest cost to dense vegetation cover types, such as forest and shrub.
Next, you'll review the layer you'll use for the third criterion: protected areas.
- In the Contents pane, click the arrow next to the Land Cover layer to collapse the symbology.
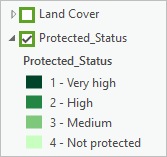
- Turn off the Land Cover layer and turn on the Protected_Status layer.
The Protected_Status layer appears on the map.
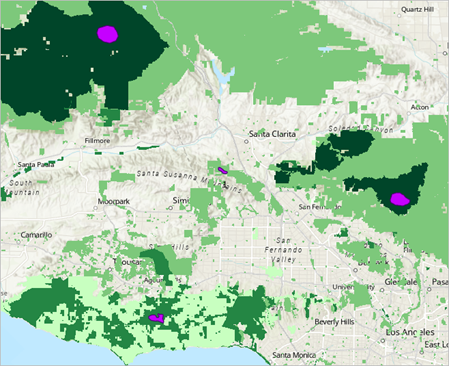
This raster layer indicates the level of protection for all lands contained in the Protected Areas Database of the United States (PAD-US): from highly protected in dark green to not protected in light green. An example of highly protected land would be a national forest. An example of not protected land would be a recreation area. Areas without a color on the map are not tracked in PAD-US, and usually correspond to urban, agriculture, or other forms of privately exploited areas—they will usually be the least favorable to mountain lions. This layer doesn't need to be preprocessed and can be used directly in the least-cost analysis, where you'll assign the lowest cost to the highest levels of protection.
Last, you'll review the dataset related to the fourth criterion: distance from roads.
- In the Contents pane, turn off the Protected_Status layer and turn on the Roads layer.
On the map, the Roads layer appears.
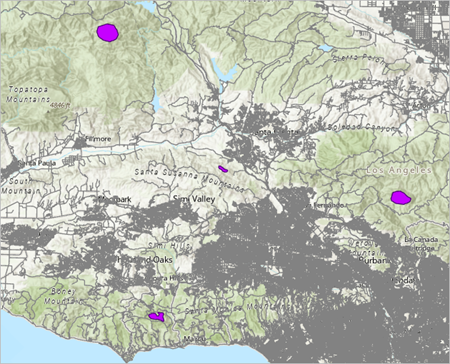
The Roads layer is not a raster layer; it's a vector layer that represents features as lines. (Other types of vector layers can contain points or polygons.) Each line represents a road, ranging from small roads to major highways, although you will not distinguish between these different types for most of the workflow. To use this layer in the least-cost analysis, you will need to preprocess it and derive from it a raster representing the distance from any cell to the nearest roads. You'll then assign the lowest cost to the highest distance-to-road cell values.
- In the Contents pane, turn off the Roads layer.
You are now familiar with the four datasets you'll use to represent the criteria in your least-cost analysis.
Create a hillshade layer
Before starting to prepare your data for analysis, you will create a hillshade layer to add more context to the map and help you make sense of the landscape. A hillshade layer highlights the landscape's relief with shade and light, for a rendering familiar to the human eye. You can derive it from the Elevation layer.
- On the ribbon, on the Imagery tab, in the Analysis group, click Raster Functions.

- In the Raster Functions pane, in the search box, type Hillshade and press Enter. Under Surface, click the Hillshade button.
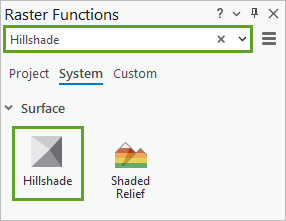
The Hillshade raster function appears.
- In the Hillshade Properties parameters, for Raster, choose Elevation.
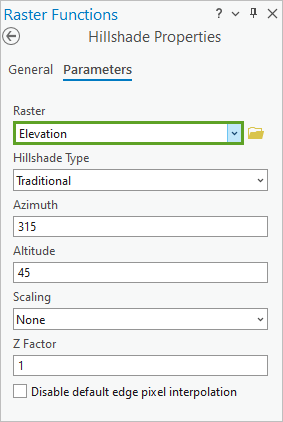
- Click Create New Layer.
A new Hillshade_Elevation layer appears on the map.
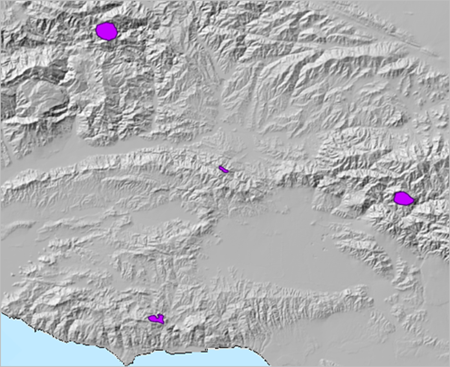
The layer makes it clear to the human eye where mountain ranges and valleys are located throughout the study area. While you won't use this layer in the analysis itself, you will use it as a helpful background to visualize the various layers you'll generate throughout the analysis.
You will rename the Hillshade_Elevation layer.
- In the Contents pane, click Hillshade_Elevation to select it, and click it again to edit it. Type Hillshade, and press Enter.
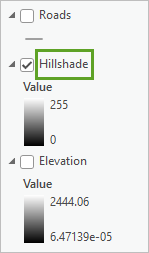
Since this layer will be used mostly as a background, you will move it below the data layers in the Contents pane.
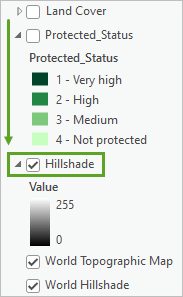
- In the Contents pane, drag the Hillshade layer down and drop it under the Protected_Status layer.
You'll save your project.
- On the Quick Access Toolbar, click Save.

So far in this workflow, you downloaded the project and opened it. You reviewed mountain lion habitats in the area of study, learned the principles of least-cost analysis, and identified four criteria for your analysis. Finally, you explored the four datasets that will represent the criteria and generated a hillshade layer.
Prepare data for analysis
You will now prepare your data for analysis. Two of the layers, Elevation and Roads, must be preprocessed. The other two can be used directly.
Whether it is to prepare the data or to perform the analysis itself, you must run several geoprocessing tools. You can run each of these tools individually; however, in this tutorial, you'll learn how to gather them all into a geoprocessing model. A model is a series of geoprocessing tools that run in an order you specify. You can run a model as many times as you want, use it to automate a workflow, or share it with colleagues. It also allows you to fine-tune an analysis quickly, as you can modify any of the tools' parameters and re-run the whole analysis in one go.
Set the environment parameters
Before you start building your model, it is recommended that you set the geoprocessing environment parameters. These parameters apply to all the geoprocessing tools you run and are helpful for limiting the extent of your processing or determining how data will be saved.
First, you will set an option so that output layers created by geoprocessing tools will overwrite any existing layers with the same name. This option is useful when you intend to repeat an analysis workflow multiple times but don't want to clutter your project with extra layers. The option may be enabled by default, but it's good to confirm that it's active before you begin the analysis.
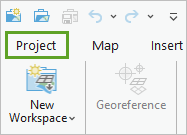
- On the ribbon, click the Project tab.
- On the vertical taskbar, click Options.
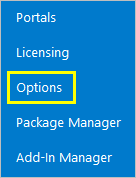
The Options window appears.
- In the Options window, click the Geoprocessing tab.
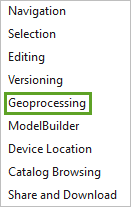
- Confirm that Allow geoprocessing tools to overwrite existing datasets is checked.

- In the Options window, click the ModelBuilder tab.
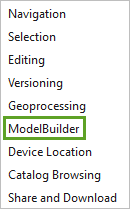
- Turn off the Add output to model group layer option.

These options will ensure that you can repeat your analysis smoothly.
- Click OK.
Settings changed through the Options window, as you just did, will be saved across all your projects in ArcGIS Pro. The rest of the settings you'll choose are specific to this project, so you must choose them within the project itself.
- On the top of the vertical taskbar, click the back arrow to return to your project.

- On the ribbon, on the Analysis tab, in the Geoprocessing group, click Environments.
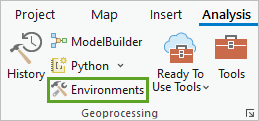
The Environments window appears. First, you will ensure that the default workspace (the location where new layers created by geoprocessing tools are saved) is the geodatabase connected to your project.
- In the Environments window, under Workspace, confirm that both Current Workspace and Scratch Workspace are set to Mountain_Lion_Corridors.gdb.

Both workspaces indicate the location where data is saved, but the scratch workspace is intended for data you don't want to keep. For this exercise, you will keep the same location for both.
- Under Output Coordinate, for Output Coordinate System, choose Elevation.
The coordinate system automatically changes to the coordinate system of the Elevation layer, NAD 1983 UTM Zone 11N. By choosing a default coordinate system, you ensure that all the output layers you create will use the same coordinate system.

- Under Processing Extent, for Extent, expand Extent of a layer and choose Study Area.
This parameter guarantees that all output layers will automatically be clipped to your study area. By reducing the size of your output, you lower the processing time and ensure that your results cover only the area you are interested in.
Extent updates to the coordinates of the Study Area's corners.
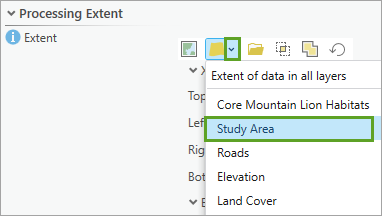
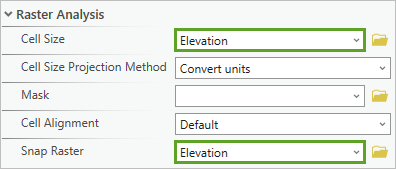
- Under Raster Analysis, for Cell Size, choose Same as layer Elevation.
The Elevation layer and other raster layers in this project have a resolution of 30 meters. This means that each cell represents an area of 30 square meters in the real world. The Cell Size parameter ensures that all output raster layers generated during the analysis will have the same cell size.
Tip:
To check the resolution of a raster layer, double-click its name in the Contents pane to open its Layer Properties window. Click Source and expand Raster Information. The Cell Size parameters give the resolution of the layer.
- Under Raster Analysis, for Snap Raster, choose Elevation.
The Snap Raster parameter causes all output raster layers to match the cell alignment of the chosen layer, meaning that the cells will overlap exactly.
- Click OK.
Create ruggedness from elevation
You will now create a new geoprocessing model and use it to generate the ruggedness layer from the elevation layer.
- On the ribbon, on the Analysis tab, in the Geoprocessing group, click ModelBuilder.
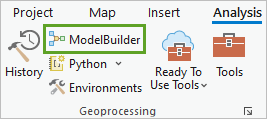
A new, blank model appears. First, you'll add the Elevation layer to it. The layer is listed in the map's Contents pane, so you can drag it from there.
- From the Contents pane, drag the Elevation layer to the blank area in ModelBuilder.
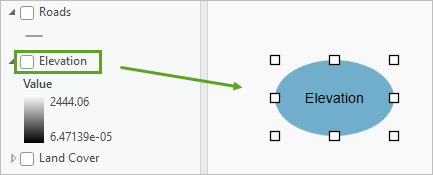
The layer is displayed in the model as a blue oval with the layer's name. Blue ovals are input data variables: they represent the initial data that you will process with a geoprocessing tool.
Next, you'll add the geoprocessing tool. For this workflow, ruggedness will be defined by large and dramatic shifts in elevation. You'll use the Focal Statistics geoprocessing tool to generate a layer that shows the amplitude in elevation variation. For each cell in the Elevation raster, the tool will look at the cells surrounding it (also known as its neighborhood) and compute the range between the lowest and highest cell values. For instance, if the lowest and highest values in a cell's neighborhood are 430 and 450 meters, the range will be 20 meters, and that will be the value assigned to that cell. Higher range values correspond to more pronounced ruggedness. First, you'll locate the Focal Statistics tool.
- On the ribbon, on the ModelBuilder tab, in the Insert group, click the Tools button.
The Geoprocessing pane appears.
- In the search box, type Focal Statistics.
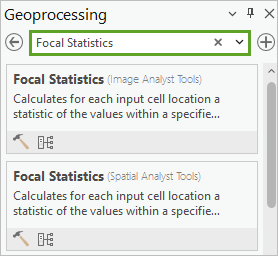
- In the search results, drag the Focal Statistics (Spatial Analyst Tools) tool into the model, and drop it to the right of the Elevation input data element.

The tool is currently depicted as a gray rectangle, connected to an output that is also gray. Both elements are grayed out because they are currently inactive. You must connect them to an input layer to make them active.
Note:
You can reposition any model elements in any way you like by dragging them. You can also resize them.
- Make sure that none of the elements are selected by clicking anywhere in the blank space in ModelBuilder.
- Draw an arrow by dragging from Elevation to Focal Statistics.
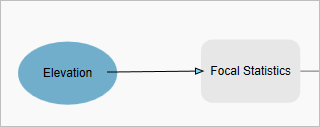
When you release the mouse button, the two model elements are connected and a list of connection options appears.
- Click Input raster.
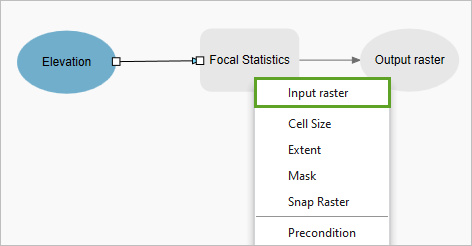
This means that the Elevation element will play the role of the input raster in relation to the tool. The tool becomes yellow and the output element becomes green, indicating that they are now active and the tool can be run.

Before you run it, you will set additional parameters to fine-tune your results.
- In the model, double-click the Focal Statistics tool to open its parameters.
You'll change the name of the output and choose the statistics type to compute the neighborhood range.
- For Output raster, change the raster name to Ruggedness. For Statistics type, choose Range.
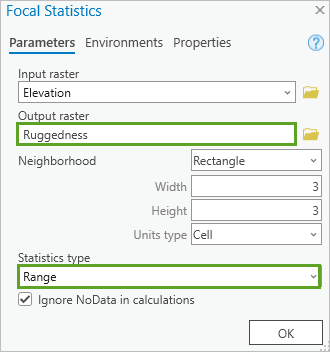
Note:
To learn more about any tool parameter, point to the parameter and then point to the information icon that appears next to it for a detailed explanation. You can also click the question mark button in the upper right corner of the tool to read more.
- Click OK.
The name of the output element changes to Ruggedness. Last, you will modify the output element, so that the output layer is added to the map when the tool runs.
- Right-click the Ruggedness model element and click Add To Display.
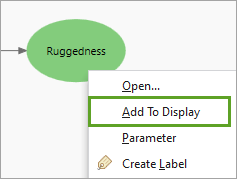
You'll name the model and save it.
- On the ribbon, on the ModelBuilder tab, in the Model group, click the Save down arrow, and choose Save As.
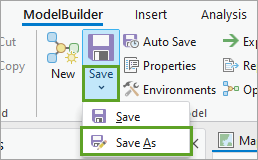
- In the Save Model As window, for Name type LeastCostAnalysis and click Save.
Note:
For now, the model contains only the elements to produce the Ruggedness layer. However, throughout this workflow, you will add more and more tools to the model until you have formed the complete least-cost analysis.
The model is saved. You will now run the model.
- On the ribbon, on the ModelBuilder tab, in the Run group, click Run.

The model runs. A window appears and informs you about the status of the process. After a few moments, the resulting Ruggedness layer is added to the Contents pane.
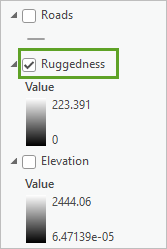
A gray drop shadow behind the Focal Statistics and Ruggedness elements also indicates that the tool has finished running.

- Close the process information window.
- Click the Map tab to make it active.
The Ruggedness layer displays on the map.
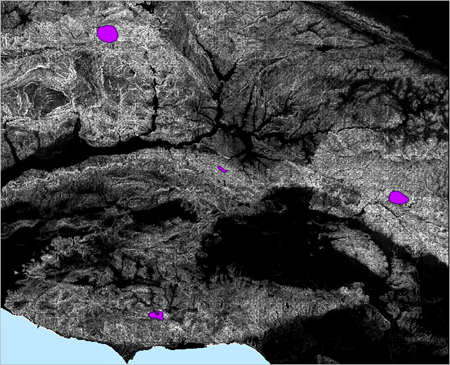
The Ruggedness layer depicts the ruggedness level in black to white tones. Darker cells have the least ruggedness, while lighter cells have the most.
Symbolize the ruggedness layer and review it
You'll change the layer's symbology to make the differences in ruggedness more apparent.
- In the Contents pane, click the symbol for the Ruggedness layer.
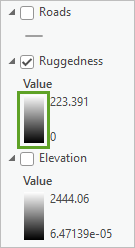
The Symbology pane appears for the Ruggedness layer.
- In the Symbology pane, under Primary symbology, for Color scheme, expand the drop-down menu and check the Show Names check box. Scroll down and choose Red-Yellow-Green (Continuous).
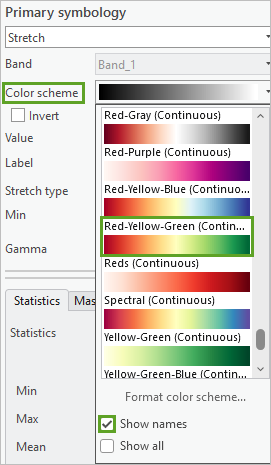
The map updates to the new symbology.
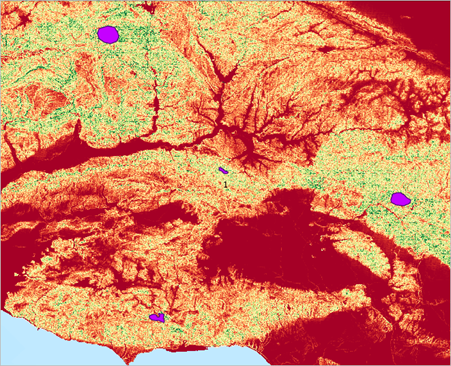
The green areas are the most rugged, and the red areas the least. To add more context, you'll make the Hillshade layer show through.
- In the Contents pane, verify that the Ruggedness and Hillshade layers are turned on and that Elevation, Land Cover and Protected_Status are turned off.
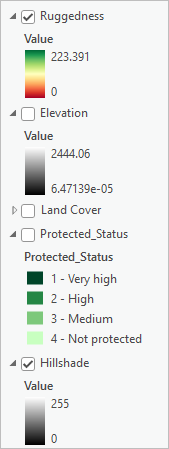
- In the Contents pane, click the Ruggedness layer to select it.
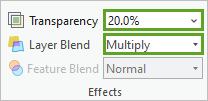
- On the ribbon, on the Raster Layer tab, in the Effects group, for Transparency, type 20%. For Layer Blend, choose Multiply.
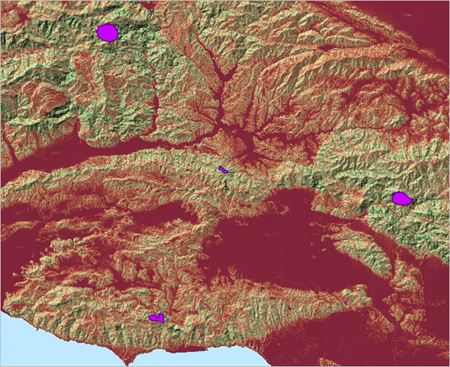
The map updates, showing the Ruggedness layer overlayed on the Hillshade layer.
Tip:
Blending two layers with Multiply generates a result with vibrant colors. Adding some transparency can soften the colors obtained to fine-tune the result.
- Examine the map.
Looking at the ruggedness in relation to the terrain relief, it's clear that the high, rocky mountain peaks tend to be more rugged, and the low-lying valleys tend to be flatter and smoother. More ruggedness signifies a lower cost for the mountain lions, in terms of stress and danger. Notice that the mountain lions core habitat patches are, unsurprisingly, located in highly rugged areas.
- Close the Symbology pane.
Create distance to roads
Starting from the Roads layer, you will now derive a distance-to-road raster layer. It will indicate each cell's distance to the nearest road.
- Click the LeastCostAnalysis tab to return to your model. From the Contents pane, drag the Roads layer into the model, below the Elevation layer.
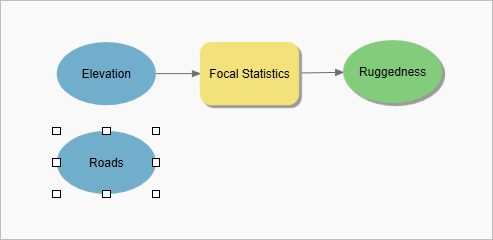
To calculate distance from roads, you'll use the Distance Accumulation tool, which will calculate the straight-line distance from each cell to the closest road.
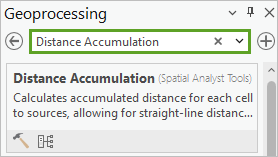
- On the Geoprocessing pane, search for Distance Accumulation.
Tip:
If you closed the Geoprocessing pane or can't find it, you can open it from the ModelBuilder tab on the ribbon by clicking the Tools button.
- From the search results, drag the Distance Accumulation tool into the model, next to the Roads input.
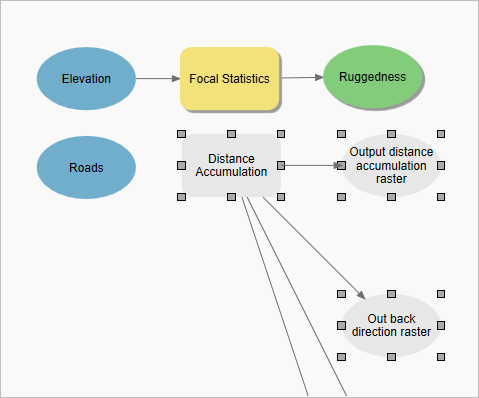
This tool has several outputs, but you are only interested in the distance accumulation raster, so you'll ignore the other output rasters.
- Draw an arrow from the Roads input to the Distance Accumulation tool to connect them. When you release the mouse button, choose Input raster or feature source data.
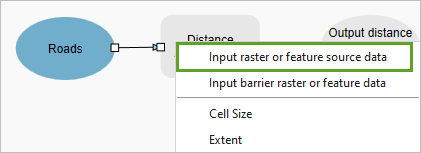
The tool and the Output Distance Accumulation Raster element become active, but the other output rasters do not. This is because these output rasters are optional and don't get created by default. You'll open the tool parameters to change the name of the distance accumulation output.
- Double-click the Distance Accumulation tool to open its parameters.
- For Output distance accumulation raster, change the output name to Distance_to_Roads.
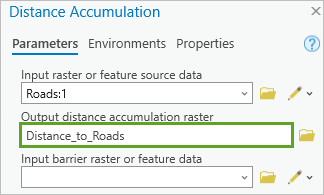
- Click OK.
- In the model, right-click the Distance_to_Roads output element and choose Add To Display.
You'll save the model.
- In the ribbon, on the ModelBuilder tab, in the Model group, click the Save button.

Tip:
By default, the model is stored in your project toolbox. If you accidentally close your model, you can open it again though the Catalog pane. To do so, on the ribbon, on the View tab, choose Catalog Pane. On the Catalog pane, expand Toolboxes, and expand Mountain_Lion_Corridors.tbx. Right-click the LeastCostAnalysis model and click Edit.
Next, you'll run the tool. However, you don't want to run the Focal Statistics tool again. You can run only part of a model by selecting the tool you want to run.
- In the model, right-click the Distance Accumulation tool and choose Run.
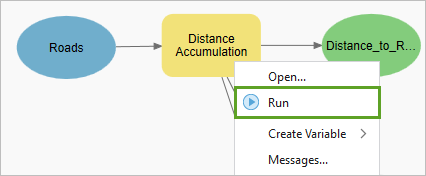
The tool runs. After a few moments, the resulting layer is added to the Contents pane.
- Close the processing window and click the Map tab to make it active.
You'll change the layer's symbology.
- In the Contents pane, click the symbol for the Distance_to_Roads layer to open the Symbology pane.
- In the Symbology pane, under Primary symbology, for Color scheme, choose Red-Yellow-Green (Continuous).
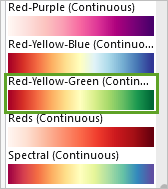
The map updates to the new symbology. You'll now let the Hillshade layer show through.
- In the Contents pane, turn off the Ruggedness layer and verify that the Distance_to_Roads and Hillshade layers are turned on.
- In the Contents pane, click the Distance_to_Roads layer to select it. On the ribbon, on the Raster Layer tab, for Transparency, type 30%. For Layer Blend, choose Multiply.

The map updates.
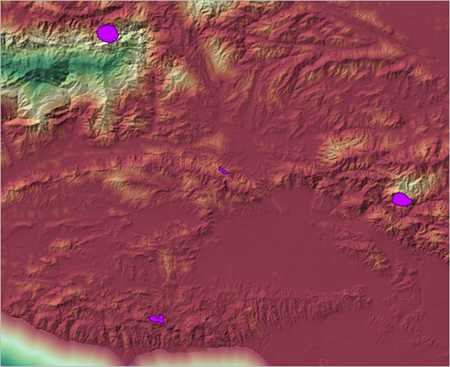
In the Contents pane, the legend for the layer indicates that the cell values range from 0 to over 10,000 meters (approximately 7 miles). Note that most of the study area is close to a road (in red) and that the farther areas (in light yellow or green) are few and fragmented. This indicates how widespread human development has become in the area. The few areas away from roads tend to be on higher mountainous peaks. You can see that the mountain lions core habitat patches are for the most part located in these rare areas away from roads. Further distance to roads signifies a lower cost for the mountain lions in terms of stress and danger. However, when roads can be found almost anywhere, they can't be entirely avoided.
- Close the Symbology pane.
- Press Ctrl+S to save the project.
In this portion of the workflow, you set geoprocessing environment parameters to prepare for your analysis. You then created a model and used it to process the Elevation and Roads layers and derive new layers that represent more directly the ruggedness and distance to road criteria. Your other two data layers don't need to be preprocessed. Next, you'll continue building your model and implement the least-cost analysis.
Generate cost surface
You now have four data layers that represent the analysis criteria–terrain ruggedness, distance to roads, dense vegetation land cover, and protected areas. However, they all have different measurement methods and value ranges. To combine the four layers meaningfully, you first must transform them to a common cost scale from 1 to 10, where 1 is the lowest cost, and 10 the highest. Then, you will combine the four resulting layers into a single cost surface: a raster that represents the overall cost for mountain lions as they move through the landscape in terms of stress and danger.
Choose the right transformation tool
Based on the type of the raster you want to convert to the common scale, you'll use different tools. There are two main types of rasters: continuous and categorical.
For instance, Distance_to_Roads is a continuous raster. This means that its cell values represent quantities (distances in this case) and have meaning relative to one another. If one of its cells has a value of 600 meters and another one of 650 meters, you can say that the second cell represents a greater distance than the first one.
In contrast, Land Cover is a categorical raster. This means that its cell values represent categories and do not have meaning relative to each other. For instance, it would be meaningless to say that Evergreen Forest is greater than Cultivated Crops.
Note:
Categorical rasters are also sometimes called thematic or discrete. Learn more about continuous and categorical rasters on the Introduction to image and raster data page.
The four criteria layers belong to the following types:
- Ruggedness—Continuous
- Distance to Roads—Continuous
- Land Cover—Categorical
- Protected Status—Categorical
You'll transform the continuous rasters into a common scale with the Rescale By Function tool, which applies continuous linear and nonlinear functions. In the output rasters, each cell will be assigned continuous cost value (floating-point value) between 0 and 10.
You'll transform the categorical rasters into a common scale with the Reclassify tool, which allows you to set the cost value for each individual category. For instance, you could decide that the Evergreen Forest land cover type should receive a low cost value of 1 and that the Developed, High Intensity type should receive a high cost value of 10. In the output rasters, each cell will be assigned an integer cost value between 0 and 10.
Transform ruggedness
You'll start with transforming the Ruggedness dataset to the common scale, using the Rescale By Function tool. Higher ruggedness values represent less stress and danger for mountain lions, so they should be transformed into lower cost values (close to 1 in the 1 to 10 scale).
- Click the LeastCostAnalysis tab to return to your model.
- In the Geoprocessing pane, search for Rescale By Function.
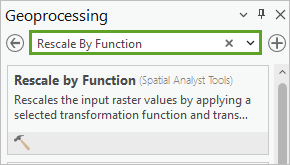
- Drag the Rescale By Function (Spatial Analyst Tools) tool into the model, next to the Ruggedness output.
- Draw an arrow to connect the Ruggedness output to the Rescale By Function tool. Choose Input raster.
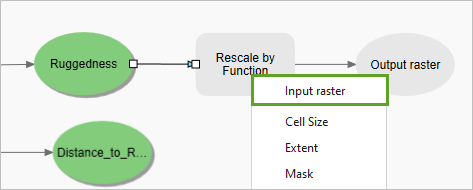
The tool and its output become active. Next, you must specify the output name and the transformation function.
- In the model, double-click the Rescale By Function tool to open its parameters.
Some of the parameters were populated automatically, based on the Ruggedness layer input. Reading the Lower Threshold and Upper Threshold parameters, you can see that the ruggedness values can vary from 0 to 223.39.
- Choose the following parameter values:
- For Output raster, change the name of the output layer to Ruggedness_Cost.
- For Transformation function, choose MSLarge.
- For From scale, type 10. For To scale, type 1.
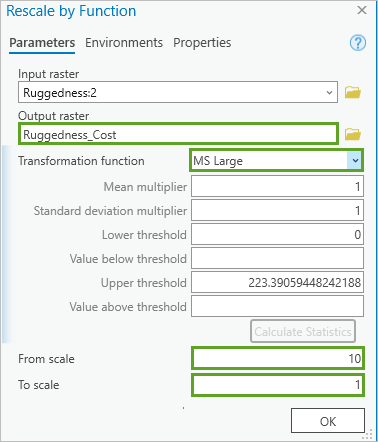
Ruggedness values close to 0 will be transformed into the highest cost of 10. Ruggedness values close to 223 will be transformed into the lowest cost of 1.
- Click OK.
The parameters are saved.
- In the model, right-click the Ruggedness_Cost output element and choose Add To Display.
You'll save the model.
- On the ribbon, on the ModelBuilder tab, click the Save button.
Next, you'll run the tool.
- In the model, right-click the Rescale By Function tool and choose Run.
After a few moments, the resulting layer is added to the Contents pane.
- Close the processing window and click the Map tab to make it active.
You want to invert the symbology of the new layer, so that the low cost values appear in green and the high cost values in red.
Note:
Red and green have strong symbolic associations, red being often used to indicate negative elements, such as danger and warnings, while green indicates positive elements and an invitation to go ahead.
- In the Contents pane, click the symbol for the Ruggedness_Cost layer to open the Symbology pane.
- In the Symbology pane, under Primary symbology, check the Invert box.
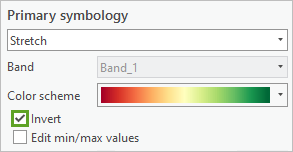
- In the Contents pane, turn off the Distance_to_Roads layer and verify that the Ruggedness_Cost and Hillshade layers are turned on.
- In the Contents pane, click the Ruggedness_Cost layer to select it. On the ribbon, on the Raster Layer tab, for Transparency, type 20%. For Layer Blend, choose Multiply.
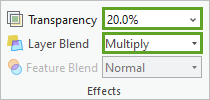
The map updates.
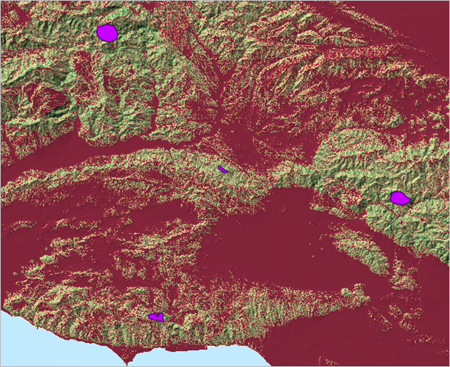
The Ruggedness_Cost layer looks relatively similar to the Ruggedness layer, but it represents cost values varying between 1 and 10.
- In the Contents pane, verify that Ruggedness_Cost is selected.
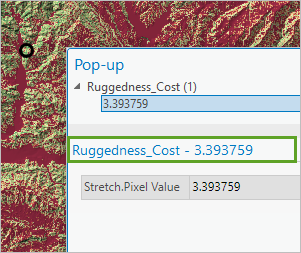
- On the map, click a few Ruggedness_Cost cells to see their values in the informational pop-up.
In the following example image, the cell has a cost value of about 3.39.
- Close the pop-up.
- Close the Symbology pane.
Transform distance to roads
Next, you will transform the Distance_to_Roads dataset to the common cost scale. Since it's a continuous raster, you'll use the Rescale By Function tool again, and the process will be very similar to the one followed for Ruggedness. Areas that are farther from roads represent less stress and danger for mountain lions, so they should be transformed into lower cost values.
- Click the LeastCostAnalysis tab to return to your model.
- If necessary, in the Geoprocessing pane, search for Rescale By Function.
- Drag the Rescale By Function (Spatial Analyst Tools) tool into the model, next to the Distance_to_Roads output.
The tool is added as Rescale by Function (2) to differentiate it from the first one you used for Ruggedness.
- Draw an arrow to connect the Distance_to_Roads output to the Rescale By Function (2) tool. Choose Input raster.
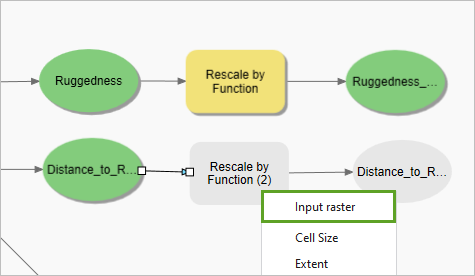
- In the model, double-click the Rescale By Function (2) tool to open its parameters.
You can see that the original Distance_to_Roads values vary from 0 to 10,961.62.
- Choose the following parameter values:
- For Output raster, change the name of the output layer to Distance_to_Roads_Cost.
- For Transformation function, choose MSLarge.
- For From scale, type 10. For To scale, type 1.
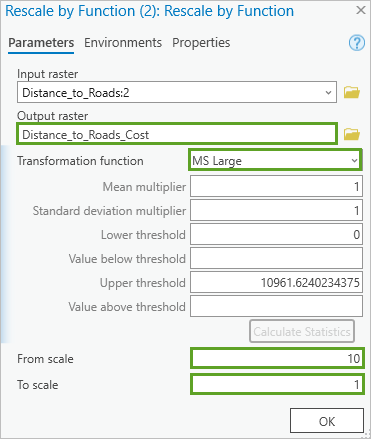
Distance_to_Roads values close to 0 will be transformed into the highest cost of 10. Distance_to_Roads values close to 10,961 will be transformed into the lowest cost of 1.
- Click OK.
- In the model, right-click the Distance_to_Roads_Cost output element and choose Add To Display.
- Save the model.
Next, you'll run the tool.
- In the model, right-click the Rescale By Function (2) tool and choose Run.
The tool runs.
- Click the Map tab to make it active.
You want to invert the symbology of the new layer, so that the low cost values appear in green and the high cost values in red.
- In the Contents pane, click the symbol for the Distance_to_Roads_Cost layer to open the Symbology pane.
- In the Symbology pane, under Primary symbology, check the Invert box.

The map updates. For more context, you'll make the Hillshade layer show through.
- In the Contents pane, turn off the Ruggedness_Cost layer and verify that the Distance_to_Roads_Cost and Hillshade layers are turned on.
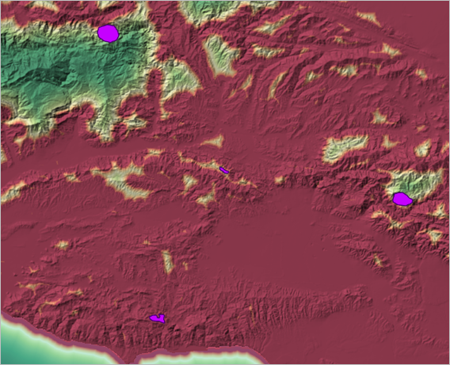
- In the Contents pane, click the Distance_to_Roads_Cost layer to select it. On the ribbon, on the Raster Layer tab, for Transparency, type 30%. For Layer Blend, choose Multiply.

The map updates.
- Close the Symbology pane.
Here again, the Distance_to_Roads_Cost layer looks relatively similar to the Distance_to_Roads layer, but it represents cost values varying between 1 and 10.
- Optionally, select Distance_to_Roads_Cost and click a few cells to see their values.
- Close the Symbology pane.
Transform land cover
You will now transform the Land Cover dataset. It's a categorical raster, so you'll use the Reclassify tool, which allows you to decide the cost value for each category individually.
Land cover types that are high in dense vegetation represent less stress and danger for mountain lions, so they should be transformed into the lower cost values in the 1 to 10 scale. Barren or developed land should be transformed into the highest cost values.
- Click the LeastCostAnalysis tab to return to your model.
First, you'll add the Land Cover layer as an input data variable.
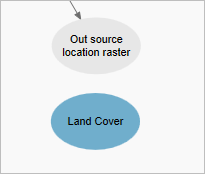
- From the Contents pane, drag the Land Cover layer into ModelBuilder and drop it under the grayed out Out source location raster element.
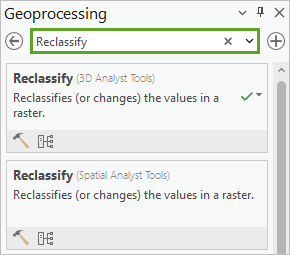
- In the Geoprocessing pane, search for Reclassify.
- Drag the Reclassify (Spatial Analyst Tools) tool into the model, next to the Land Cover element.
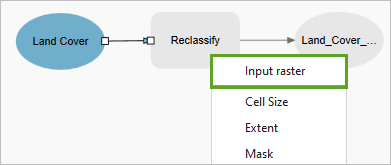
- Draw an arrow to connect the Land Cover element to the Reclassify tool. Choose Input raster.
Next, you must specify the output name and the one-to-one transformations.
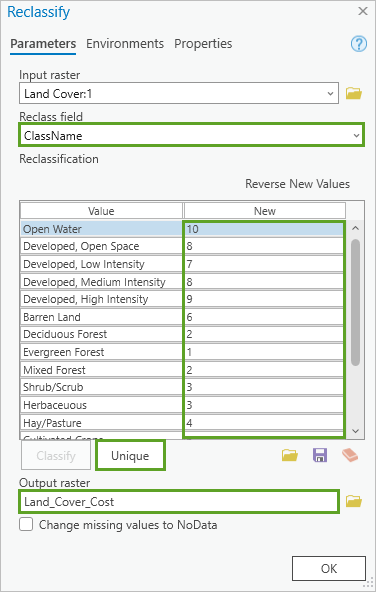
- Double-click the Reclassify tool to open its parameters, and choose the following options:
- For Reclass field, verify that ClassName is selected.
- Below the Reclassification table, verify that Unique is selected.
In the Reclassification table, the Value column is populated with the land cover types. In the New column, you will replace the defaults with 1 to 10 cost values based on your assessment of each land cover type. Mountain lions feel the most safe in forest and shrub land cover types, although they can also make use of agricultural or open areas. Developed lands are not safe and should receive a high cost value. Finally, water-covered areas will get the highest cost value, since they are inhospitable for mountain lions.
- In the Reclassification table, update the New column with the following values.
Value New Open Water
10
Developed, Open Space
8
Developed, Low Intensity
7
Developed, Medium Intensity
8
Developed, High Intensity
9
Barren Land
6
Deciduous Forest
2
Evergreen Forest
1
Mixed Forest
2
Shrub/Scrub
3
Herbaceous
3
Hay/Pasture
4
Cultivated Crops
6
Woody Wetlands
4
Emergent Herbaceous Wetlands
4
NODATA
NODATA
- For Output raster, change the output name to Land_Cover_Cost.
- Click OK.
- In the model, right-click the Land_Cover_Cost output element and choose Add To Display.
- Save the model.
Next, you'll run the tool.
- In the model, right-click the Reclassify tool and choose Run.
After a few moments, the resulting layer is added to the Contents pane.
- Click the Map tab to make it active.
The new Land_Cover_Cost layer displays, but the Distance_to_Roads_Cost layer shows underneath in the ocean portion of the study area.

You'll turn that latter layer off.
- In the Contents pane, turn off the Distance_to_Roads_Cost layer.
The map updates.
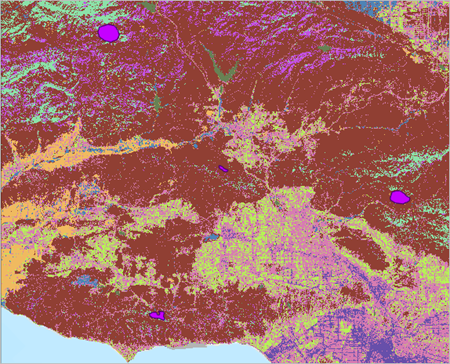
The colors representing the cost values were assigned at random. You will change the symbology to make it more meaningful.
- In the Contents pane, click any of the symbols for the Land_Cover_Cost layer to open the Symbology pane.
- In the Symbology pane, under Primary symbology, for Field 1, choose Value.

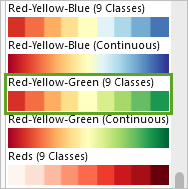
- For Color Scheme, choose Red-Yellow-Green (9 Classes).
Note:
There are only 9 classes and not 10, because the cost value 5 was not assigned to any categories.
You will invert the symbology of the new layer.
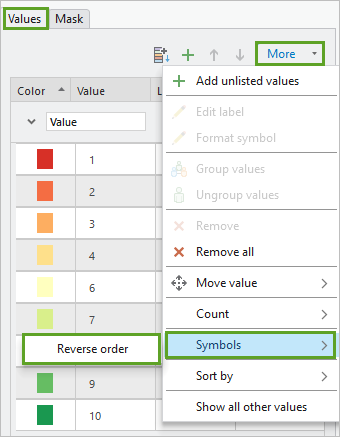
- In the Symbology pane, in the Values tab, click More > Symbols > Reverse order.
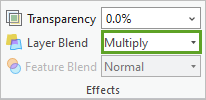
- In the Contents pane, click the Land_Cover_Cost layer to select it. On the ribbon, on the Raster Layer tab, for Layer Blend, choose Multiply.
The map updates.
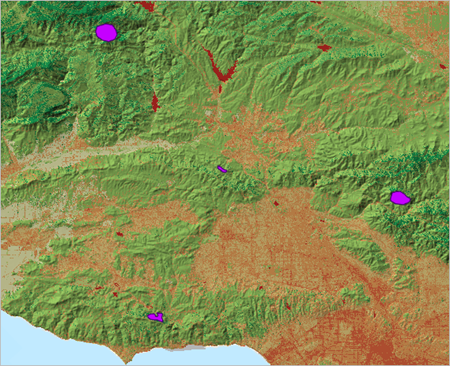
The lower cost land cover types are mostly located in the mountain ranges with a lot of forest and shrubland. The higher cost land cover types tend to be located in the flatter low-lying valleys where most of the human development has taken place. The mountain lions core habitats are clearly nested in midst of low cost areas. This makes sense, since the lions would naturally gravitate toward low stress land cover.
- Close the Symbology pane.
Transform protected status
You will now transform the last criteria dataset, Protected_Status. It's a categorical raster, so you will again use the Reclassify tool, and the process will be very similar to the one followed for Land Cover. Areas that are the most protected represent less stress and danger for mountain lions, so they should be transformed into the lower cost values.
- Click the LeastCostAnalysis tab to return to your model.
- From the Contents pane, drag the Protected_Status layer into ModelBuilder and drop it under the Land Cover element.
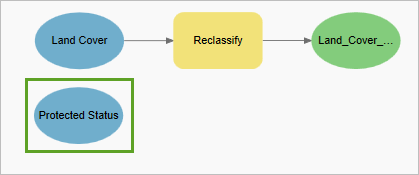
- From the Geoprocessing pane, drag the Reclassify (Spatial Analyst Tools) tool into the model, next to the Protected_Status element.
- Draw an arrow to connect the Protected_Status element to the Reclassify (2) tool. Choose Input raster.
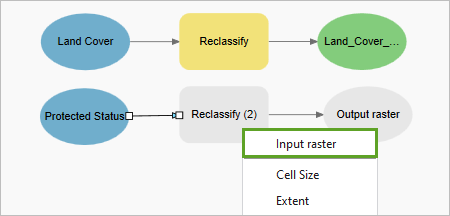
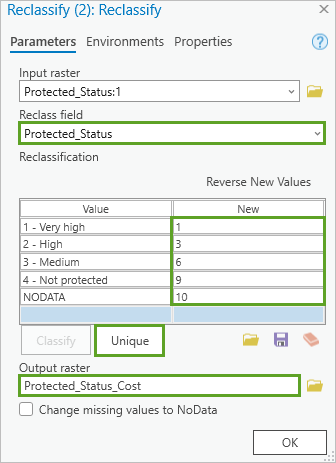
- In the model, double-click the Reclassify (2) tool to open its parameters and choose the following options:
- For Reclass field, verify that Protected_Status is selected.
- Below the Reclassification table, verify that Unique is selected.
In the Reclassification table, the Value column is populated with the Protected_Status levels. In the New column, you'll replace the defaults with cost values between 1 and 10, based on your assessment of each protection status category. Mountain lions feel the least stress in the most protected areas, so these should receive the lowest cost value. Unlike with land cover, you'll also reclassify NODATA cells, which correspond to locations that are not tracked in Protected Areas database and are usually very high stress areas like urbanized and other development-prone locations. NODATA cells should receive the highest cost value.
- In the Reclassification table, update the New column with the following values.
Value New 1 – Very high
1
2 – High
3
3 – Medium
6
4 – Not protected
9
NODATA
10
- For Output raster, change the output name to Protected_Status_Cost.
- Click OK.
- In the model, right-click the Protected_Status_Cost output element and choose Add To Display.
- Save the model.
Next, you'll run the tool.
- In the model, right-click the Reclassify (2) tool and choose Run.
After a few moments, the resulting layer is added to the Contents pane.
- Click the Map tab to make it active.
The colors representing the cost values were assigned at random. You will change the symbology to make it more meaningful.
- In the Contents pane, click any of the symbols for the Protected_Status_Cost layer to open the Symbology pane.
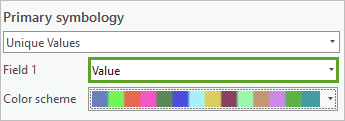
- In the Symbology pane, under Primary symbology, for Field 1, choose Value.
- For Color Scheme, choose Red-Yellow-Green (5 Classes).
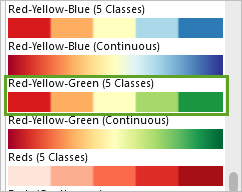
- In the Symbology pane, on the Values tab, click More > Symbols > Reverse order.
- In the Contents pane, turn off the Land_Cover_Cost layer and verify that the Protected_Status_Cost and Hillshade layers are turned on.
- In the Contents pane, click the Protected_Status_Cost layer to select it. On the ribbon, on the Raster Layer tab, for Transparency, type 30%. For Layer Blend, choose Multiply.

The map updates.
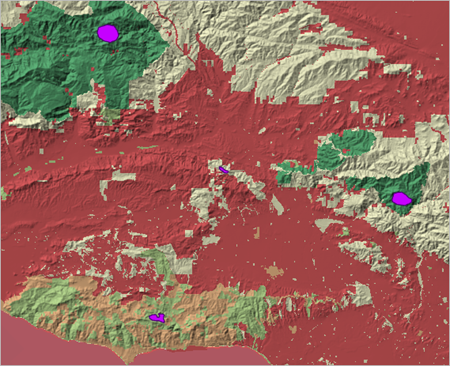
The lowest cost areas (in dark green and light green) in terms of protection status are located in the mountain ranges. Many areas are not protected (in orange or red). It doesn't mean that mountain lions couldn't go through them at all, but they would tend to be higher stress.
- Close the Symbology pane.
Create a weighted cost surface layer
You've now added the steps to your model to convert the four criteria data layers to the same 1 to 10 cost scale. You will now combine these cost layers into a single cost surface that simulates how the mountain lions will experience the landscape as they move through it. You will do that with the Weighted Sum tool, which will add the values in the four cost layers, with certain weights given to each layer. The weights allow you to make some layers play a heavier role than others (making certain features more costly) in the creation of the combined cost surface. For each cell, the tool multiplies the values for each input raster by the given weight and then adds the four values together to create a new value representing the total cost.
- Click the LeastCostAnalysis tab to return to your model.
- In the Geoprocessing pane, search for Weighted Sum.
- Drag the Weighted Sum (Spatial Analyst Tools) tool into the model, to the right of the four cost layers.
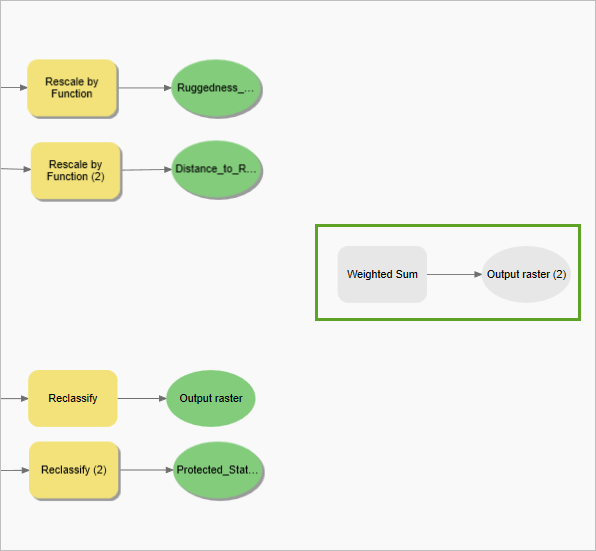
You will connect the four cost layers to the tool.
- Drag an arrow from Ruggedness_Cost to the Weighted Sum tool. Choose Input rasters.
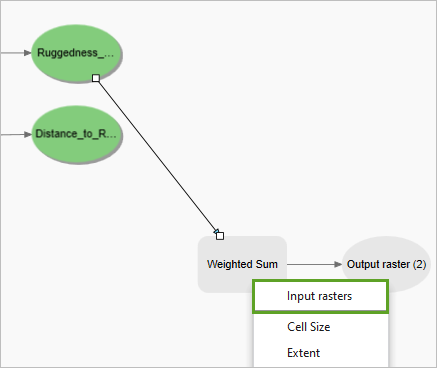
- In the same way, connect the other cost layers to the tool.
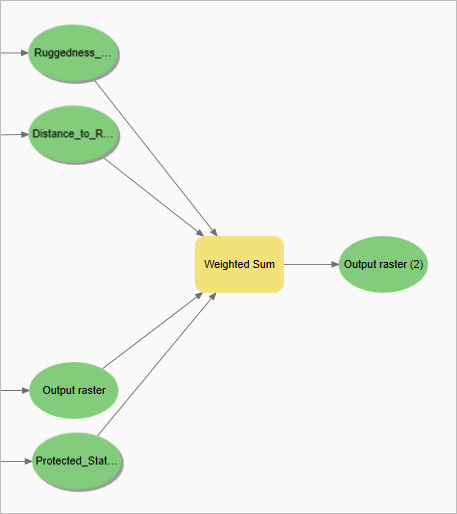
Next, you'll edit the tool parameters to provide your chosen weight for each input.
- In the model, double-click the Weighted Sum tool to open its parameters.
The four transformed layers are listed as input rasters. The default weight for each one is 1, which means they all have the same weight. You will need now change some of those weights. You decide that the land cover criterion should play a heavier role, as you don't want the mountain lions passing through urban areas. Similarly, you decide that the ruggedness criterion is very significant, as mountain lions don't do well in flat, non-rugged areas. As a result, you will increase the weights of these two criteria to ensure that the mountain lions avoid urban areas and avoid flat areas: the higher weights will make these unwanted areas significantly more costly. Because you created a model of the workflow, you can always go back and adjust the weights afterward to fine-tune your results.
- For Distance_to_Roads_Cost and Protected_Status_Cost, keep the Weight at 1. For Ruggedness_Cost and Land_Cover_Cost, change the Weight to 1.25.
- For Output raster, change the output name to Cost_Surface.
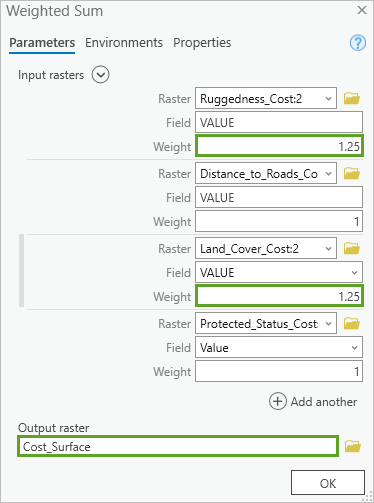
- Click OK.
- In the model, right-click the Cost_Surface output and choose Add To Display.
- Save the model.
Next, you'll run the tool.
- In the model, right-click the Weighted Sum tool and choose Run.
After a few moments, the resulting layer is added to the Contents pane.
- Click the Map tab to make it active.
You'll invert the symbology of the new layer, so that the low cost values appear in green and the high cost values appear in red.
- In the Contents pane, click the symbol for the Cost_Surface layer to open the Symbology pane.
- In the Symbology pane, under Primary symbology, check the Invert box.

The map updates. For more context, you'll make the Hillshade layer show through.
- Turn off all layers except for Study_Area, Cost_Surface, Hillshade, World Topographic Map, and World Hillshade.
- In the Contents pane, click the Cost_Surface layer to select it. On the ribbon, on the Raster Layer tab, for Transparency, type 20%. For Layer Blend, choose Multiply.

The map updates.
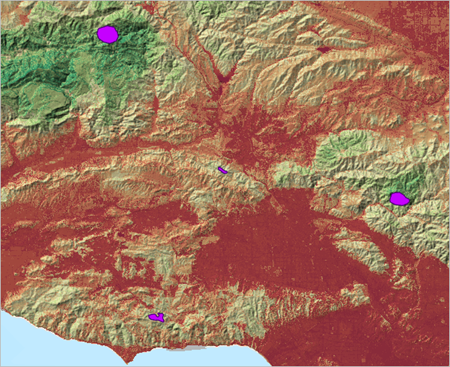
This Cost_Surface layer simulates how the mountain lions will experience the landscape as they move through it. The green areas have the lowest cost in terms of stress and danger, while the red areas have the highest cost, and the beige areas have a medium cost. You can see that almost all low and medium cost areas are located in mountainous regions. The core mountain lion habitats are all located in areas that are low cost (dark green or light green). This makes sense, since mountain lions would naturally want to live in low stress and low danger areas. It is a good indication that, although it's your first attempt and your model could be refined further, your results are good.
- Close the Symbology pane.
- Press Ctrl+S to save the project.
In this portion of the workflow, you added steps in your model to transform the four criteria datasets into a common scale from 1 to 10 and to combine the resulting layers into a single cost surface. You ran the model steps, symbolized the results, and investigated them. Next, you will add a tool to your model to determine the best locations for mountain lion corridors.
Generate least-cost paths
Previously, you developed a model that builds a cost surface simulating the mountain lions' experience as they move through the landscape. You will now use this cost surface to determine the optimal paths connecting the core habitats patches. Modeling the location of corridors can be thought of as determining the path of least resistance. In a least-cost path, you want to travel between specified locations accumulating as little cost as possible. Conceptually, think of the cost surface as having a number of marbles in each raster cell (corresponding to the cost value). You give a bag to the mountain lion, and for every cell they pass through, they have to put the cell's marbles in their bag. Their goal is to get from one core habitat to the other collecting the fewest marbles possible.
Identify least-cost paths
To create the optimal paths, you'll use the Optimal Region Connections geoprocessing tool. This tool identifies an optimum network of least-cost paths between identified regions. The tool will use two inputs: the cost surface and the core mountain lion habitats.
- Click the LeastCostAnalysis tab to return to your model.
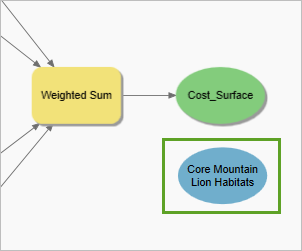
- From the Contents pane, drag the Core Mountain Lion Habitats layer into the model, near the Cost_Surface output.
Next, you'll add the Optimal Region Connections tool.
- In the Geoprocessing pane, search for Optimal Region Connections.
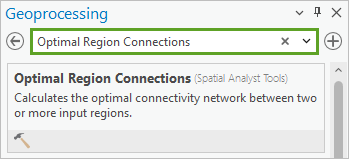
- Drag the Optimal Region Connections tool into the model, next to the Cost_Surface and Core Mountain Lion Habitats inputs.
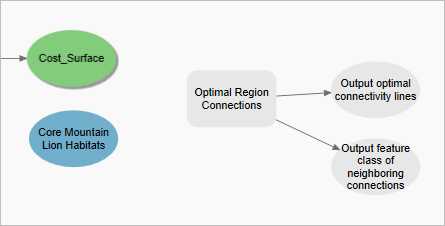
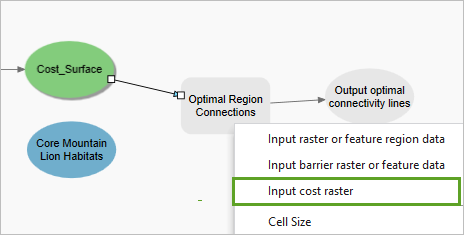
- Drag an arrow to connect the Cost_Surface input to the Optimal Region Connections tool. Choose Input cost raster.
- Drag an arrow to connect the Core Mountain Lion Habitats input to the Optimal Region Connections tool. Choose Input raster or feature region data.
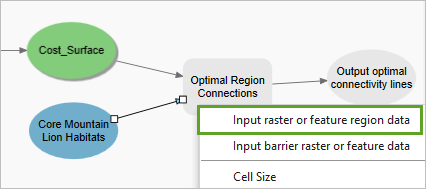
The input regions that you want to connect can be either raster data or vector data. The Core Mountain Lion Habitats layer is a polygon vector layer.
- In the model, double-click the Optimal Region Connections tool to open its parameters.
You'll enter the names for the tool's two output layers.
- For Optimal output connectivity lines, change the output name to Mountain_Lion_Paths.
This is the primary output layer. It will contain the optimal network of paths (or lines) for mountain lions to move from one habitat patch to any other patches (possibly passing through another patch).
- For Output feature class of neighboring connections, type Mountain_Lion_Paths_Neighbors.
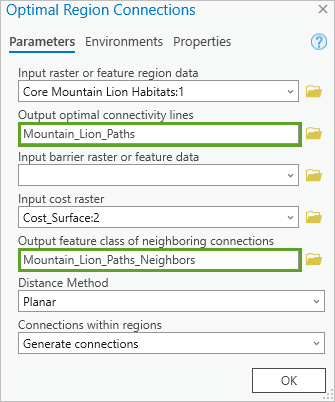
This is a secondary optional output identifying all paths from each patch to each of its closest (or lowest cost) neighbors. The paths to lowest cost neighbors can possibly provide alternative paths to reach specific patches.
- Click OK.
- Right-click each of the two outputs of the tool and choose Add To Display.
- Save the model.
You'll run the Optimal Region Connections tool and explore the results.
- In the model, right-click the Optimal Region Connections and choose Run.
After a few moments, the resulting two layers, Mountain_Lion_Paths and Mountain_Lion_Paths_Neighbors, are added to the Contents pane.
- Click the Map tab to make it active.
The new layers are line vector layers. The default symbology might be difficult to see, so you'll change it.
- In the Contents pane, click the symbols for the Mountain_Lion_Paths_Neighbors layer to open the Symbology pane.
- In the Symbology pane, if necessary, click Gallery. On the Gallery tab, search 2.5 Point. In the list of Symbols found, click the 2.5 Point symbol.
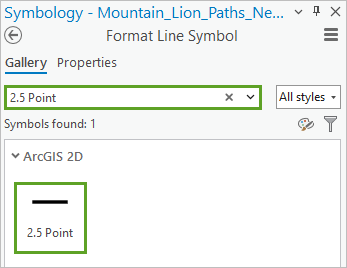
The map updates.
- Similarly, apply the 2.5 Point symbol to the Mountain_Lion_Paths layer.
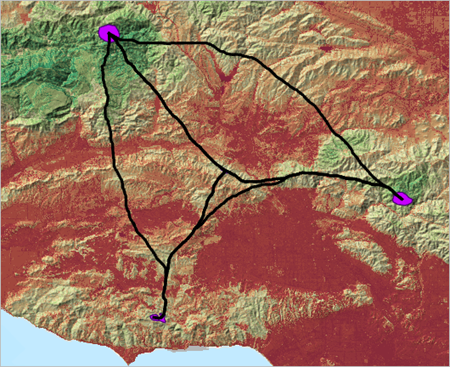
You'll first examine the Mountain_Lion_Paths layer.
- In the Contents pane, turn off the Mountain_Lion_Paths_Neighbors layer.

The Mountain_Lion_Paths layer represents the optimal network of paths to connect the four habitat patches with the least cost. You can observe that the paths primarily go through darker green and lighter green areas of the Cost_Surface layer. This makes sense since these are the lower cost areas. The paths only go through red areas when there are no other alternatives. This network is the most efficient way of connecting the four patches, and it represents the optimal locations for creating mountain lion corridors.
- Turn on the Mountain_Lion_Paths_Neighbors layer.

This layer contains the same paths as the previous layer, but it offers additional paths that connect each habitat patch to its lowest cost neighbors. These extra routes are not necessary, but they provide supplementary options. Similarly, you can see that they primarily go through dark green and light green areas, whenever possible.
- Save the project.
Clean up the model
Before evaluating your results further, you will clean up your model to finalize it.
- Click the LeastCostAnalysis tab to return to your model.
- On the ribbon, on the ModelBuilder tab, in the View group, click Fit To Window.

The model redraws to fit entirely in the window.
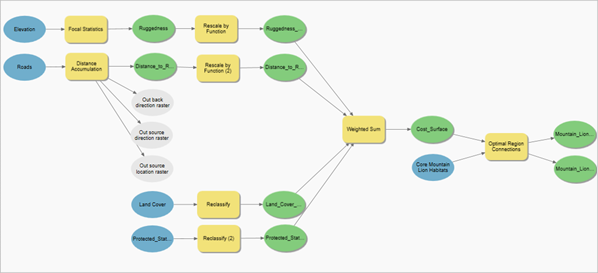
The positioning of your model elements might not be perfectly aligned and equally spaced. You'll use the Auto Layout functionality to reorganize the model optimally.
- On the ribbon, on the ModelBuilder tab, in the View group, click Auto Layout.

The model redraws to optimize the placement of the elements.
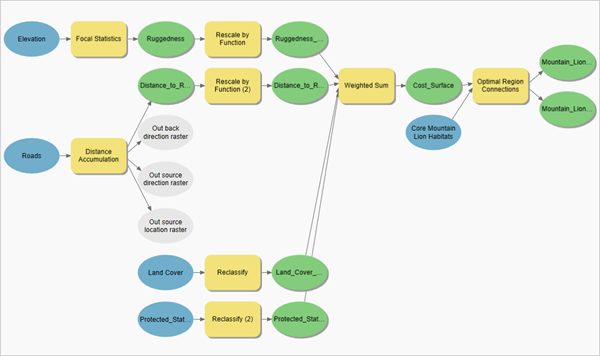
Tip:
If you are not fully satisfied with the automated placement, you can reposition some of the elements manually.
To better show the model's structure, you'll reorganize it into three sections or groups:
- Preprocess datasets
- Create cost surface
- Find least-cost paths
- In the model, draw a box around the Focal Statistics and Distance Accumulation tools and their associated output elements to select them.
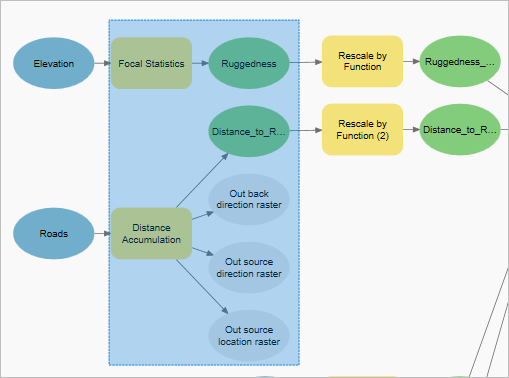
- On the ribbon, on the ModelBuilder tab, in the Group group, click Group.
The elements you selected are now encapsulated into a group. You'll rename it.
- Double-click the Group name.
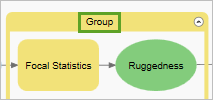
- In the window that pops up, type the new name Preprocess datasets, and press Enter.
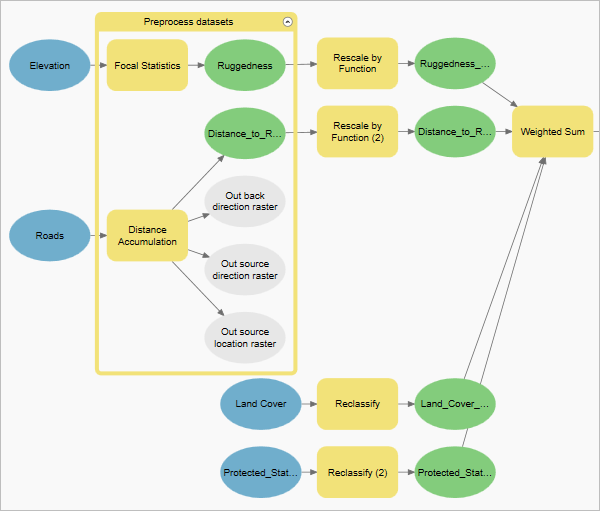
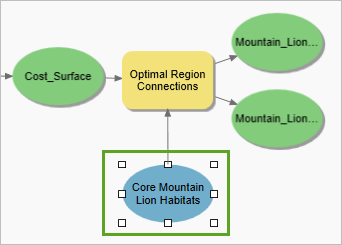
The first group is complete, and you'll now create the second one. First, you'll move the Core Mountain Lion Habitats element out of the way.
- Click the Core Mountain Lion Habitats element to select it and drag it under the Optimal Region Connections tool.
- Draw a box around the Rescale by Function, Reclassify, and Weighted Sum tools and their associated output elements.
- On the ribbon, on the ModelBuilder tab, click Group.
- Rename the new group to Create cost surface.
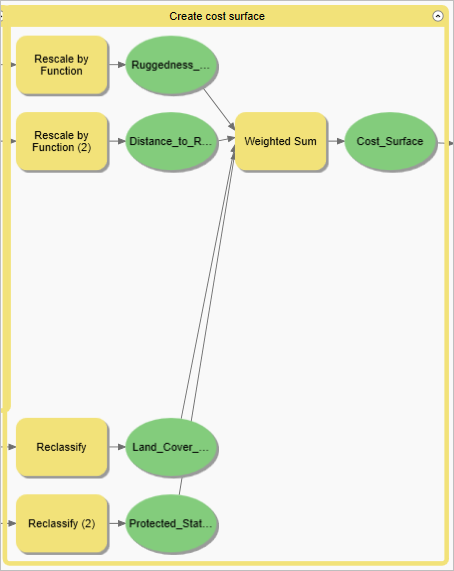
The second group is complete. You'll now create the third one.
- Draw a box around the Optimal Region Connections tool, its associated output elements, and the Core Mountain Lion Habitats element.
- On the ribbon, on the ModelBuilder tab, click Group.
- Rename the new group to Find least-cost paths.
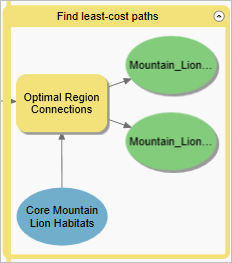
- Drag the groups slightly away from each other to increase the model's legibility.
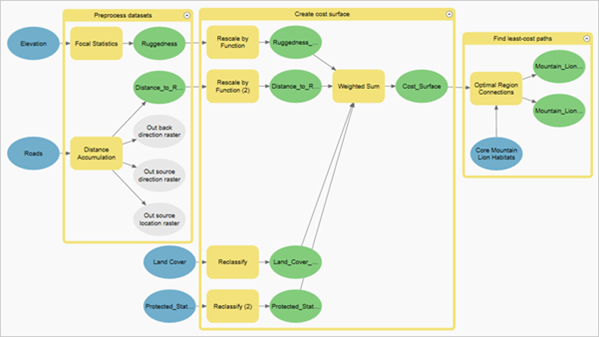
- Save the model.
Your model is now finalized.
Continue using the model
For future use, you can always retrieve the model from the Catalog pane.
- Close the model.

- On the ribbon, on the View tab, in the Windows group, click Catalog Pane.

- In the Catalog pane, expand Toolboxes and the Mountain_Lion_Corridors.tbx toolbox.
The model you built is located there.
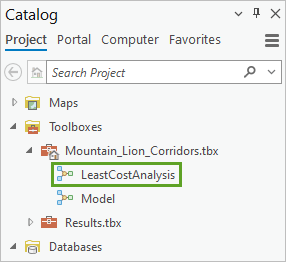
Tip:
The Results.tbx toolbox contains a copy of the model that was created for you and is provided for reference or comparison purposes.
- Right-click the LeastCostAnalysis model and choose Edit.
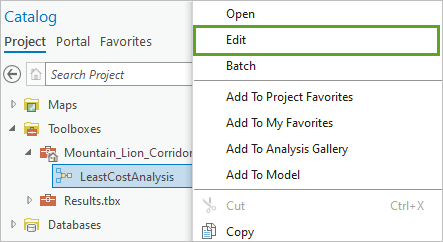
The model reopens and is ready to be used, either to run it or edit it further.
- On the ribbon, on the ModelBuilder, in the Run group, click Validate.

Validate verifies that all data elements and parameter values are valid. It also resets the model status, so that it's ready to run again.
You could now run the entire model as many times as you want by clicking the Run button. However, note that the symbology styles you applied to the result layers earlier in the workflow would be lost. You won't run it now.
Tip:
While it is beyond the scope of this tutorial, it is possible to apply symbology styles automatically to the output layers within your model by incorporating the Apply Symbology From Layer tool to it.
- Press Ctrl+S to save the project.
In this portion of the workflow, you added a tool to your model to determine the least-cost paths between the core mountain lion habitats. You then ran the tool, symbolized the output layers, and examined them. Finally, you cleaned up your model to finalize it and learned how you can continue using it in the future.
Evaluate results
You will now evaluate the results further.
Compare the results to other layers
First, you'll compare the proposed paths to the different cost layers.
- Click the Map tab to make it active.
- In the Contents pane, turn off the Mountain_Lion_Paths_Neighbors layer and verify that the Mountain_Lion_Paths, Core Mountain Lion Habitats, and Cost_Surface layers are visible, like in the following example image.
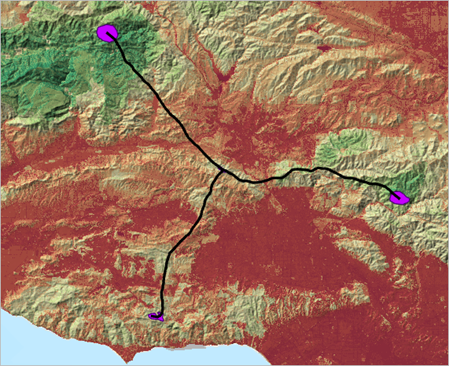
You saw earlier that the proposed paths go through the lowest cost areas within the cost surface raster, whenever possible. When there is no other alternative, they might be passing through a few short higher-cost stretches. Overall, these paths look like good options for developing wild corridors to connect the core mountain lion habitats. You will now look at the four individual criteria cost layers individually to check how the paths fit each one.
- In the Contents pane, turn off Cost_Surface and turn on Ruggedness_Cost. Examine the map.
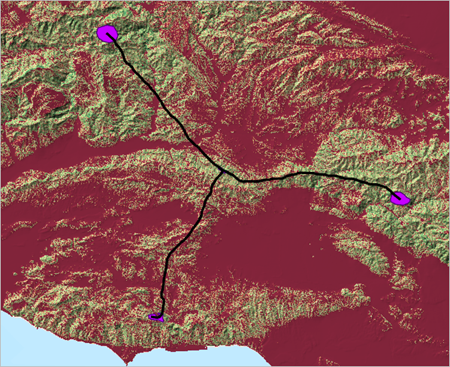
The paths are almost only through high ruggedness terrain. From this criteria's standpoint, the paths show great promise for high quality mountain lion corridors.
- In the Contents pane, turn off Ruggedness_Cost and turn on Distance_to_Roads_Cost. Examine the map.
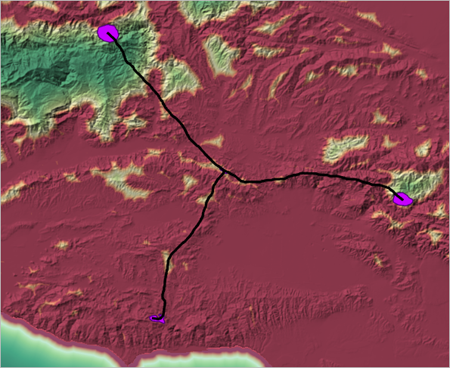
Even though the paths are as low cost as possible, as expected, there is no way to avoid near-road locations in this study area. Later in the workflow, you will make a more fine-grained distinction between highways and small roads and learn about possible approaches to tackle this challenging high-road density situation.
- In the Contents pane, turn off Distance_to_Roads_Cost and turn on Land_Cover_Cost. Examine the map.
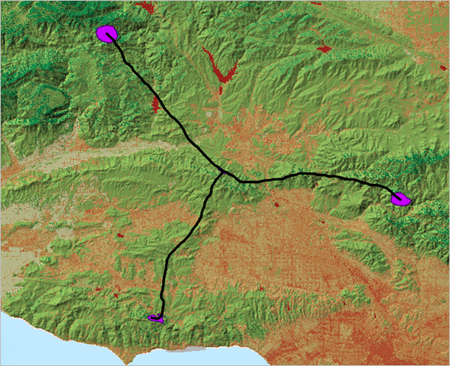
The paths are almost only through low-cost land cover. From this criteria's standpoint, the paths show again great promise for high quality mountain lion corridors.
- In the Contents pane, turn off Land_Cover_Cost and turn on Protected_Status_Cost.
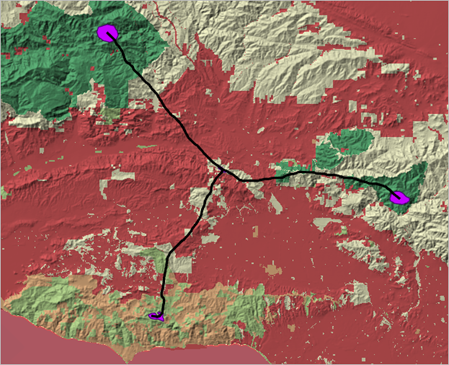
The optimum paths do their best to go through protected areas, but much of the valleys and some of the mountainous regions are unprotected, and the paths can't avoid going through them. Later in the workflow, you will learn how this situation could be improved by changing the protection status in the stretches of land along the paths.
Examining the paths against the individual cost layers confirms the strength of these proposed corridor locations, but it also highlights some challenges. Next, you will learn how these challenges can be approached.
Visualize areas to protect
Implementing wildlife corridors along the paths proposed would necessitate several actions. One of them would be to preserve the remaining undeveloped land along these routes, while there is still time. For instance, the state of California could launch a program to give protected status to these strips of land. You'll visualize the land that would be the highest priority for such a program.
You can define a wildlife corridor as a swath of land of a certain width that runs along a proposed path. In this workflow, you'll choose the width of your corridors to be 2 kilometers (1.24 miles) wide. You'll visualize the wildlife corridors by creating a buffer of 1 kilometer (or 1,000 meters) on each side of the proposed paths.
- In the Geoprocessing pane, search for Pairwise Buffer. In the result list, click the Pairwise Buffer tool.
- In the Pairwise Buffer tool, choose the following parameter values.
- For Input Features, choose Mountain_Lion_Paths.
- For Output Feature Class, type Wildlife_Corridors.
- For Distance, type 1000, and choose Meters.
- For Dissolve Type, choose Dissolve all output features into a single feature.
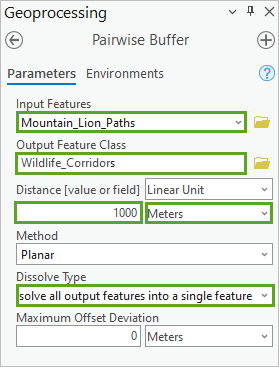
- Click Run.
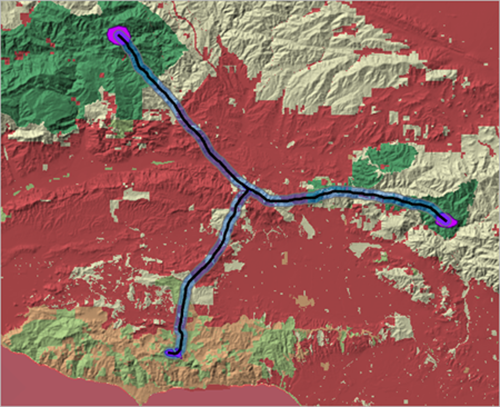
The Wildlife_Corridors buffer appears on the map in semitransparent blue.
- Verify that Protected_Status_Cost is still on, like in the following example image.
Note:
In this workflow, you create a basic buffer (named Euclidean buffer). A more advanced approach would be to create a cost buffer, which would take into account the cost surface. This can be done in the Distance Accumulation tool using the paths and cost surface and setting a maximum distance. It can also be done using the Least Cost Corridor tool. Learn more on the Connect locations with corridors documentation page. See also the Connecting locations with optimal paths article.
On the Protected_Status_Cost layer, the areas that are not protected appear in red and orange.
- Examine the map and visually identify the areas that are within the Wildlife_Corridors buffer and are symbolized in red or orange in the Protected_Status_Cost layer.
These are the areas that would need to be turned into protected land, whenever possible.
Tip:
While it is beyond the scope of this tutorial, you could also extract the stretches of land you just identified visually. You could do that by using the Reclassify tool to derive from the Protected_Status_Cost layer a new raster that only contains unprotected land (that is, values 9 and 10), the other values being reclassified to NoData. Then you would use the tool Extract by Mask on this resulting layer to extract the raster cells that represent unprotected land and are within the Wildlife_Corridor buffer.
Assess the need for wildlife overpasses
Another type of actions needed to implement the wildlife corridors would be to help the mountain lions pass through the more dangerous areas along the way, such as highways. You will now investigate your data to find out more.
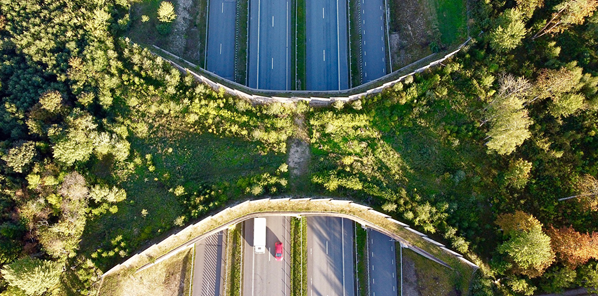
While in an ideal world the wildlife corridors would not cross any roads, you saw that this is impossible in the study area, due to the high level of development that already took place. However, it can be useful to distinguish between different types of roads. Mountain lions could cross smaller roads with a relatively low level of casualty, whereas they would be in tremendous danger whenever attempting to cross a highway. When a wildlife corridor can't avoid crossing a highway, a well-established approach is to build a wildlife overpass to go over it, as shown in the following example image.
You will identify where the proposed paths cross highways in your study area. First, you'll derive a new layer from the Roads layer displaying only highways. You'll do that with a definition query. First, you'll create a copy of the Roads layer.
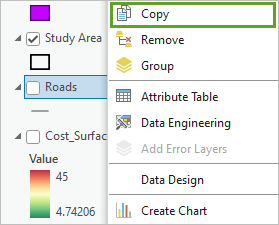
- In the Contents pane, right-click the Roads layer and choose Copy.
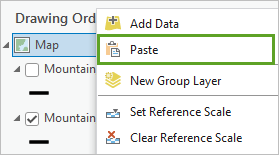
- In the Contents pane, right-click Map, and choose Paste.
A copy of the Roads layer is added. You'll rename it.
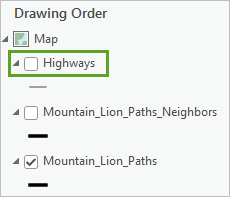
- Click the new Roads layer to select it and click it again to enter edit mode. Type Highways and press Enter.
You'll create the definition query.
- Right-click Highways and choose Properties.
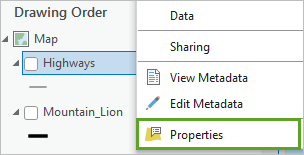
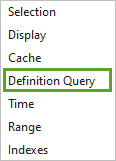
- In the Layer Properties: Highways window, in the left column, choose Definition Query.
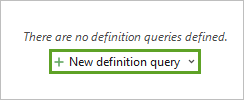
- Click New Definition Query.
- Under Query 1, form the query Carto is less than or equal to 2.
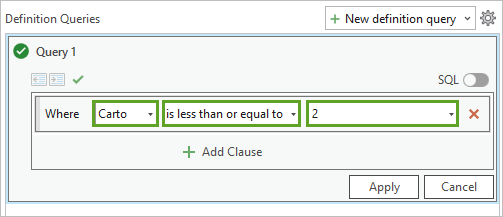
The Carto attribute stores a numeric value that encodes the road types from largest (1) to smallest (6). The query will keep only the roads with Carto values of 1 and 2, which are highways and highway ramps.
- Click Apply and click OK.
- In the Contents pane, turn on the Highways layer. Turn off the Wildlife_Corridors, Protected_Status_Cost, and Hillshade layers.
The map should look like the following example image.
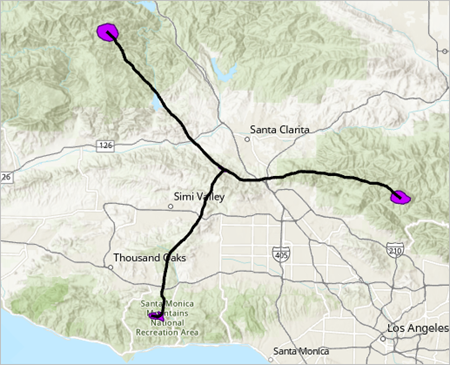
You'll choose a more visible symbol for the Highways layer.
- Click the Highways symbol to open the Symbology pane.
- In the Symbology pane, if necessary, click Gallery. On the Gallery tab, under ArcGIS 2D, click Highway.
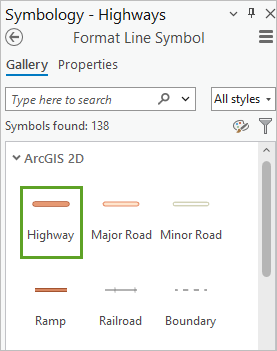
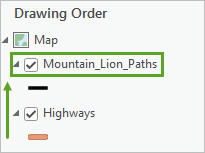
- In the Contents pane, drag the Mountain_Lion_Paths layer above the Highways layer, so that it draws above the Highway layer on the map.
On the map, the highways now display as thick red lines. You can identify four locations where a proposed path crosses a highway.
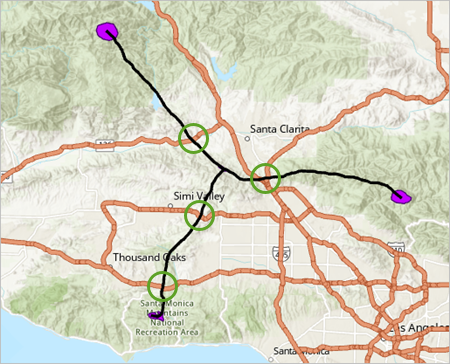
This number of intersections between paths and highways is not surprising, as the Los Angeles area is known for its extensive highway system. Examining the map, it's clearly not possible for the paths to avoid crossing these highways, even if considering taking longer detours. Therefore, the construction of overpasses should be considered at these four intersections. You'll look closer at one of these locations.
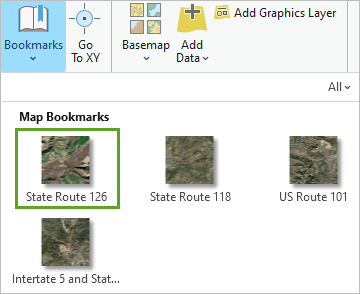
- On the ribbon, on the Map tab, in the Navigate group, click Bookmarks and choose State Route 126.
You'll switch to an imagery basemap to get a better sense of the situation on the ground.
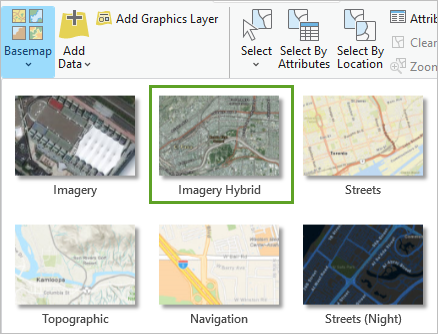
- On the ribbon, on the Map tab, in the Layer group, click Basemap. In the basemap list, choose Imagery Hybrid.
The map updates displaying a photographic view of the area along with some cartographic indications.
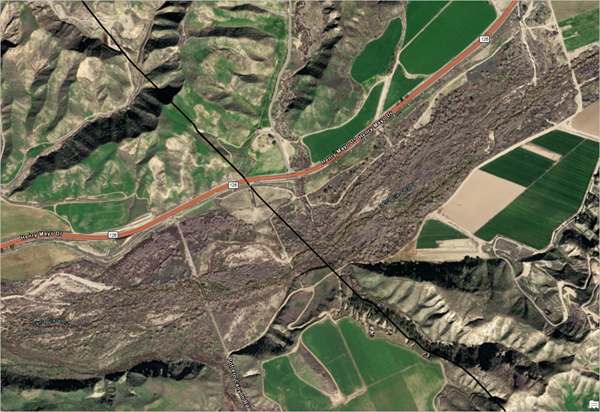
- Examine the map and zoom on the intersection between the highway and the proposed path to see it in more detail.
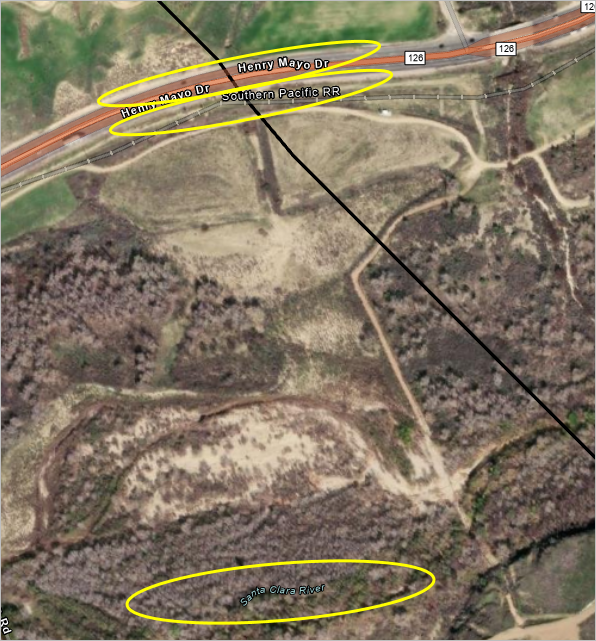
You can see that the path needs to cross not only Route 126 (or Henry Mayo Dr.), but also a railroad from the Southern Pacific company. A single overpass could probably go over both at the same time, since they are very close to each other. A bit further south, there is also the Santa Clara River that would need to be reviewed, to see if it's passable by mountain lions. If it isn't, some type of passage would also need to be arranged there.
Note:
The overpass wouldn't need to be built at the exact location proposed. It could be judicious to move it slightly, if it can avoid a steep slope or provide denser vegetation cover for the mountain lions to feel safer.
- Optionally, you can use the other bookmarks to review the other three crossing locations.
- Press Ctrl+S to save the project.
Undoubtedly, implementing wildlife corridors in the study area present challenges, as it is already quite developed. However, you now have a concrete and well-informed plan to propose to the local government and other relevant institutions. The analysis method and the model you created, while simplified for clarity, is an excellent starting point for those seeking to carry out similar analyses in their own regions of the world. You can continue to edit the tool parameters in your model to fine-tune the results. What if you changed the weights for the Weighted Sum tool? What if you added a fifth criterion to the cost surface? With a documented and editable workflow, you can test theories and make adjustments as needed to perfect your analysis. You might also be able to enhance your analysis by adding supplementary data on local conservation efforts, land ownership, and agriculture.
To learn more about mountain lions and efforts to protect it, check out the Cougar Fund.
You can find more tutorials in the tutorial gallery.
