Configure your portal website
With your ArcGIS Enterprise portal already installed and configured, you're ready to customize its appearance. First, you'll add a name and logo for your organization and choose a banner for the home page.
Note:
If you haven't yet installed and configured ArcGIS Enterprise, do so before starting this tutorial. Use the installation guides and files provided to you from My Esri.
Configure home page and footer
Once your installation and configuration is complete, you can open your portal and personalize the site.
Note:
If necessary, confirm that your ArcGIS Enterprise configuration is sufficient to complete these tutorials.
- Sign in to your ArcGIS Enterprise portal default administrator or custom role with the appropriate privileges to manage portal settings.
Note:
You can sign in using the initial administrator account that you created to register your portal with ArcGIS Web Adaptor or another administrator account that you may have already created.
Your portal opens to the Organization page. This page displays a list of current members and membership status with expiration dates.
Note:
The organization administrator, or those with home page editing privileges, can edit the organization home page and modify it at any time. Those with sufficient privileges will see the Edit home page button on the organization home after signing in.
- On the Organization page, click Settings.

Note:
If you're completing this tutorial to practice, you can use the sample information in the steps and change your setup later. The images throughout the tutorial will match the sample.
First, you'll replace the default name and add a logo and a cover image.
- Click Home page on the left side of the page.
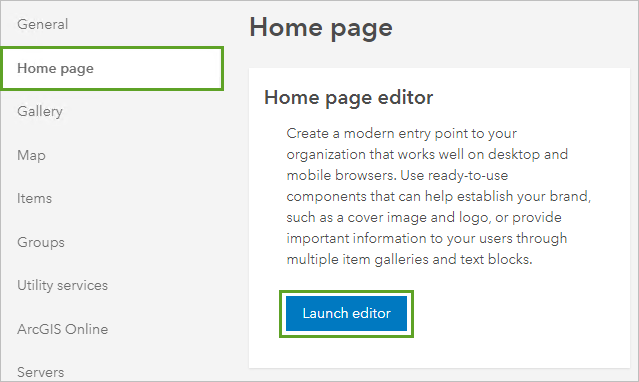
In the Home page editor section, click the Launch editor button.
Note:
You can configure the following elements for your home page:
- Header—Title, logo, and cover image
- Body—Item galleries, text, and links
- Footer—Contact information, custom footer text and links, and footer styling
- Under Contents, click Header.
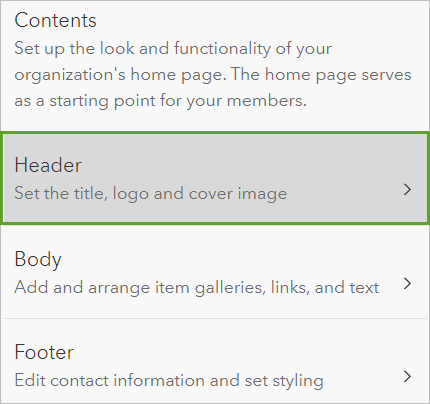
- The Show organization title toggle button is enabled by default. In the Organization title text box, type a name to represent your website. If you're replicating the sample organization, type Geogger | Maps In Motion .
- If you don't have your own logo image, save the sample image to a location where you can easily find it.
Note:
Acceptable image formats are PNG, GIF, and JPEG. For best results, the logo should be 65 pixels wide by 65 pixels high.
- Enable the Show logo toggle button.
- Click Choose file and browse to the image file on the desktop. Pan and zoom to what you want to appear in your logo and click Save.
Next, you'll upload a cover image. The Show cover image toggle button is enabled by default. You can use one of the ready-to-use stock cover images from the drop-down menu or upload your own image. For this tutorial, you'll upload your own image
- If you don't have your own banner image, save the sample image to a location where you can easily find it.
Note:
For best results, your image should be 960 pixels wide. To avoid distortion, a standard banner image should be 960 pixels wide by 180 pixels high. To fill more of the background, you can use a taller image (470 pixels high).
- Select Upload a custom cover. Click Choose file and browse to the folder where you saved homepage-banner.png and upload the image. Click Save.
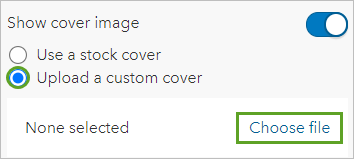
- Click Layout option.
Note:
In the Layout options, you could change any of the following settings:
- Select a height for the cover image.
- Adjust the focal point of the cover image by clicking in the image preview window. The focal point you specify determines the center of the image on all screen sizes.
- Adjust the opacity of the cover image using the Overlay opacity slider.
- Adjust the vertical alignment of the title and logo and their horizontal position in relation to the cover image.
- Scroll down and in Position to cover image, select Below the cover image in the drop-down menu.
- Navigate back to the Contents pane.
Next, you'll configure a custom contact link for your organization that will appear at the footer.
- Under Contents pane, click Footer.
- Turn on the Display contact us link toggle button and enter your email address, for example, name@gmail.com.
Tip:
To learn more about customizing the home page, see the Create a great home page for your organization blog post.
- Click Save.
- Close the Edit home page window.

Next, you'll create a group for featured items and you'll create content to share with your organization.
Share content
Previously, you configured general site settings. Next, you'll create a group for items to feature on your home page so members can easily access key layers, maps, and apps. You'll also create an item to share with your organization.
Create a group
A group is a collection of items, often related to a common topic, such as region, subject, or project. Groups are used to organize and share items. For example, you can use groups to facilitate team collaboration on a project, share items privately with specific organization members, or organize content to feature on your portal's home page or gallery.
Earlier, you configured a basic home page for your portal and customized it by including a logo and banner. Now you want to further customize the home page by adding a featured content gallery that members will see when they sign in to the site. You must find, collect, and organize the content that you want to feature. The best way to do this is by using a group to organize the featured content. You'll use the built-in Featured Maps and Apps group.
- If necessary, sign in to your ArcGIS Enterprise portal with an administrator account.
- At the top of the page, click Groups.

- On the Groups page, click Featured Maps and Apps.
Note:
Optionally, you can click Create group to use a different group for your home page content or to share other items with only certain members of your organization.
The group's Overview page appears. You'll add a summary and tags for the group so that it's easy to find and identify.
- Click Add a brief summary about the group. Type Featured content for the home page. Click Save.
- For Tags, click Edit and type each of the following tags, pressing Enter after each one:
- featured content
- home page
- Click Save.
Next, you'll add a thumbnail image for the group to make it stand out to organization members.
- If you don't have your own logo image, save the sample image to a location where you can easily find it.
Note:
For best results, the logo image should be at least 400 pixels by 400 pixels.
- Click Edit Thumbnail.
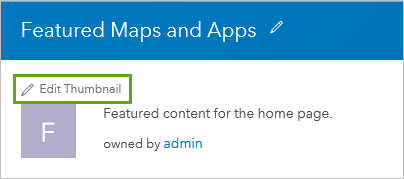
- In the Upload Thumbnail window, click Browse (or your browser's equivalent command).
- Browse to the folder where you saved group-logo.png and upload the image.
- Click Save.
- Click the Settings tab.
You want anyone who searches for your group to find it, but you don't want anyone to be able to apply to join the group.
- For Group membership set the following:
- For Who can join this group?, select Only those invited by a group manager.
- For How can people join this group?, select By invitation.
- For Who can contribute content?, select All group members.
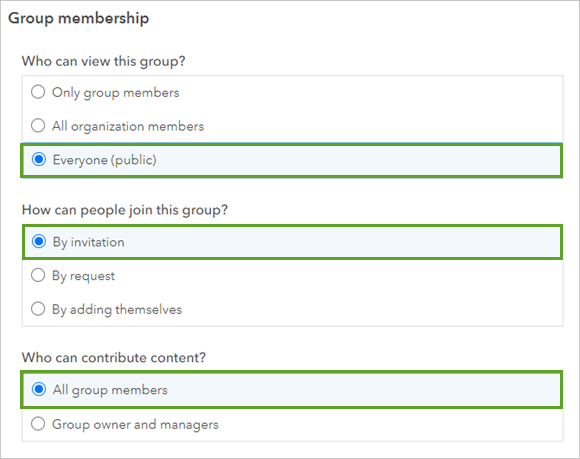
Employees will need to share some of their items with this group, so you want to allow others to contribute content. Later, when you create accounts for employees, you'll add them as a member to this group.
- Click Save.
The group is saved with the settings that you specified.
- Click the Content tab.
The Featured Maps and Apps group currently has no content.
Share items
You want your employees to take advantage of the curated content available from ArcGIS Living Atlas of the World. You'll share some of these items with your group to feature them on the home page.
By default, members of your portal organization can access content from ArcGIS Living Atlas that is available without having to sign in with an ArcGIS Online organizational account; however, the portal must have access to the internet to use this content. These items are owned by a user named esri_livingatlas.
- In the search bar at the top of the page, type children's map and press Enter.
Note:
If ArcGIS Living Atlas access is disabled in your portal, search and share your own content to feature on the home page instead.

- In the search results, click the web map title, A Children's Map.

The item page appears for the web map. From here, you'll share the map with the Featured Maps and Apps group.
- Click Share.
- In the Share window, click Edit group sharing .

The map is now shared with your group. You can browse ArcGIS Living Atlas content in Map Viewer and Scene Viewer, or on the Content page.
- In the Filters section on the left, under View groups for, select your username(me).
- Check the Featured Maps and Apps group. Click OK.

- Click Save.
- At the top of the page, click Content.

- Click the Living Atlas tab.
- Use the available filters to explore the maps by category.
- Click the title of an item to open the item's page.
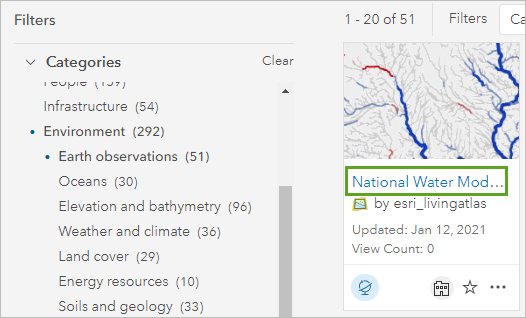
- On the item page, click Share and share the item with your group.
- On your own, share three more ArcGIS Living Atlas maps (or your own content) with your group to feature on the home page.
Feature group content on the home page
Now that you have a group of items that you'd like to feature, you'll display them in a gallery ribbon on your home page.
- Go to the Organization page and click Settings.
- Click the Home Page tab. Click Launch editor.
- Click Body.
Note:
The body of your home page can contain three types of content blocks: text blocks, item gallery blocks, and link blocks. Up to 15 blocks can be added, but using only what is essential will keep the home page experience simple.
Use text blocks to configure headlines and other text-based content about your organization. Configure item galleries to showcase maps, scenes, apps, and other content items. Use link blocks to help users discover content or other destinations.
- Click Content blocks, then click Add block.
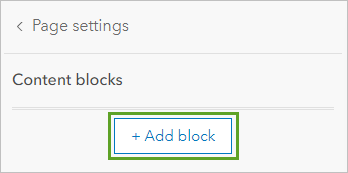
You will first add an item gallery
- Select Item gallery. The Featured Maps and Apps group is selected by default. If not, click the Group box and find and select a group whose content you want to feature in the gallery.
- The Show title and Show summary toggle buttons are enabled by default. Try switching them off and on to see the changes in the preview on the right.
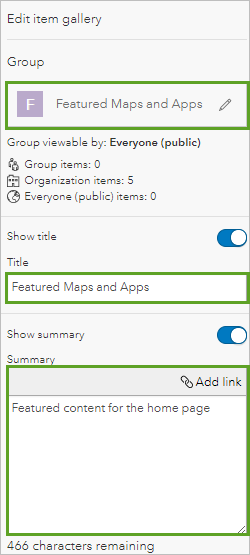
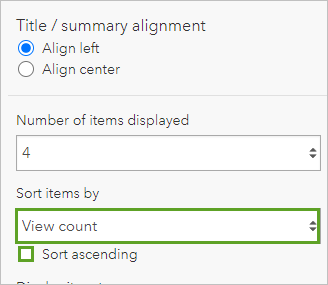
- For Sort items by, select View count in the drop-down menu. Uncheck Sort ascending. .
- Click Save
Next, you'll add a text block.
- In the Content blocks pane, click Add block. Select Text.
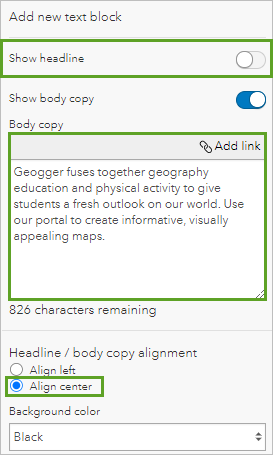
- Disable Headline. In the Body copy section, type a few sentences to describe your organization, or use the description for the sample organization:
Geogger fuses together geography education and physical activity to give students a fresh outlook on our world. Use our portal to create informative, visually appealing maps.
- In the Headline / body copy alignment section, select Align center.
- Click Save. Close the Home page editor window.
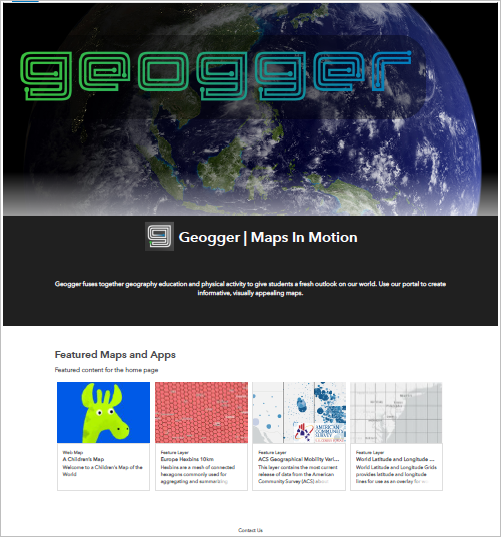
- Go back to your home page.
Create and share an item
You can add your own items to your portal, and share your items with groups, your organization, or the public. You'll add a CSV file of addresses to your portal.
- Save this CSV file of addresses to a location where you can easily find it. (Or use your own CSV file; for requirements, see Publish a CSV file).
- At the top of the page, click Map.

Map Viewer opens showing a basemap. You'll add the CSV file to the map to display the store locations as points.
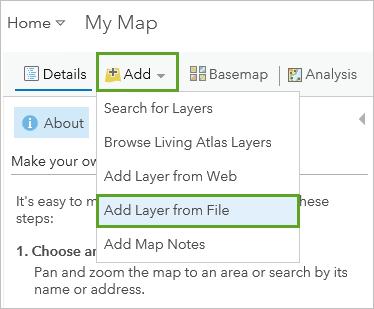
- Click Add and choose Add Layer from File.
- In the Add Layer from File window, click Browse (or your browser's equivalent command).
- Browse to the RunningShoeStores.csv file (or your own file), select it, and click Import Layer.
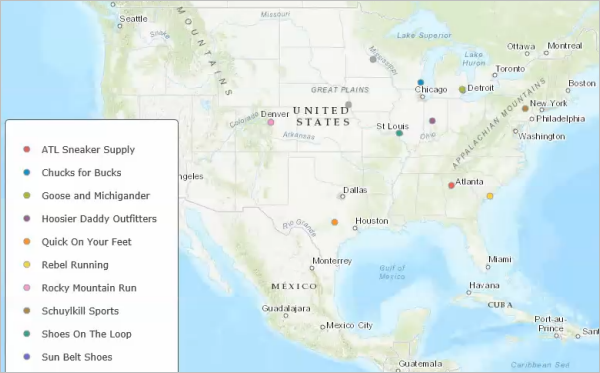
Because the CSV file contains valid latitude-longitude coordinates for each location, points for the stores are added to your map.
By default, each store location appears with a distinct color. You can change the symbology of the layer in the Change Style pane.
- Experiment with the style options. When you've finished styling the layer, click Done.
Tip:
Once you’ve added a layer to the map, you can change its symbology at any time using the Change Style button in the Contents pane.
Now you'll save the layer to your ArcGIS Enterprise portal.
- In the Contents pane, point to the RunningShoeStores layer and click the More Options button. Select Save Layer.
- In the Create Item window, type a title or accept the default value.
- Type tags to describe the item. If you're using the RunningShoeStores.csv file, type retail and contracts.
- Type a summary for the layer. If you're using the sample, type A list of running shoe stores with which Geogger has contracts.
- Click Create Item.
- Click Home and from the drop-down choose Content.
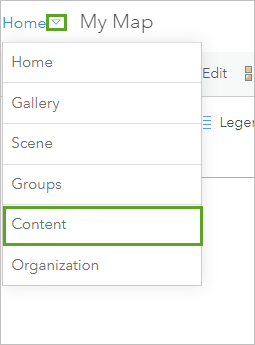
The layer has been added to your content as a Feature Layer. From the My Content list, you can open the item to view its details, add it to a new map, and share it to certain groups, the entire organization, or the public. Your employees will frequently use the shoe store layer in their work, so you'll share the layer with your featured content group.
- Click the lock icon on the item to open the Share window.

- Select the Featured Maps and Apps group.
- Click OK to share the layer.
The item is now accessible from your home page. You could also create a group to share work-related items with only certain members of the organization.
You've created a group to feature items on your home page. You're almost ready to add members to the organization.
Configure additional site settings
Previously, you created a group and shared content for members to access. Next, you'll configure security settings for your site. You'll limit who can share content with the public and create a custom role that you can assign to members to further limit privileges.
Update security
As the administrator of your organization, you can configure security policies for your website, including settings for sharing, searching, and signing in.
- If necessary, sign in to your ArcGIS Enterprise portal with an administrator account.
- Go to the Organization page and click Settings.
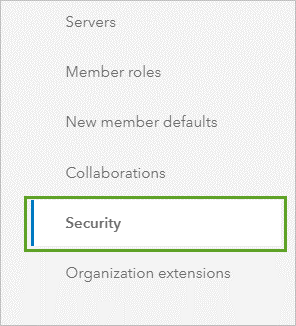
- Click the Security tab.
Caution:
The steps in this section are specific to the tutorial scenario. Be cautious about the security settings that you change for your organization.
You want to ensure that only authoritative content is shared with the public, so you'll disable the option that allows members to share with everyone.
- In the Policies section, Sharing and searching subsection, disable the Members can share content publicly toggle button.

Administrators can still share content outside the organization.
You'll accept the defaults for the other sharing and searching settings. The next few sections relate to the user names and passwords that members use to sign in to the organization. For members with ArcGIS accounts, you can establish rules to determine the format of their passwords and the frequency with which they need to be changed.
- In the Password policy section, click Manage password policy.
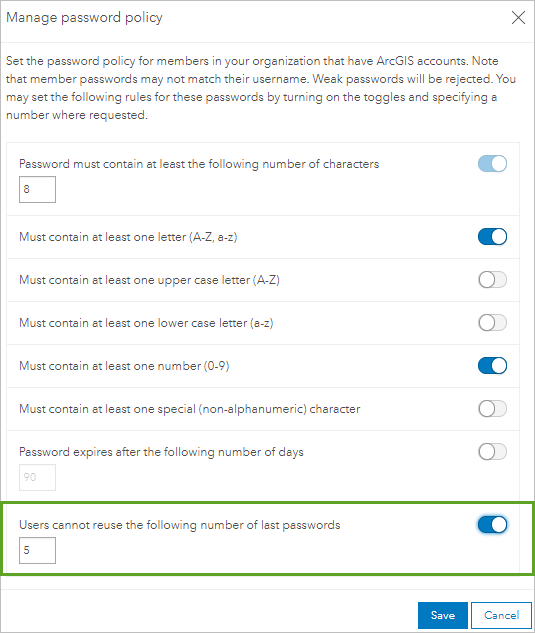
A window appears with a variety of rules for member passwords. You can define a minimum number of characters and what type of characters are required for passwords. You'll set a rule that prevents members from repeating their last five passwords when they reset their password.
- In the Manage password policy window, enable the Users cannot reuse the following number of last passwords toggle button. (If you're not following the sample, enable and disable toggle buttons for options that meet the needs of your organization.)
The Enterprise Logins section allows you to specify that members sign in with the same user names as your enterprise information systems. With this approach, members don't need to create and remember multiple user names to access essential systems.
Optionally, if members need to access services that are secured with web-tier authentication, you can configure a list of trusted servers. These settings are for a more complex scenario than that of this tutorial. For more information, see Configure security settings.
- Click Save.
Create a custom role
Administrators can configure custom roles to limit member privileges based on the specific workflows in your organization. You want one of your managers to help you test a custom role intended for your employees. Employees need to perform analysis and create content, but they do not need to generate tiles (because they won't be making basemaps). You also want your employees to create groups that other organization members can join, but you don't want them to join public groups.
- Click the Member Roles tab.
There are five default roles in an organization: Administrator, Data Editor, Publisher, User, and Viewer. Each role has a defined set of specific privileges for members who are assigned the role.
- Click the Role Information button next to each of the role names to read about each one.
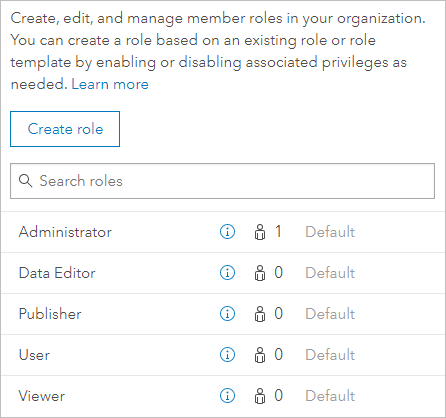
The Publisher role would give employees the privileges they need to complete their work. However, they'd also be able to publish tiles, which you don't want. None of the default roles meet your needs exactly, so you'll create a custom role to limit employee privileges.
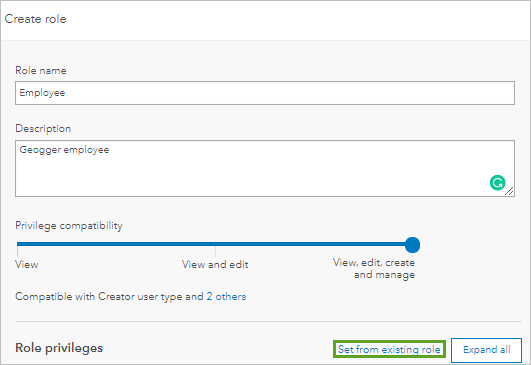
- Click Create role.
- For Role name, type Employee (or a name that's appropriate for your custom role).
- For Description, type Geogger employee (or a phrase or sentence that describes your role).
You can create a role by using an existing role as a starting point or choosing a template that best matches the members' needs. You're creating a role for employees, so you'll start with Analyst Template and modify the privileges to meet your requirements.
- For Role privileges, click Set from existing role.
- For Select role or template to import settings from, choose Analyst Template.
- Click Import settings.
The page updates with several settings enabled for general privileges. The enabled privileges indicate what members can do if they're assigned to this role.
- Point to a few of the privileges to display a callout with a description.
The analyst template includes privileges that allow members to join groups; create, update, delete, and publish content; use premium content (including analysis services); and edit features. In contrast, assigned members can't publish tile or scene layers and won't have administrative privileges. The default choices for this template are close to meeting your requirements for employees, but you also need to modify two group-related privileges.
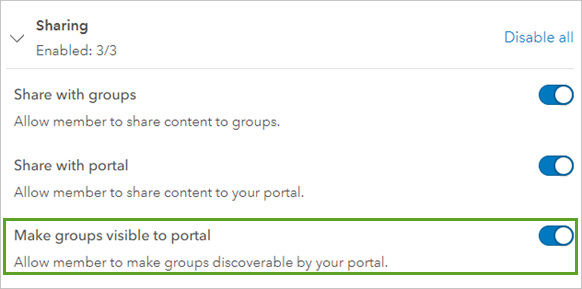
- In the General Privileges section, browse to Sharing and enable the Make groups visible to portal option.
Note:
If you aren't following the sample scenario, enable and disable toggle buttons to add or remove privileges for the custom role according to the needs of your organization.
- Click Save.
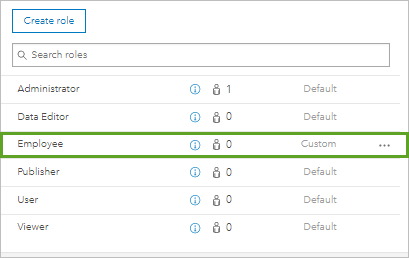
The list of roles in your portal now includes your custom role. You can modify custom roles by clicking the Options button and selecting the Edit or Delete button. (You can't edit or delete the default roles.)
- Click the Role Information button for your new role.
A window appears displaying a description of the role and the list of privileges.
- Close the window.
At this point, if your portal had members, you could assign the custom role. In this scenario, you're currently the only member, so you'll assign roles later when you add members.
The settings page includes several other tabs, such as Map, Items, and Utility Services. You can skip these tabs for now because the default settings are acceptable for your testing scenario.
- Click the ArcGIS Online tab.
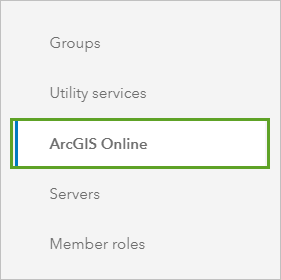
Notice that this is where access to ArcGIS Living Atlas content is configured. Feel free to explore the other tabs on your own. To learn more about the available options, see Fundamentals of configuring the portal website.
You've configured security settings for your site and created a custom role to limit privileges for employees. Next, you'll add members to your organization and update your profile.
Add members to the organization
Previously, you created a custom role for employees. Now that you've specified the privileges for roles in your organization, you're ready to add members. You can use the portal to add accounts individually or in bulk from a comma-separated values (CSV) file. A command line utility tool is also available to add accounts in bulk. You'll use both methods.
Add built-in portal members
You can allow users to add their own accounts using the portal website and you can add accounts for them. You'll add employee accounts from a file and add them as members to your Featured Maps and Apps group.
- If necessary, sign in to your ArcGIS Enterprise portal with an administrator account.
- Go to the Organization page and click Members.

- Click Add Members.
- Select Add build-in portal members and click Next.
Note:
For more information about the other methods, see Add members to your portal.
You can use the form to add members one at a time, or you can add multiple members at once by uploading a CSV file that contains the required member information. You'll upload a CSV file of names and email addresses to add four new members.
- Click the New members from a file tab.
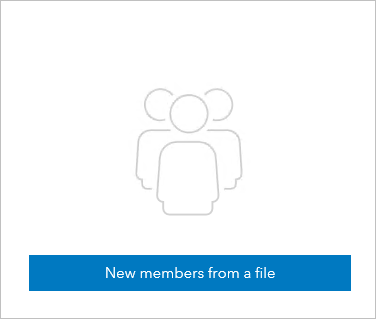
To add members from a file, the first line in the CSV file must contain these field names separated by a comma, semicolon, or tab:
- First Name
- Last Name
- Username
- Password
- Role
- User Type
- If you're following the sample scenario, save this CSV file of accounts to a location where you can easily find it. (You can delete the members after creating them.)
Note:
You may need to edit the password values in the CSV file if you changed the password policy for your organization.
- If you're creating your own CSV file to add members, consider the following guidelines and confirm that the records in your file meet the requirements:
- This is an email address for the account. This parameter is required, so provide a value for the email address even if it's not a valid address, or use your own.
- User names must contain 6 to 128 alphanumeric characters and cannot contain spaces or be the same as the password. You can exclude values for the Username field if you'd prefer that the system generate unique user names for each account. You can edit the user names during a review process.
- The password is case sensitive and must match the requirements of your organization. It's recommended that you encourage the member to change their password after signing in for the first time.
- For Role, the value can be Viewer, Data Editor, User, Publisher, Administrator, or a custom role. You can change a member's role later, if necessary.
- For User Type, the value can be Viewer, Editor, Field Worker, Creator, or GIS Professional. The user type determines which privileges can be assigned to the member. You can change a member's user type later, if necessary.
- For Add members from a file, click browse.
- Browse to the folder where you saved accounts.csv and upload the file.
Your file is checked for required information.
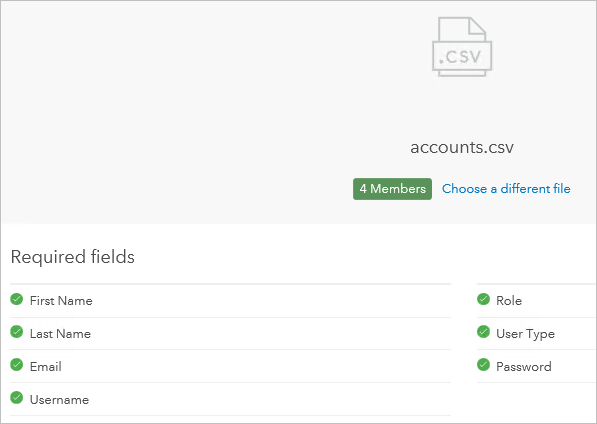
- Click Next.
- Review the list of members. If needed, click the Edit Member button to edit any fields, such as Username or Email, if needed.
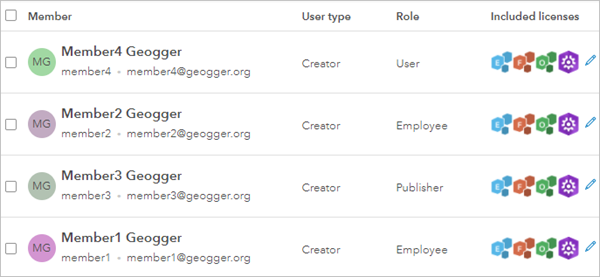
- Click Next.
- In the Groups section, click Manage.
Employees need to contribute content to the home page, so you'll add these new members to the appropriate group.
- In the Groups list, click the Featured Maps and Apps group (or another appropriate group for your new members).
The group is added to the Groups assigned list.
- Click Save.
- Click Next and click Add Members.
You are returned to the Organization page. The Members grid updates to show your new members.
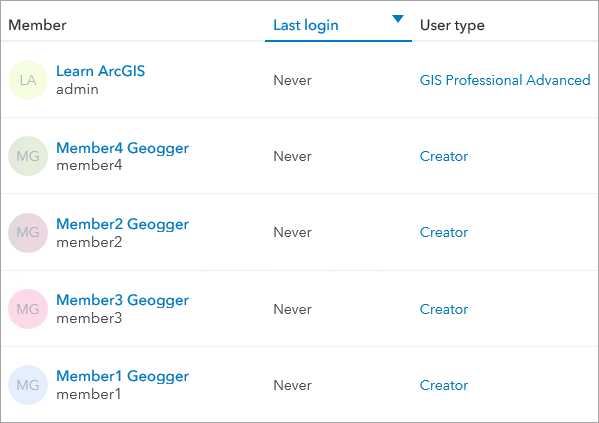
When you add members, you must inform them of their user names and passwords.
- In the Role column, click Employee.
As your organization's needs change, you can choose from a list of available roles to assign members. You can also manage other options regarding individual accounts.
- Click the More options button next to one of the new members.
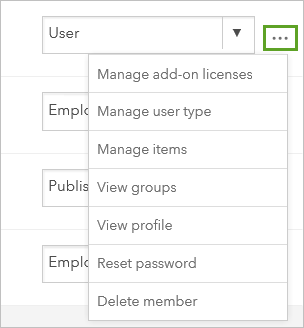
A menu appears. With this menu, an administrator can reset a member's password or delete the member from the organization. You can also manage add-on licenses to ensure that members have access to the applications and extensions they need. For more information, see Manage members.
Create a user profile
All users should create informative profiles to help others know more about them, their groups, and the content they've shared. You'll create a profile for your account to set an example for other members.
- Click your user name and choose My profile.
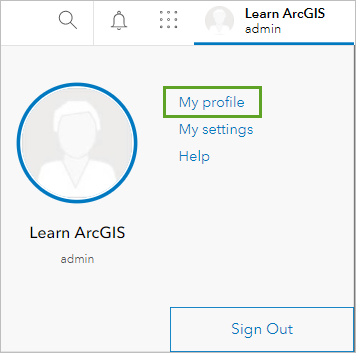
- As an administrator, you can modify most of the information in your profile, but user names cannot be changed. At this time, you shouldn't need to modify your first name, last name, or email address because you set these values when you activated your account earlier.
Note:
Only administrators can modify the email address associated with member accounts. (To modify another member's profile, access it from the Organization page or click the member name that appears as an item's owner.)
- For Bio, type a few sentences about yourself, such as areas of expertise, interests, and contact information. If you're using a practice organization, you can use the member description from the sample:
I am the founder and CEO of Geogger, a new startup that teaches geography and spatial thinking to kids through physical activity. I'm passionate about geography education and cartography. In my free time, I like to run and ski and hang out with my three dogs.
You can also change your password and security question and answer. If you ever forget your password and need to reset it, you'll be prompted to answer the security question to receive a temporary password. Temporary passwords are provided when a password is reset. You chose a security question and answer when you activated your account, but the form only displays the question.
The next setting indicates that only members in your organization can see your profile. This default setting also means that users outside your organization cannot invite you to join groups. Users who can see your profile can see your image, name, user name, and biographical information (if allowed in your organization's settings). Profile pages also include links to view a user's items and groups. Members can change this setting to Private so only administrators can see their profile. If the organization allows sharing with the public, members can also choose for everyone to see their profile. You configured your organization to prevent sharing outside the organization, so only an administrator can make member profiles visible to the public.
- For Who can see your profile, select Everyone (public).
Click View my settings.
The Language value matches the previously configured portal settings. Members can choose their preferred language for the user interface.
The Units setting defines the units used for the map scale bar, measure tool, directions, and analysis. Members can choose US Standard or Metric.
Tip:
As an administrator, you can change the default units for the organization on the Map tab in Edit Settings.
Finally, you'll add an image of yourself (or something else that represents you).
- If you don't have your own image, save the sample thumbnail image to a location where you can easily find it.
Note:
Acceptable image formats are PNG, GIF, and JPEG. For best results, the logo should be 150 pixels wide by 150 pixels high. The maximum file size is 1 MB.
- Click the thumbnail to add a photo.
- In the Upload Thumbnail window, click Browse (or your browser's equivalent command).
- Browse to the folder where you saved profile-thumb.png and upload the image. Click OK in the Upload Thumbnail window.
- Your profile is updated with your new image and other changes.
You've added members and updated your member profile. Next, you'll review available usage statistics for items, members, and groups.
View status reports
Previously, you added members to your organization. Next, you'll explore available reports that you can use to monitor how members use the organization's resources.
Check the reports
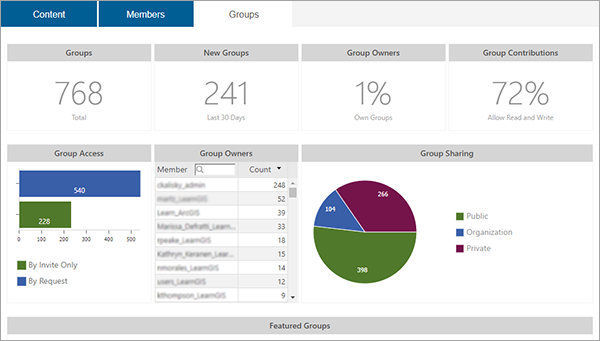
Administrators can view status reports for the organization. You can access interactive, detailed usage reports and see general information. Reports are organized into three categories: content, members, and groups.
The following example shows a sample report for group statistics in an established organization with several members and groups. Group reports provide a sense of active collaborations by members of the organization.
- If necessary, sign in to your ArcGIS Enterprise portal with an administrator account.
- At the top of the page, click Organization.
- Click the Status tab.
For a new organization, there isn't enough data yet to generate meaningful reports. After members start using the organization, you can experiment more with the reporting capabilities. (You can click your user name and click Help to learn more about the various options.) For now, you'll review today's activity. You can adjust the time to change the reporting period for the reports. You can see member activity for up to the past 12 months.
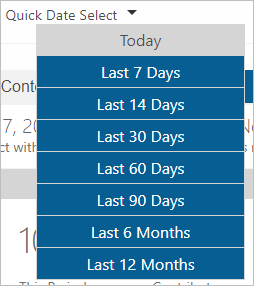
- Click Quick Date Select and choose Today.
Note:
If you've been working on this tutorial over multiple days, change the Start date by choosing the day that you began this tutorial. Click Refresh, if necessary.
You see reports for the content that you've created and shared, as well as the most popular content.
- Click the Members tab.
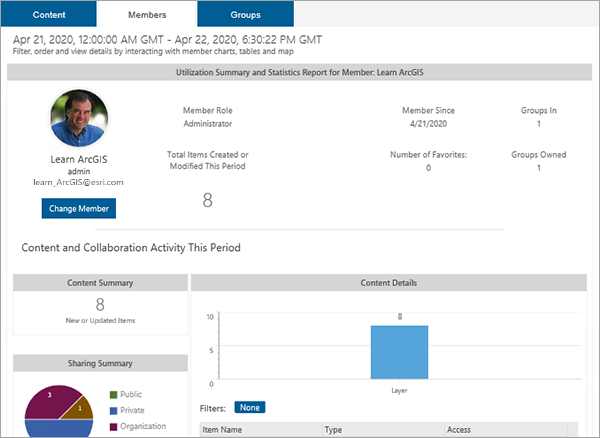
Member reports help you monitor the activities of your organization's members. You can refine the report details using the interactive charts, tables, and map.
Click Change Member to show more statistics for another account. The Utilization Summary and Statistics section defaults to your member account. It lists the total items you've created or modified during the selected time period. For more information, see Usage reports.
Now that you've successfully set up your ArcGIS Enterprise portal, you and your new members can start using it.
You've learned how to set up and customize an ArcGIS Enterprise portal for your organization. Watch this video to learn how to effectively administer your ArcGIS Enterprise portal. The portal is an essential component of modern Web GIS workflows and a central hub for your mapping and analysis activity. To learn more about GIS mapping and analysis, try some of the other lessons that use ArcGIS Enterprise.
Finally, explore some of these additional ArcGIS Enterprise resources:
- Security is key to an Enterprise deployment, and is both flexible for your organization's policies and appropriately stringent to protect against modern threats. For more information, see The ArcGIS Enterprise security model.
- A complete Web GIS workflow involves publishing web layers to an ArcGIS Enterprise portal from ArcGIS Pro. For more information, see Layers published to federated servers.
- Automation and scripting tools unlock new capabilities and make your existing tasks much easier to run. For more information, see Automation solutions for your portal.
You can find more tutorials in the tutorial gallery.
